Choose tools that match your project size, required output, work pace, accuracy needs, and total production cost.
In the United States, tool selection can change a great deal from one project to the next. A homeowner in Texas may need a drill for one deck. A cabinet shop in North Carolina may need to cut hundreds of matching panels each week. A metal shop in Ohio may have to make the same part each day. Each job calls for a different level of tool capacity, speed, and control.
The right tool is not always the largest or most costly one. A compact tool may be a good fit for a small job. A larger machine may make more sense when the same task must be done many times. The key is to match what the tool can do with what the job needs.
Project scale means the size and scope of the work. Production requirements describe how much work must be done, how fast it must be done, and how well each result must meet the job specifications. Both affect the type of tool you should use.
The choice also depends on setup time, labor, power supply, work space, material size, maintenance, and safety. A fast machine can still slow down a project if it takes too long to set up or needs more support than the shop can provide.
This guide explains how to match tools to small jobs, batch work, and larger production runs. It also shows how to estimate output, compare costs, find weak points in a workflow, and decide when a tool upgrade makes sense.
What Project Scale Means for Tool Selection
Project scale tells you how much work must be done and how complex that work will be. It includes the number of parts, size of each part, number of work steps, and time allowed for the job.
A small project may involve one repair or a few custom parts. A medium project may involve several sets of the same item. A large project may require a steady flow of work across many days or weeks.
Production scale is not just a count of finished pieces. A single large steel frame can need far more machine capacity than hundreds of small brackets. A custom cabinet can also need more setup time than a batch of plain shelves.
For this reason, volume, workpiece size, design complexity, and production rate must be assessed together. No single part count defines the right tool class for every trade.
Tool selection should start with the hardest task the project requires. Next, check if the tool can handle that task at the rate and quality the work plan demands.
One-Time Projects
Use flexible tools when the job has few repeat steps and a short period of use. Low setup effort often matters more than top speed.
Small Batch Projects
Choose tools that can repeat cuts, holes, or fasteners with good control. Simple guides and fixtures may save time.
Regular Production
Favor tools that can hold quality through many work cycles. Setup, upkeep, and operator comfort become more important.
High-Volume Production
Assess dedicated machines, feed systems, automated controls, and quality checks when demand is stable enough to support them.
Why Project Complexity Changes the Answer
Two projects may have the same number of parts but need very different tools. A shop that makes 100 plain wood blocks can use a simple repeat setup. A shop that makes 100 custom parts may have to change settings for each one.
Frequent design changes add setup work and raise the chance of errors. In such cases, a flexible tool may be more useful than a dedicated machine built for one fixed task.
The best choice depends on how much of the job stays the same from one work cycle to the next.
How to Choose Tools for Small, Medium, and Large Projects
Small projects tend to reward low setup cost and easy tool changes. Large projects often place more value on repeat output and lower cost per finished unit.
There is no universal size limit between these groups. The practical difference is how often a task repeats, how much time is available, and whether faster equipment can repay its added cost.
The following comparison gives a starting point. The categories are planning guides, not fixed industry rules.
Small Scale: One-Off and Custom Work
Typical tools include hand tools, portable power tools, compact saws, and bench machines. Best suited to repairs, prototypes, custom work, and jobs with frequent changes. The main benefit is flexibility. The main limit is the time required for repeated manual work.
Medium Scale: Repeat Batch Work
Typical tools include higher-capacity bench machines, drill presses, jigs, fixtures, and shop-grade cutting equipment. Best suited to repeat parts and small production teams. The main benefit is more consistent output. The main limit is setup and labor demand.
Large Scale: Sustained Production
Typical tools include production machinery, CNC systems, powered feeds, and specialized fixtures. Best suited to stable repeat work and high output needs. The main benefit can be lower labor time per unit. The main limit is higher capital cost and less flexibility in some dedicated systems.
Tool Choices for a Small Project
For a one-time task, ease of use and setup may matter more than speed. A portable circular saw may be enough to cut a small set of boards. A large panel saw may add cost, space needs, and setup work without saving enough time.
Choose equipment that can safely handle the largest workpiece. Check cutting depth, reach, power needs, and support before starting.
Rental can also make sense when a special tool is needed for only one stage of the work.
Tool Choices for Medium-Scale Production
Repeat work places more value on consistent setup. A drill press with a suitable stop and fixture can help place holes in the same spot on many parts. A properly selected power feed may also help with some approved machine operations.
The goal is not just to work faster. It is to reduce setup changes and limit avoidable variation between parts.
At this scale, workholding and measuring tools may add as much value as the main machine.
Tool Choices for Large Production Runs
When the same operation repeats for long periods, setup costs can be spread across more finished units. That may justify dedicated tooling or a machine with faster cycles.
A CNC machine, for example, can repeat a programmed operation when the machine, program, tool, and fixture are suited to the job. It still needs setup, checks, upkeep, and trained staff.
Large machines are not always the right choice. If orders change often, a flexible production cell may provide more value than a highly specialized line.
Define Production Requirements Before Choosing Equipment
A clear production plan makes tool selection far more reliable. It turns a broad goal into a set of limits that each tool must meet.
Start with the finished product. Record the required dimensions, material, finish, quantity, and due date. Then list the work steps needed to make it.
You should also separate firm orders from expected future demand. Buying large equipment for sales that have not yet occurred adds risk.
Use the same requirements when you compare tools. Otherwise, one option may appear cheaper only because it has not been checked against the full job.
Required Quantity
Record how many good finished units must be delivered. Include any approved allowance for scrap, tests, and rework.
Delivery Schedule
Set the date and the actual production hours available after setup, breaks, cleaning, and planned maintenance.
Material Specifications
Record the material type, grade, thickness, hardness, size, and any special handling needs.
Accuracy and Finish
State the allowed size variation and surface quality. Do not assume a faster machine can meet every tolerance.
Process Changes
Estimate how often the tool will need a new setup, fixture, cutter, or work program.
Staff and Facilities
Check operator skills, safe work space, available power, ventilation, dust collection, and material handling.
Turn the Work Plan Into a Tool Checklist
Create one row for each critical task. Add the largest workpiece, target output rate, required accuracy, and available work hours.
Next, compare each tool against those needs. A tool that fails a core requirement should not remain on the list just because its price is low.
For safety-critical work, verify the applicable requirements and seek help from a qualified professional before choosing equipment.
Match Tool Capacity to the Size of the Work
A tool must be able to handle the physical size and demands of the work. Rated motor power alone does not show whether it can do the job.
Check the usable working range. A saw may have enough power to cut a material but not enough cutting depth. A drill press may accept the right drill bit but lack the throat depth needed to reach a hole location.
Machines also have limits for load, speed, workholding, material type, and approved accessories. The manufacturer’s instructions should guide these checks.
For a large project, plan how parts will enter and leave the machine. A large sheet may need safe infeed and outfeed support. Heavy stock may require rated lifting or handling equipment.
A tool that fits the part but cannot be used safely within the work area is not a suitable choice.
Working Range
Check cutting depth, travel, throat reach, bed size, and clearance against the largest required part.
Load Capacity
Confirm that the equipment and its supports are rated for the expected workpiece mass and working loads.
Tooling Compatibility
Match bits, blades, cutters, fixtures, and holders to the exact machine and material.
Shop Support
Allow space for access, guards, extraction, service, handling, and safe operator movement.
Why Extra Capacity Is Not Always Better
Buying more capacity than the job needs can raise the total cost. Larger machines may need more floor space, power, handling gear, and service.
However, a small reserve can help when workpiece sizes vary or demand rises. The reserve should be based on a real range of planned work, not a guess.
Choose enough capacity for known jobs and a reasonable allowance for likely changes. Do not assume that a larger machine is safer or more precise.
Calculate Tool Output and Production Capacity
Tool speed matters only when it leads to enough good finished work. A machine’s listed speed may not include setup, loading, checks, or downtime.
Start with cycle time. This is the time needed to complete one full work cycle under a stated set of conditions. For simple repeat tasks, you can estimate output by dividing available working time by cycle time.
A more useful plan also allows for lost time and rejected units. The basic planning relationship is: Good output equals available minutes times productive-time fraction, divided by minutes per cycle, then multiplied by the good-part fraction.
Use measured shop data when possible. If no data exists, make a trial batch and record each step. Do not treat a tool’s marketing speed as a proven shop output rate.
Cycle Time
Measure the full time from one completed part to the next, including normal loading and unloading.
Productive Time
Estimate the share of scheduled time left after setup, planned stops, and other expected interruptions.
Good-Part Rate
Track the share of completed units that pass the required checks without needing rework.
Output Target
Compare expected good units with the number due. Leave enough room for realistic delays.
Example: Can One Machine Meet a Weekly Target?
Consider a hypothetical U.S. workshop that must make 480 matching parts in one week. The shop has 40 scheduled work hours. A trial run suggests that each part takes 3 minutes.
The shop estimates that 75% of scheduled time will be productive. It also expects 96% of completed parts to pass the first quality check. These are example assumptions, not measured industry rates.
Forty hours equals 2,400 minutes. At 75% productive time, the shop has 1,800 minutes for output. Dividing by 3 minutes gives 600 completed parts before the quality allowance.
At a 96% good-part rate, the expected result is 576 acceptable parts. This exceeds the 480-part target by 96 units under the stated conditions.
The extra capacity gives room for some delays. It does not guarantee delivery. If setup takes longer or cycle time rises, the result will change.
Scheduled Time
2,400 minutes per week.
Estimated Productive Time
1,800 minutes per week.
Estimated Completed Units
600 units per week.
Estimated Good Units
576 units per week.
Check the Bottleneck Before Buying a Faster Tool
A production line can move only as fast as its limiting work stage over a sustained period. A faster saw may not help if drilling or assembly cannot keep up.
Suppose cutting can handle 40 parts per hour, drilling can handle 28, and assembly can handle 35. With one station at each step, a balanced flow cannot exceed the drilling stage’s 28 parts per hour under those conditions.
The first upgrade to study may be the drilling process, not the cutting machine. A fixture, process change, extra approved workstation, or better scheduling may solve the problem at a lower cost.
This is why the full workflow matters more than the speed of one tool.
Compare Total Tool Cost and Find the Break-Even Point
A tool’s purchase price is only one part of its cost. A sound comparison includes setup, labor, consumables, service, energy, floor space, and the cost of rejects or delays.
Low-cost tools can suit small batches because the fixed cost is low. Equipment with a higher setup or purchase cost may become more economical when many identical units are produced.
To compare two options, estimate the fixed cost of each and the cost per good finished unit. Use the same project quantity and quality target.
The basic cost model is: Total cost equals fixed cost plus quantity multiplied by variable cost per good unit. For an owned machine, fixed cost should reflect the share of its purchase and setup cost assigned to the project, based on a clear accounting method.
A break-even point is where the two estimated total costs are equal. It is not a promise that either tool will meet the deadline or quality target.
Initial Cost
Include purchase, rental, delivery, installation, fixtures, and any required training.
Operating Cost
Estimate labor, energy, cutters, abrasives, supplies, and waste for each good finished unit.
Maintenance Cost
Include planned service, repair risk, spare parts, and lost output during downtime.
Useful Life and Reuse
Consider later jobs, expected service life, resale value, and whether future demand is firm or uncertain.
Hypothetical Break-Even Calculation
Assume Tool A has a fixed project cost of $300 and a variable cost of $8 per good unit. Tool B has a fixed project cost of $1,800 and a variable cost of $3 per good unit.
At 100 units, Tool A costs $1,100 and Tool B costs $2,100. Tool A is less costly for this order under the example assumptions.
At 500 units, Tool A costs $4,300 and Tool B costs $3,300. Tool B is now less costly because its lower variable cost offsets its higher fixed cost.
The fixed-cost difference is $1,500. The per-unit savings from Tool B are $5. Dividing $1,500 by $5 gives a break-even quantity of 300 good units.
Below 300 units, Tool A has the lower modeled cost. Above 300 units, Tool B has the lower modeled cost. At 300 units, both cost $2,700.
This is an illustrative calculation. Real estimates must account for capacity, tool wear, labor rates, financing where relevant, and any quality or schedule differences.
When Renting or Outsourcing Makes More Sense
A special tool may be needed for only one part of a large project. In that case, rental or outside production may reduce the need for a large capital purchase.
Compare rental fees, delivery, operator needs, schedule risk, and return terms. For outsourced work, check the supplier’s actual lead time, quality controls, and capacity.
If future demand is uncertain, a trial order or short rental can provide useful data before the business commits to owning a machine.
Account for Setup Time, Changeovers, and Repeat Accuracy
Setup time can decide which tool is most productive. A machine with a short cycle may lose its advantage when it needs a long setup for every new part.
A changeover is the work needed to move from one product or task to another. It may include a new cutter, fixture, work program, or machine setting. The more often the work changes, the more time these steps consume.
A shop that makes 200 identical parts may gain from a dedicated fixture. A shop that makes 200 different parts may benefit more from flexible workholding and quick, controlled setup.
Accuracy also affects true output. A fast tool that produces many rejected parts may be less productive than a slower tool with a stable process.
Repeat Stops and Guides
Use approved stops and guides where they help keep matching parts the same size without placing hands near hazards.
Workholding Fixtures
Choose fixtures that secure the work as required by the operation and allow safe loading and removal.
Setup Records
Record approved settings, tool types, part locations, and inspection results to make later runs easier to repeat.
First-Part Checks
Check the first finished part after setup or changeover before starting a large batch.
How to Reduce Changeover Loss
Track each setup step and how long it takes. Separate work that can be prepared while a machine is stopped from preparation that can safely take place away from the operating machine.
Keep approved tools, instructions, and fixtures ready before the changeover starts. This can reduce time spent searching for parts or checking old settings.
Do not adjust, clean, or reach into moving equipment to save time. Follow the manufacturer’s safe setup steps and the workplace’s required energy control procedures.
Choose Between Manual Tools, Power Tools, and Automation
The right level of automation depends on repetition, cost, task variation, and the skill required to run and maintain the system.
Manual tools offer close control and low setup costs for many small jobs. Power tools can reduce physical effort and cycle time. Automated equipment can make repeat operations more consistent when the process is well planned.
Automation does not remove the need for workers. It changes the work toward setup, material supply, inspection, service, and process control.
For a changing product mix, flexible equipment can be more useful than a fixed automated line. For stable work with high repeat demand, dedicated automation may be worth examining.
Manual Tools
Useful for one-off work, fine adjustments, repairs, and tasks with frequent changes. Output depends strongly on operator skill and effort.
Portable Power Tools
Useful for jobsites and changing work areas. They can reduce task time but need the right accessories, power supply, and safe handling.
Stationary Machines
Useful for repeat shop operations where work support, settings, and material flow can be controlled.
Automated Systems
Useful when stable demand can justify programming, fixtures, maintenance, guarding, and operator training.
When Does Automation Pay Off?
Automation becomes easier to justify when repeat volume is high enough to spread its cost over many units. It can also help when a process needs more consistent control than a manual method can provide.
However, a low-cost fixture or better work layout may solve the same production problem. Compare these options before choosing a fully automated system.
Use a pilot batch to check real cycle time, changeover needs, quality, and downtime. A planned cost saving is only an estimate until the process has been measured.
Plan Tool Safety for the Expected Workload
Production pressure must not override safe tool use. Higher output can increase the number of repeated motions, tool cycles, and times that workers handle material.
In the United States, OSHA sets workplace safety requirements that vary with the type of work and employer activity. Its rules for hand and portable powered tools place responsibility on employers for the safe condition of equipment used by workers.
OSHA machine guarding requirements address hazards from moving parts, cutting zones, and other danger points. Workers should not remove or bypass required guards to improve output.
For covered general industry servicing and maintenance, OSHA’s hazardous energy rules address unexpected startup and stored energy. Construction and other sectors may have different applicable rules. Employers must determine which requirements apply to their work.
NIOSH and OSHA guidance also support choosing tools that fit the worker and reduce awkward wrist positions, excess grip force, and needless strain during repeat work.
A project may need qualified help with electrical service, machine installation, structural supports, dust controls, or a formal risk assessment. These tasks should not be based on a general tool checklist alone.
Guarding
Confirm that required guards and safety devices are present, suitable, and functional for each planned operation.
Operator Training
Provide training on safe operation, limits, emergency actions, inspection, and approved setup methods.
Repeated Motion
Assess grip force, reach, posture, vibration, and task frequency. Consider suitable ergonomic tools and work supports.
Dust, Noise, and Debris
Assess exposure risks and provide appropriate engineering controls and protective equipment for the process.
Maintenance Safety
Use applicable energy isolation and maintenance procedures. Never treat a control switch alone as adequate isolation without verification.
Material Handling
Use rated supports and lifting methods where workpieces are too heavy or awkward for safe manual handling.
Why Faster Work Can Require Better Workstation Design
A task done twice a day places different demands on workers than the same task done hundreds of times. Repetition can make a poor handle or awkward reach a larger concern.
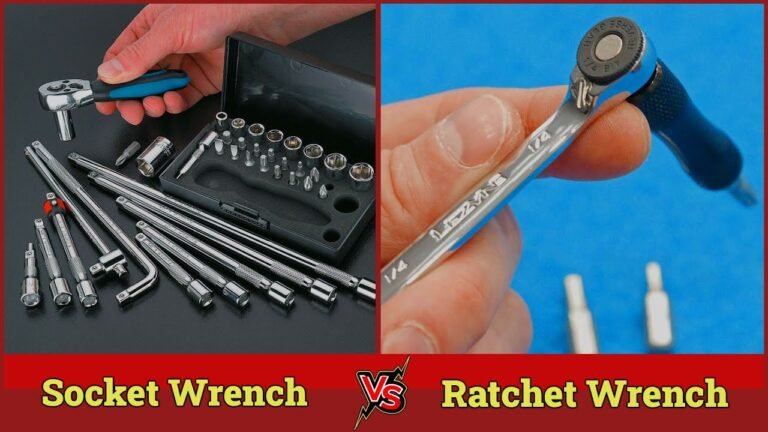
A bench at a suitable height, secure workholding, and a tool that fits the worker can reduce needless effort. Some repeat jobs may benefit from powered or ratcheting tools when they are suitable for the task.
The aim is a work process that can be sustained without rushing, unsafe force, or loss of control.
Common Tool Selection Mistakes and How to Avoid Them
Many poor tool choices come from looking at only one factor. Price, speed, motor rating, or machine size may be easy to compare, but none describes the full production process.
The most useful check is to ask which assumption could cause the project to fail. It may be an unrealistic cycle time, a missed setup step, a material limit, or a lack of trained operators.
Review these risks before committing to a tool or machine.
Buying for Maximum Power
A high power rating does not prove the tool fits the workpiece or produces the required finish. Check the full operating range and intended use.
Ignoring Setup Time
A faster machine may lose time through frequent changes. Compare total batch time rather than cutting or drilling time alone.
Assuming Rated Speed Equals Real Output
Loading, inspection, scrap, maintenance, and delays reduce finished output. Use trial data and realistic allowances.
Buying for Unconfirmed Future Demand
A large machine may remain underused if projected orders do not arrive. Compare rental, outsourcing, or a smaller flexible setup.
Overlooking the Bottleneck
A faster tool adds little value when another work stage limits output. Measure the full work path first.
Ignoring Accessories and Facilities
Cutters, workholding, extraction, power, supports, and safe floor space can change the total cost and feasibility.
Reducing Safety to Save Time
Bypassing guards or unsafe maintenance can cause severe harm. Use safe methods and revise the production plan when needed.
A Step-by-Step Method for Selecting Production Tools
A repeatable selection method helps prevent costly guesses. Use the steps below before buying, renting, or assigning equipment to a new project.
The method works for small workshops, trade contractors, and production teams. The detail will vary by task, but the order helps keep quality, cost, and safety in view.
Step 1: Define the Finished Work
Record materials, dimensions, finish, quantity, approved tolerances, and delivery date.
Step 2: Map Every Work Stage
List cutting, drilling, forming, assembly, finishing, inspection, and handling steps as applicable.
Step 3: Set the Capacity Target
Calculate the good units needed per hour or shift. Include a realistic allowance for planned stops and rejects.
Step 4: Check Tool Limits
Confirm working range, material compatibility, duty requirements, safe setup, and available power or utilities.
Step 5: Compare Full Costs
Estimate purchase or rental costs, setup, labor, consumables, upkeep, and expected cost per good unit.
Step 6: Test a Small Batch
Use a representative sample with suitable safety controls. Record setup time, cycle time, part quality, and causes of lost time.
Step 7: Check the Whole Workflow
Make sure each work stage can support the required flow. Find the true bottleneck before upgrading one tool.
Step 8: Approve and Monitor the Setup
Confirm safe operating methods, operator training, maintenance plans, and quality checks. Track actual output after production begins.
How to Know the Tool Choice Is Working
A suitable tool should complete the planned operation within its approved limits. Finished parts should meet the stated quality checks, and the shop should be able to sustain the needed output rate.
Track good units per hour, setup time, scrap, maintenance stops, and total cost. Compare each result with the estimate used to choose the tool.
If quality falls, tools overheat, output drops, or work becomes unsafe, stop the affected operation as needed and review the cause. Do not raise the load or bypass safety features to meet a schedule.
If the tool is suitable but capacity remains low, examine workholding, batch size, material flow, training, and the slowest production stage before buying more equipment.
Plan for Future Projects Without Overbuying
Future work matters, but uncertain demand should not drive the whole purchase. A tool that fits current jobs and can adapt to likely new tasks may be a better investment than an oversized machine.
Review the range of work the business expects to perform. Check whether a tool can accept approved fixtures, replacement parts, and different compatible accessories. Also consider service access and operator training.
Modular workstations can help some shops expand in stages. A business may first improve fixtures, then add another workstation, and later invest in a larger machine once orders justify it.
For high output, plan a way to keep work moving when a key tool is down. Spare consumables, planned service, and access to a backup supplier can reduce disruption.
Do not assume that owning duplicate equipment is always economical. Compare the cost of downtime with the cost of backup capacity.
Likely New Work
Choose capacity based on known customer needs and realistic project types rather than unsupported growth forecasts.
Repair and Parts Support
Check access to service, replacement parts, consumables, and qualified repair support before purchase.
Upgrade Options
Confirm compatible fixtures, controls, or attachments from documented specifications rather than assuming they will fit.
Backup Plan
Identify how urgent work can continue if a critical tool fails or needs planned maintenance.
Frequently Asked Questions
Q
What Type of Tools Are Best for Small Production Projects?
Flexible hand tools, portable power tools, and compact bench machines often suit small projects. They tend to need less setup and can handle a range of tasks.
The final choice depends on the material, workpiece size, accuracy, and safe operating needs. A specialized tool may still be required for a single difficult task.
Q
When Should a Workshop Upgrade to Industrial Equipment?
An upgrade may make sense when current tools cannot meet the required output, quality, working range, or sustained workload within their safe limits.
Measure actual cycle time, downtime, scrap, and full operating cost first. A better fixture or workflow change may solve the problem without a major machine purchase.
Q
Is One Large Machine Better Than Several Small Machines?
Not always. One large machine may offer more capacity and reduce some setup work. Several smaller machines may support separate jobs at the same time and provide more flexibility.
Compare staffing, floor space, material flow, maintenance, and downtime risk. The best layout depends on the actual work mix and required output.
Q
How Can I Estimate How Many Tools a Project Needs?
Start with the required number of good finished units and the hours available. Measure how many good units one tool can produce in that time after setup and normal stops.
Divide the required output by the realistic capacity of one workstation to get an initial estimate. Round up when a whole extra station is needed, then check staffing, safety, and shared bottlenecks before making a purchase.
More tools do not always increase output if the team cannot supply material, complete later steps, or operate the added equipment safely.
Q
Should I Buy, Rent, or Outsource Tools for a Large One-Time Project?
Compare the full cost and delivery risk of each option. Renting may suit a short project that needs specialized equipment. Outsourcing may suit work that requires a machine, process, or skill the shop does not have.
Buying may make sense when the equipment will serve enough confirmed future work to justify its cost. Include maintenance, storage, setup, training, and the risk that the tool may sit unused.
✦ Wrapping Up
Conclusion
Good tool selection starts with a clear view of the work. Project size tells you the scope, while production requirements tell you the output, quality, and pace the tools must support.
For small jobs, flexible tools with low setup effort often make sense. For repeat batch work, accurate guides, fixtures, and suitable stationary machines can improve consistency. Larger production runs may justify dedicated equipment or automation when the demand and cost estimates support it.
No single tool type is best for every scale. The right setup must fit the material, safe working range, shop facilities, operator skills, and total production budget.
Before spending money, test the proposed process when feasible. Measure real output, find the bottleneck, and compare full costs. Then choose the least complex safe setup that meets the work requirements with a sensible allowance for delays.
💡 Key Takeaway
Write down the required quantity, due date, material, accuracy, and available work hours. Calculate the needed good-unit output, test a suitable tool, and compare total costs before selecting or upgrading equipment.