Good tool operation means choosing the right tool, setting it correctly, controlling its movement, and following safe steps from startup to shutdown.
Across the United States, people use hand tools and power tools in home workshops, garages, construction sites, factories, and repair shops. Each setting has its own risks. A drill, table saw, grinder, and wrench all need different handling methods. Yet they share one basic rule: the operator must stay in control of the tool and the work.
Tool Operating Techniques and Control Methods explain how to handle equipment, adjust its settings, guide its movement, and stop it safely. Good methods improve accuracy and reduce damage. They also help prevent cuts, burns, flying debris, electric shock, and other injuries. OSHA guidance for hand tools, power tools, and machine guarding supports the use of proper training, working guards, suitable equipment, and clear operating procedures.
This guide covers the steps that matter before, during, and after a job. It explains how to control speed, pressure, direction, and feed. It also covers workpiece support, operator position, machine controls, and safe shutdown. The goal is simple: help you get a clean result without taking risks or placing extra strain on the tool.
Source: phlebologie-2018.de
1. What Are Tool Operating Techniques and Control Methods?
Tool operating techniques are the actions used to complete a task with a tool. They include holding, positioning, guiding, feeding, and adjusting equipment. Control methods are the ways an operator manages tool movement, speed, force, and power. Together, they help produce steady and repeatable results.
A tool can be simple or complex. A hand saw depends on body movement and steady pressure. A cordless drill uses a motor, trigger, speed control, and clutch. A stationary machine may use a motor, feed system, guard, fence, and emergency stop. Each tool needs a method that fits its design.
OSHA describes three basic machine areas: the point of operation, the power transmission parts, and the operating controls. The point of operation is where the tool works on the material. Power transmission parts carry energy to the working part. Operating controls let the user manage or stop that energy.
Good control starts before the motor runs. The operator must know what the tool does, how its controls work, and what can go wrong. A safe method also accounts for the material, workpiece size, tool condition, and space around the machine.
Source: slideteam.net
Manual control
The operator supplies the force and movement. Examples include using a hammer, chisel, wrench, hand plane, or manual saw.
Mechanical control
Gears, belts, levers, bearings, and other parts guide or transfer movement inside a tool or machine.
Electrical control
Switches, triggers, speed settings, and motor controls manage electrical power and tool operation.
Pneumatic and hydraulic control
Air or fluid pressure powers equipment such as impact tools, nailers, lifts, and hydraulic presses.
Safety control
Guards, interlocks, emergency stops, and suitable workholding methods help limit exposure to hazards.
Why Does Proper Tool Control Matter?
A tool can cause damage when its movement is not controlled. A drill bit may wander. A saw blade may bind. A grinder may catch an edge. Poor control can also leave rough cuts, uneven holes, damaged threads, or loose joints.
Good technique helps keep the tool on its intended path. It also reduces sudden movement and excess force. This can improve the finish and help the tool last longer.
Control does not mean using more strength. It means using the right amount of force at the right time. A sharp cutting tool often needs less pressure than a dull one. A well-supported workpiece is also easier to guide than a loose one.
Accuracy
Steady movement and correct alignment help keep cuts, holes, and other work within the planned dimensions.
Operator safety
Correct hand position, suitable guards, and clear stop controls help reduce contact with moving parts.
Tool life
Correct settings and suitable pressure help limit excess heat, wear, and strain.
Match the Method to the Tool
Do not use one operating method for every tool. A hand plane needs a smooth push and a stable workpiece. A drill needs controlled pressure and a suitable bit. A belt sander needs even contact and steady movement.
Read the manual before using unfamiliar equipment. Check its rated capacity, approved accessories, control functions, and safety limits. If the task falls outside those limits, choose another method or ask a trained person for help.
Hand tools
Use a firm grip, a clear working path, and the correct tool size for the fastener or material.
Portable power tools
Control the trigger, speed, direction, and contact pressure while keeping a stable stance.
Stationary machines
Use the proper guard, fence, guide, feed method, and machine-specific operating procedure.
2. Prepare the Tool and Work Area Before Operation
Good tool operation begins with preparation. Before switching on a tool, check its condition, select the correct accessory, secure the material, and clear the work area. These steps help prevent avoidable problems during the job.
Start by defining the task. Identify the material, the size of the workpiece, and the result you need. Then choose a tool that can complete the work within its rated limits. Do not use a small tool for a task that needs a larger or more suitable machine.
Next, inspect the tool. Look for cracks, loose parts, damaged handles, worn cords, missing guards, and unusual wear. Check blades, bits, discs, and other accessories for damage. Make sure each accessory is approved for the tool and the intended task.
OSHA’s hand and power tool guidance stresses regular maintenance, proper tool selection, pre-use checks, and following the manufacturer’s instructions. A damaged tool should not remain in service. Remove it from use and report the problem through the correct workplace process.
Source: phlebologie-2018.de
Check the tool body
Look for cracks, loose screws, damaged handles, bent parts, and signs of overheating or leakage.
Check the power source
Inspect electrical cords, plugs, batteries, air hoses, and hydraulic lines for damage. Use the correct supply for the tool.
Check the accessory
Confirm that the blade, bit, wheel, or attachment has the correct size, type, rating, and fit.
Check the safety devices
Confirm that guards, safety switches, handles, interlocks, and other required devices are present and working.
Check the work area
Remove clutter, loose material, trip hazards, and objects that could interfere with the tool.
Step 1: Set Up a Stable Work Area
Place the tool on a stable surface when its design requires one. Keep the floor dry and clear. Make sure the work area has enough light for you to see the cutting point and controls.
Keep cords and hoses away from sharp edges, heat, water, and moving parts. Route them so they do not cross a walkway. Keep other people outside the work zone, especially when the task can throw chips, sparks, dust, or small parts.
Check dust control and ventilation before work begins. Cutting, sanding, and grinding can release harmful dust. Use a suitable extraction system and the required respiratory protection for the material and task.
Stable footing
Stand on a firm, dry surface. Keep your feet in a position that allows you to maintain balance.
Clear access
Keep the work area free from loose items and make sure you can reach the stop control.
Good visibility
Use enough light to see the tool, workpiece, cutting line, and nearby hazards.
Step 2: Secure the Material
A workpiece should not move freely while you cut, drill, sand, or shape it. Use a vise, clamp, fixture, fence, or other suitable support. The correct method depends on the shape, size, and type of material.
Do not hold a small workpiece by hand when the task requires a clamp or jig. Your hand may move toward the cutting point if the material slips. Good workholding also helps prevent vibration and uneven results.
For long or heavy stock, provide support at the right points. Make sure the support does not block the tool or create a pinch point. Check that the material can move through the operation without catching.
Use a vise
Hold suitable parts firmly while drilling, filing, or working on their edges.
Use clamps
Secure boards and panels when a vise is not suitable.
Use guides and fences
Keep stock aligned during suitable cutting and shaping tasks.
Step 3: Select Personal Protective Equipment
Choose protective equipment based on the hazards of the task. Safety glasses or goggles may protect against flying particles. Hearing protection may be needed around loud equipment. A suitable respirator may be required for harmful dust or fumes.
Use footwear and clothing that fit the task. Tie back long hair and remove loose jewelry. Loose sleeves, cords, and other items can catch in moving parts.
Gloves need special care. They can protect against some cuts and rough surfaces, but they may catch in rotating equipment. Follow the tool manual and workplace risk assessment. Never assume that gloves are safe for every operation.
Eye protection
Use suitable eye protection where chips, sparks, dust, or other particles may reach the eyes.
Hearing protection
Use suitable earplugs or earmuffs when the noise risk calls for them.
Respiratory protection
Use the correct protection for the dust, mist, vapor, or fume involved.
3. Use Correct Operating Techniques During the Job
The safest operating method is controlled, steady, and suited to the task. Hold the tool as its manufacturer directs. Keep a balanced stance and use the intended handles. Do not force the tool through the material.
Before starting, confirm that the workpiece is secure and the tool is clear of unwanted contact. Keep your hands away from the point of operation. Start the tool only when you are ready to control its movement.
Once the tool is running, pay attention to sound, vibration, heat, and resistance. These signs can help you spot a problem early. Stop if the tool begins to behave in an unusual way.
Source: slideteam.net
Use a firm but relaxed grip
Hold the tool securely without adding needless tension. Follow the intended grip and handle positions.
Maintain a stable stance
Keep your balance and avoid reaching too far across the work area.
Apply steady pressure
Let the correct cutting or working accessory do its job. Do not force it when resistance increases.
Watch the working area
Keep your attention on the tool path, workpiece, and nearby hazards.
Keep control of the tool
Do not carry a running tool in a way that exposes others to its moving parts.
Hand Tool Operating Techniques
Hand tools depend on the operator’s grip, force, and movement. Use each tool for its intended purpose. A wrench should fit the fastener. A chisel should have a suitable edge and handle. A hammer should have a secure head and sound handle.
Keep the workpiece steady. Direct the force away from your body where practical. Use short, controlled movements when working in a tight space. Avoid striking a tool that is not designed for impact.
Inspect the tool during long jobs. A loose handle, damaged jaw, or worn cutting edge can change how it behaves. Stop and replace or repair the tool through the correct process when a defect appears.
Wrenches
Use the correct size and keep the wrench fully seated on the fastener. Avoid makeshift extensions unless the manufacturer allows them.
Hammers
Use the correct hammer for the material and strike area. Keep the work stable and check the handle before use.
Chisels
Keep the cutting edge in good condition and direct the tool away from your body and hands.
Hand saws
Support the stock and guide the saw along the planned line with smooth strokes.
Portable Power Tool Operating Techniques
Portable power tools need extra care because their motors can create strong movement. Keep both hands on the tool when the design or manual calls for it. Use the side handle on equipment that provides one.
For drilling, select a bit that suits the material and hole size. Keep the bit aligned with the planned hole. Apply steady pressure without pushing so hard that the motor slows or the bit binds.
For cutting, choose the correct blade and keep the material supported. Let the tool reach its required operating speed before making contact when the manual directs this. Guide the tool along the planned path. Do not twist or turn a blade inside a cut unless the tool is designed for that movement.
For grinding, use an approved wheel and guard. Check that the wheel is suitable for the tool and the task. Keep the work angle within the manufacturer’s guidance. Do not use a cracked or damaged wheel.
Drills
Use a suitable bit, correct speed range, secure workholding, and controlled trigger pressure.
Circular saws
Use the correct blade, maintain the required guard, and support the material to prevent binding.
Angle grinders
Use a rated accessory, the correct guard, and the approved handle position.
Sanders
Use the right abrasive and keep the tool moving as its manual directs. Avoid pressing hard to speed up the work.
Stationary Machine Operating Techniques
Stationary machines need careful setup and a clear feed method. Set the fence, guide, depth, or other adjustment before starting. Confirm that the workpiece can move through the machine without hitting an obstruction.
On woodworking machines, use the guards and safety devices designed for the operation. Push sticks, push blocks, featherboards, and suitable jigs can help keep hands away from the point of operation. OSHA’s woodworking guidance also warns against freehand sawing and reaching toward blades that are still moving.
Stand where you can control the material without placing your body in the likely path of kickback. Keep your hands in the safe positions taught for that machine. Never remove or bypass a guard to make a task easier.
Table saws
Use the proper blade guard, riving knife or spreader where required, fence, and suitable push tools.
Drill presses
Secure the workpiece, select a suitable speed, and keep the chuck key out before startup.
Band saws
Set the blade guide close to the work within the machine’s instructions and use a suitable feed method.
Planers and jointers
Respect the machine’s capacity, use the supplied guards, and follow the approved feed direction.
4. Control Tool Speed, Pressure, Direction, and Feed
Speed, pressure, direction, and feed affect how a tool works. These settings should match the material, accessory, and operation. A setting that works for one task may be unsuitable for another.
Start with the tool manual and accessory instructions. Use their approved settings as your guide. Do not guess at a speed or feed rate when the manufacturer provides a limit or setting range.
Make small, planned adjustments when the tool allows them. Observe the result after each change. If the tool begins to vibrate, stall, overheat, or lose control, stop and check the cause instead of making larger adjustments.
Source: phlebologie-2018.de
Speed control
Adjust motor speed only within the approved range for the tool, accessory, and material.
Pressure control
Use enough force to maintain the intended operation without overloading the motor or cutting edge.
Direction control
Check the correct direction of rotation or travel before using the tool.
Feed control
Move the workpiece or tool at a steady rate that suits the operation.
Depth control
Set the cut or working depth according to the task and the machine’s rated limits.
How to Choose the Correct Operating Speed
The correct speed depends on the tool, material, accessory, and task. A drill bit may need a different speed in metal than in wood. A grinding wheel has a maximum rated speed that must not be exceeded.
Some tools have variable-speed triggers or electronic settings. Others use fixed speeds or mechanical ranges. Use only the settings approved for the exact tool model and attachment.
Do not assume that a faster setting always saves time. Excess speed can cause heat, wear, poor finish, or accessory failure. A lower setting may offer better control for some tasks.
Check the material
Identify the material type, thickness, and condition before selecting a speed.
Check the accessory
Confirm its speed rating and compatibility with the tool.
Check the manual
Use the manufacturer’s speed range or recommended setting for the task.
Control Pressure and Feed Rate
Pressure is the force applied by the operator. Feed rate is how quickly the tool or material moves through the working area. Both affect heat, finish, and tool load.
Too much pressure can slow a motor or cause an accessory to bind. Too little pressure can also produce poor results if the tool requires steady contact. The correct amount depends on the design and the job.
For a cutting operation, feed the material at a steady pace. Do not push hard to finish faster. If the tool struggles, stop and check the blade, bit, material, and setup.
Slow or stalled motor
Stop and check for excess pressure, binding, a dull accessory, or an unsuitable setting.
Burn marks
Check for excess heat, a dull cutting edge, poor feed, or an unsuitable speed.
Rough finish
Check alignment, workholding, accessory condition, and movement.
Excess vibration
Stop and inspect the accessory, workpiece support, and tool condition.
Use Guides and Reference Systems
Guides help keep the tool or workpiece on the intended path. Common examples include fences, stops, rails, templates, depth guides, and angle guides. These parts reduce the need to rely on visual judgment alone.
Check that each guide is secure and correctly set. Measure the setup before making the final cut or hole. A small setup error can affect every piece in a repeated job.
Use a test piece when the task allows it. A short test can reveal a wrong depth, angle, or offset before you work on the final material. This is useful when accuracy matters or when a machine has several adjustments.
Fences
Help maintain a straight and repeatable workpiece path.
Stops
Help repeat a length or position across several workpieces.
Templates
Help guide a tool around a planned shape or pattern.
Depth guides
Help limit how far a bit or cutter enters the material.
Recognize Signs of Correct Operation
A tool is operating well when it follows the intended path and produces the expected result. The motor should sound normal for that tool and task. There should be no sudden movement, unusual heat, or new vibration.
The material should remain stable. The accessory should stay secure. Guards and controls should remain in their intended positions. A clean result is useful, but it does not prove that the operation was safe. Check the whole process, not just the finished surface.
Stable movement
The tool or workpiece moves in a controlled way without sudden shifts.
Consistent result
The cut, hole, surface, or joint meets the planned size and finish.
Normal tool behavior
There is no unusual noise, smoke, smell, heat, or vibration.
5. Safe Shutdown, Troubleshooting, and Tool Maintenance
Safe operation continues after the work is complete. Stop the tool with its normal control and allow all moving parts to come to a full stop. Do not reach toward a blade, wheel, belt, or cutter while it is still moving.
Some machines continue to coast after the power is switched off. Others may hold stored electrical, mechanical, pneumatic, hydraulic, or thermal energy. A stopped motor does not always mean the machine is safe to service.
For cleaning, repairs, adjustments, or accessory changes, follow the tool manual and the applicable energy control procedure. In covered U.S. workplaces, OSHA’s lockout/tagout requirements under 29 CFR 1910.147 address hazardous energy during servicing and maintenance. Simply pressing the stop button may not provide enough protection.
Source: slideteam.net
Normal shutdown
Use the intended stop control and wait for moving parts to stop fully.
Power disconnection
Disconnect the tool when the manual or task procedure requires it before cleaning or changing accessories.
Energy isolation
Use the required lockout or other approved energy control process before covered servicing work.
Check the tool, accessory, work area, and material after the operation.
Step 1: Follow a Safe Shutdown Sequence
Release the trigger or use the normal stop control. Keep control of the tool as it slows down. Wait until the working part has stopped completely before placing the tool down or moving the workpiece.
Switch off or disconnect the power source as required by the manual. For battery tools, remove the battery when the task instructions call for it. For air-powered tools, close the supply and release pressure as directed by the equipment procedure.
Do not leave an operating machine unattended. Keep clear of the machine while it is coasting. Only remove chips or offcuts after the machine has stopped and the correct safety procedure allows it.
Stop
Use the normal operating control to stop the tool.
Wait
Allow blades, wheels, belts, and other moving parts to stop fully.
Isolate
Disconnect or isolate energy when required for the next task.
Clear
Remove debris with a suitable brush or tool after confirming that it is safe.
Store
Place the tool in a dry, secure location and protect its accessories.
Step 2: Know When Lockout and Tagout Are Needed
Lockout/tagout, often called LOTO, controls hazardous energy during certain servicing and maintenance tasks. It is designed to prevent unexpected startup or the release of stored energy. This matters when someone may be exposed to moving parts, electrical power, pressure, heat, or other hazards.
A machine may have more than one energy source. A motor can stop while a spring remains under tension. A hydraulic system can hold pressure. A raised part can fall if its support is removed. The operator must identify and control each relevant energy source under the approved procedure.
Under OSHA’s general industry rule, covered employers must establish an energy control program and use procedures, training, and inspections. Authorized workers must follow the specific process for the equipment. A warning tag alone is not a substitute for a required lockout method.
There is a limited exception for certain cord-and-plug equipment when unplugging it controls the hazard and the plug remains under the exclusive control of the person doing the service. Do not assume this exception applies to every tool or machine. Follow the workplace procedure and the exact OSHA requirements.
Identify energy
Find all relevant electrical, mechanical, pneumatic, hydraulic, thermal, and other energy sources.
Isolate energy
Use the approved energy-isolating devices and procedure.
Control stored energy
Release, block, restrain, or otherwise make stored energy safe as the procedure directs.
Verify isolation
Confirm that the equipment cannot start or release hazardous energy before servicing begins.
Step 3: Troubleshoot Unusual Tool Behavior
Stop using a tool when it makes a new noise, vibrates more than usual, smells hot, produces smoke, or loses power. Do not keep working in the hope that the problem will disappear. Continued operation can make a small fault worse.
Wait for the tool to stop. Disconnect or isolate its power before carrying out any inspection that could expose you to moving parts or electrical hazards. Follow the manual for checks that are safe for the operator.
Look for a damaged accessory, loose workpiece, blocked air path, worn part, or unsuitable setting. Do not open electrical or pressure systems unless you are trained and authorized to do so. If the cause is not clear, remove the tool from service and ask a qualified repair person to inspect it.
Unusual vibration
Possible causes include an unbalanced accessory, loose part, poor mounting, or damaged bearing. Stop and inspect safely.
Burning smell
Possible causes include overheating, motor strain, or a damaged electrical part. Stop using the tool.
Poor cutting or drilling
Check the accessory condition, material support, alignment, and approved settings.
Unexpected movement
Check workholding, guides, controls, and the machine setup before any further use.
Damaged power cord or hose
Remove the tool from service. Do not cover damage with tape or continue using it.
Step 4: Maintain Tools for Reliable Operation
Regular maintenance helps tools work as designed. Clean equipment according to the manual. Keep vents and approved dust paths clear. Inspect handles, cords, switches, guards, and accessories at suitable intervals.
Lubricate moving parts only with the recommended lubricant and method. Too much lubricant can attract dust or affect nearby parts. The wrong lubricant can damage seals or other components.
Keep cutting accessories sharp and in good condition. Replace damaged blades, wheels, bits, and other parts with approved items. Do not modify accessories to make them fit a tool.
Record inspections and repairs when workplace procedures require it. A clear record helps identify repeat faults. It also helps other operators know whether a tool is ready for use.
Daily checks
Look for visible damage, loose parts, missing guards, and unusual changes before use.
Routine cleaning
Remove dust and debris using a method approved for the equipment.
Scheduled service
Follow the maintenance intervals and service steps in the manufacturer’s manual.
Safe storage
Protect tools from moisture, impact, dirt, and unauthorized use.
Frequently Asked Questions
Q
What are the most important tool operating techniques?
The main techniques are correct tool selection, proper grip, stable positioning, secure workholding, controlled pressure, and steady movement. Operators should also understand speed, direction, depth, and feed settings. The exact method depends on the tool and task.
Always follow the manufacturer’s instructions. Keep required guards in place and stop when the tool behaves in an unusual way.
Q
How do you control the speed of a power tool?
Use the speed trigger, selector, or control system provided by the manufacturer. Choose a setting that suits the material, accessory, and task. Check the accessory’s speed rating before use.
Do not exceed the approved speed. A higher speed does not always improve the result. It can create more heat, wear, or loss of control.
Q
What should you check before starting a power tool?
Check the tool body, power cord or battery, switch, guard, handles, and accessory. Confirm that the accessory is suitable and secure. Inspect the workpiece and make sure it is supported.
Clear the work area and select the required protective equipment. Make sure you know how to stop the tool before starting it.
Q
Why should you never force a power tool through material?
Excess pressure can overload the motor, bind an accessory, increase heat, and reduce control. It can also damage the workpiece or cause sudden movement.
Use the correct accessory and approved settings. Apply steady pressure and let the tool work at its intended rate. Stop and check the setup if resistance increases.
Q
What is the difference between switching off a tool and lockout/tagout?
Switching off a tool uses its normal control to stop operation. It may not isolate every energy source or prevent someone from restarting the equipment. Moving parts may also continue to coast after shutdown.
Lockout/tagout is a formal energy control process for covered servicing and maintenance work. It isolates hazardous energy and controls stored energy to prevent unexpected startup or release. Follow the applicable workplace procedure and OSHA requirements.
✦ Wrapping Up
Conclusion
Good tool operation depends on preparation, control, and safe work habits. Choose the right tool for the task. Inspect it before use. Secure the material and set the correct guides, guards, and controls.
During the job, use steady movement and suitable pressure. Control speed and feed according to the tool manual. Watch for unusual sound, heat, vibration, or movement. Stop if something does not feel or sound right.
Safe work does not end when the motor stops. Wait for moving parts to stop. Disconnect or isolate energy when required. Use the correct procedure before cleaning, adjusting, or repairing equipment. Regular care also helps keep tools ready for the next job.
💡 Key Takeaway
Before your next job, use a simple check: select the right tool, inspect it, secure the workpiece, confirm the guards and controls, choose suitable settings, operate with steady pressure, and follow a safe shutdown procedure. Never continue using damaged equipment or bypass a safety device.
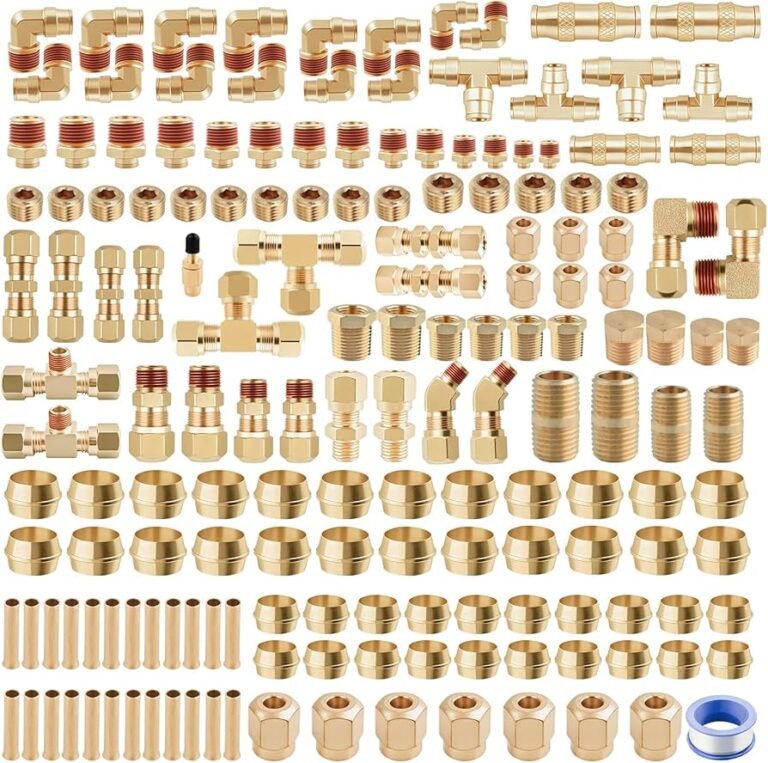
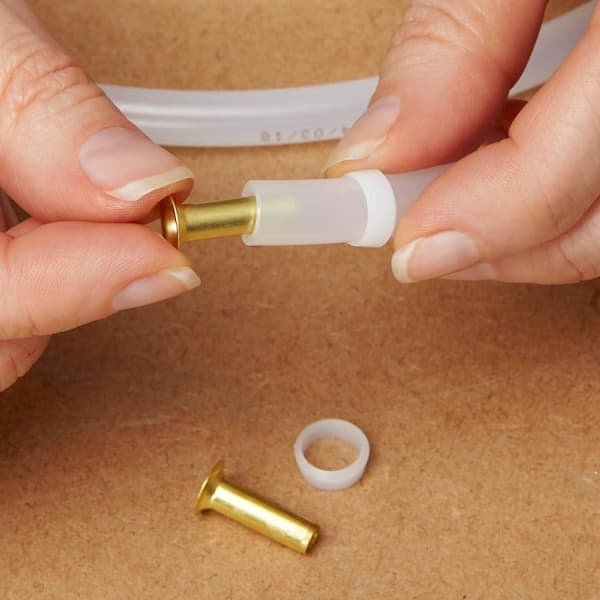
Compare compression fitting vs push to connect fitting to find the best choice for your plumbing, plus tips, pros, cons, and quick installation advice.