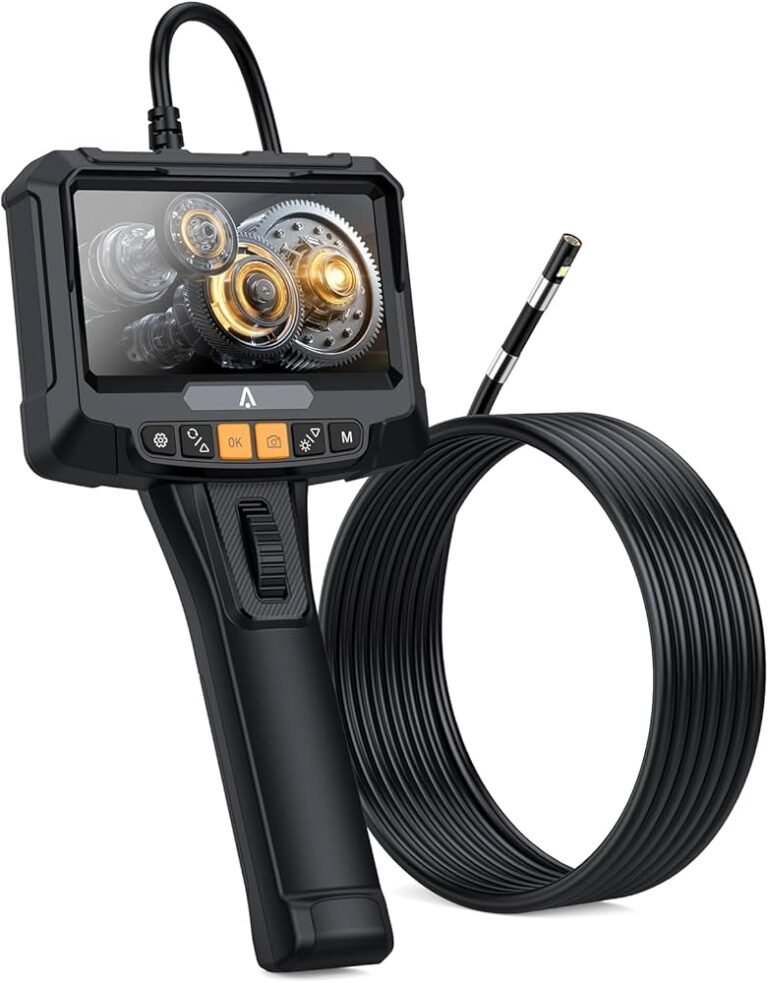
Choose tools that fit the work area, allow safe movement, and suit the site’s power, weather, and air conditions.
Across the United States, people use tools in home garages, repair shops, factories, and construction sites. Each place has its own limits. A large drill may work well on an open bench but fail inside a narrow cabinet. A corded saw may cut well in a dry shop but create risks on a wet jobsite. The right tool must fit both the task and the place where the task takes place.
Tool selection by workspace accessibility and operating environment means checking the work area before choosing equipment. This includes room to move, available power, light, airflow, temperature, moisture, and nearby hazards. It also means checking whether the operator can hold and control the tool without strain.
A tool does not become suitable just because its motor has enough power. Its full size, grip, attachments, and working motion must fit the space. The operator must also have room to see the work and react if the tool binds, kicks back, or slips.
The Occupational Safety and Health Administration, or OSHA, provides workplace safety rules and guidance for many of these conditions. The National Institute for Occupational Safety and Health, or NIOSH, also offers guidance on tool design and work posture. These sources support a simple approach: assess the site, remove hazards where possible, and then choose equipment that can be used safely.
This guide explains how to measure work areas, compare tool types, plan for difficult environments, and check a setup before starting work. It covers common home and trade tasks without treating one tool as the best choice for every job.
Workspace access affects how a tool reaches the workpiece and how well the operator can control it. A tool that is easy to use on a bench may be hard to handle behind a wall, beneath a sink, or between floor joists. The tool may fit into the opening but leave no room for a safe grip.
A useful distinction is the difference between tool access and operator access. Tool access means the cutting edge, bit, or fastener can reach the target. Operator access means the person can see the target, hold the equipment, maintain balance, and leave the area safely. Both conditions must be met.
Restricted space also changes how a tool reacts under load. A drill can twist when its bit binds. A saw needs room for its full cutting motion. A grinder needs clearance for its guard and the possible path of sparks. These needs remain even when the equipment has a compact body.
The main goal is not to find the smallest available tool. It is to find the smallest practical tool that still meets the task’s force, accuracy, guarding, and control needs.
Physical clearance
Check the size of the opening, the tool body, and every part that must move during use.
Safe body position
Make sure the operator can stand, sit, or kneel without losing balance or twisting sharply.
Work visibility
The operator must be able to see the working edge, the intended line, and nearby hazards.
Emergency access
Keep a clear way to stop work, release the tool, and leave the area.
Open Workspaces Versus Restricted Workspaces
Open work areas often support larger tools, wider handles, and stable work stands. They may offer more space for clamps, dust collection, and material handling. Large equipment can be useful when the task needs sustained force or repeated cuts.
Restricted work areas often favor compact tools, short heads, offset drives, and carefully placed supports. A small work area can also require more time for setup. The operator should not trade safe access for a faster cutting speed.
How to Assess a Workspace Before Choosing Tools
Start with the actual task and the place where it will happen. This avoids choosing a tool based only on a catalog photo or a motor rating. The first checks should identify hazards that could make the work unsafe regardless of which tool is used.
Record the workpiece material, required cut or hole, access direction, and acceptable result. Then check the floor, walls, overhead space, power supply, and nearby people. If the work area is not ready, improve it before selecting the equipment.
A short site review can prevent common errors. It can reveal that a tool needs a longer bit, that a dust hose blocks a doorway, or that the operator needs a stable work platform instead of a taller reach.
Step 1: Define the job
Write down the required action, material, depth, size, precision, and finish.
Record usable height, width, depth, and the room needed for tool movement.
Step 4: Check environmental risks
Look for water, heat, cold, dust, fumes, flammable materials, and poor airflow.
Step 5: Compare tool configurations
Evaluate straight, angled, compact, handheld, and supported tool options.
Step 6: Verify safe operation
Confirm that the tool can be held, guarded, powered, and stopped safely.
What to Prepare for the Assessment
A tape measure, flashlight, task drawing, and the intended tool dimensions are useful starting points. For complex work, an accurate sketch of the space can show where access is blocked.
Use the manufacturer’s instructions to check tool limits and required clearance. If the instructions do not answer a critical safety question, obtain reliable guidance before use. Never assume that a compact design permits operation in any restricted area.
Measure Tool Clearance and Working Space
Measure the complete tool setup rather than the bare housing. A drill’s usable size changes when a chuck, bit, side handle, or battery is added. A saw may need room for its guard to open and close. A vacuum hose may also limit where the tool can move.
For a simple fit check, compare available space with the tool’s full working dimensions. For example, suppose a cabinet offers 7.5 inches of straight clearance. If the loaded drill and bit need 8.2 inches, the setup is short by 0.7 inch. This is a hypothetical size example, not a general clearance rule.
Even a tool that appears to fit may fail the next test. The operator may need extra room to start the fastener, withdraw the bit, or change the tool’s angle. Plan for the whole operation, not just the first contact with the workpiece.
Do not use a single minimum-clearance number for all tools. Safe space depends on tool geometry, torque, cutting action, material, and the manufacturer’s instructions.
Tool envelope
Measure the full length, height, and width of the assembled tool.
Accessory clearance
Include the chuck, bit, blade, sanding pad, guard, and side handle.
Movement clearance
Allow enough space for approach, feed, travel, and safe withdrawal.
Operator clearance
Make room for hands, approved protective gear, grip changes, and stable posture.
When the Tool Fits but the Operator Does Not
A narrow opening may admit a small drill while leaving little room for its operator. Working with one hand at full reach can reduce control, especially when the bit may bind. A light tool can still create a strong reaction force.
The better solution may be to move the workpiece, change the work sequence, use a suitable extension or guide, or create safe access through an approved method. If none of these options provides control, the task should be redesigned.
Check the Path Before Drilling or Cutting
Limited access often hides what lies behind a wall, floor, or panel. A drill can damage wiring, plumbing, gas lines, or structural parts that are not visible from the work face.
Review drawings when available, inspect from accessible sides, and use suitable detection methods. Detection tools have limits and may miss some objects. Stop when the path cannot be verified. Structural or utility work may require a qualified trade professional.
Choose Tool Designs That Match the Available Access
Tool shape can matter as much as motor power. A compact drill may clear a cabinet shelf that blocks a full-size model. A right-angle drill can place its chuck in a different direction from its body. An oscillating multi-tool can perform some localized cuts where the normal travel of a saw would be difficult.
Each design has limits. A right-angle attachment may have restrictions on torque and compatible bits. A compact drill may not support large hole saws. A small cutting tool may work slowly on thick stock. Selection must account for both access and workload.
For woodworking and repair tasks, the cutting accessory often decides whether a tool is practical. A long blade, broad guard, or large sanding head can cancel the benefit of a short tool body.
Right-angle drills
Useful when the required hole direction leaves too little space behind a straight drill. Match the tool to bit size, torque, and the available grip.
Compact drill drivers
Useful for smaller holes and fasteners in cabinets, frames, and service areas when their ratings suit the job.
Oscillating multi-tools
Useful for certain plunge cuts, trim work, and local material removal when the blade and dust controls are suitable.
Hand tools
Useful for some light or delicate tasks where a powered tool adds bulk, noise, or poor control.
Supported equipment
Useful when a guide, clamp, fixture, or work stand improves control more than changing to a smaller handheld tool.
When an Attachment Is Better Than Another Tool
An approved offset or right-angle attachment can help with occasional light work. It may be easier to store than another powered tool. However, the added joint can change tool length, control, and torque capacity.
Check the attachment’s own rating and its compatibility with the host tool. Do not assume that an attachment can handle the same loads as the drill that drives it.
Match the Power Source to the Operating Environment
Power access is a key part of tool selection. A corded tool needs a suitable electrical supply and a safe cable route. A cordless tool removes the trailing power cord but still needs charged batteries and a safe place to charge them.
For an open, dry workshop with stable power, corded equipment may be practical for long work sessions. For a remote repair site or a task that moves between rooms, a cordless tool may provide easier movement. Neither power type is automatically safer.
Cordless tools can still overheat, bind, start by accident, or create sparks. They also have limits set by battery charge, temperature, and motor design. Battery power should never be treated as proof that a tool is safe for wet or flammable areas.
Check battery condition, expected runtime, safe charging space, and approved temperature ranges.
Pneumatic tools
Check compressor output, hose routing, air quality, connection ratings, and noise.
Engine-driven equipment
Assess exhaust gases, fuel handling, ventilation, heat, and fire hazards before use.
Electrical Safety in Damp or Wet Areas
OSHA advises against using electric tools in damp or wet locations unless the equipment is approved for that purpose. On covered construction sites, OSHA electrical rules also address grounding and ground-fault protection.
A ground-fault circuit interrupter, or GFCI, can reduce some electric shock risks by interrupting power when it detects an imbalance. It does not make an ordinary tool waterproof or remove every electrical hazard.
Inspect cords, plugs, and the work area before use. Follow the applicable electrical rules and manufacturer instructions. Never continue with damaged equipment, standing water, or uncertain electrical conditions. Have a qualified electrician assess hazards that cannot be resolved safely.
Power Planning for Remote Sites
Remote sites may lack fixed electrical service. Battery-operated equipment can be useful, but the plan must account for the work period and battery capacity.
Do not place a fuel-powered generator inside a building, garage, or other enclosed or partly enclosed area. Carbon monoxide can accumulate and cause fatal poisoning. Follow generator safety guidance and use a suitable power setup designed for the location.
How Temperature, Moisture, and Weather Affect Tool Choice
The operating environment affects both equipment performance and operator safety. Rain can increase electrical risks. Heat can affect battery performance and increase worker heat stress. Cold can change material behavior, battery output, and grip control.
Tool manufacturers set operating and storage limits for specific models. These limits are more useful than assuming that all tools in one category tolerate the same weather. A rugged housing is not proof that the tool can be used in heavy rain or extreme temperatures.
Outdoor work in the United States can range from hot, humid summer sites to cold winter repair jobs. The location matters, but the conditions at the exact work area matter more than a broad regional label. Assess the site at the time of use.
OSHA heat guidance identifies air temperature, humidity, sun exposure, air movement, and physical workload as key factors. A heavy tool can add strain in hot conditions. Better work planning may include shade, rest, water, and changes to the work schedule.
High heat
Follow equipment temperature limits and workplace heat controls. Watch for battery overheating and operator fatigue.
Low temperature
Check battery and material limits. Keep controls clear and use suitable hand protection that does not create a moving-parts hazard.
Rain and moisture
Use only equipment approved for the conditions, with the required electrical protection and dry storage.
Wind
Assess workpiece movement, dust spread, balance, and elevated-work risks.
Corrosive exposure
Check whether salt, chemicals, and cleaning fluids can damage tool parts or connections.
Understanding Tool Weather Ratings
Some products carry an ingress protection, or IP, rating. This rating describes protection against specified solid particles and water exposure under defined tests. It does not mean that every form of outdoor use is safe.
Check the rating and manufacturer instructions for the exact model. The battery, charger, and accessories may have different limits. A tool designed to resist splashes should not be assumed suitable for immersion.
Control Dust, Fumes, Noise, and Poor Airflow
Environmental limits are not only about space and weather. Cutting, grinding, sanding, and drilling can create dust or other airborne hazards. A tool that fits the area may still be unsuitable if those hazards cannot be controlled.
Dust can remain in indoor air when ventilation is poor. Some materials produce hazardous particles when cut or ground. Crystalline silica can be released during work on materials such as concrete, brick, and mortar. The type of task determines the required controls.
For covered construction tasks involving silica, OSHA’s construction standard specifies control methods for listed equipment and tasks or requires an alternative exposure assessment and control approach. Its requirements can differ for indoor and outdoor work.
A dust shroud, vacuum, or water feed can help control exposure when correctly selected and used. A standard household vacuum is not automatically suitable for hazardous construction dust. A visible drop in dust also does not prove exposure is below a legal limit.
Source control
Choose suitable dust extraction, wet methods, or other engineered controls that match the material and task.
Airflow
Plan airflow that moves contaminants away from the breathing zone without spreading them into occupied areas.
Noise
Consider tool noise, sound reflection, nearby people, and the need for measured exposure controls.
Respiratory protection
Where required, use a workplace respiratory protection program with appropriate respirator selection, fit testing, and training.
Operating Near Flammable Vapors or Combustible Dust
Ordinary electric and battery-powered tools can create ignition sources. A cordless tool is not automatically spark-free, and a small motor is not automatically suitable for a hazardous location.
If flammable gases, vapors, or combustible dust may be present, stop routine work until the area has been assessed. Specialized equipment may be required for the site’s hazard classification. A qualified safety or electrical professional should determine the correct controls and equipment.
Select Tools for Overhead Work and Limited Reach
Overhead work places added demands on the arms, shoulders, and hands. A lighter tool may reduce the effort needed to hold it in position, but weight alone does not determine safety. Balance, grip shape, reaction torque, and work duration also matter.
NIOSH hand-tool selection guidance emphasizes reducing force, awkward posture, and repeated movement. These ideas apply when assessing work above shoulder height or at the edge of comfortable reach. The workpiece and the operator should be positioned to reduce strain where practical.
A long extension is not always the answer to poor access. It can increase leverage and reduce control. For tasks that need high force, changing the work platform or using supported equipment may be safer than holding a tool farther from the body.
Improve the working position
Use a suitable platform or adjust the work height when the task allows.
Check tool balance
Assess whether the tool remains easy to control in its actual operating direction.
Manage reaction forces
Use required handles and approved supports. Do not work where a sudden tool twist could cause a fall.
Prevent dropped objects
Secure the work area below and use approved retention methods when appropriate.
Working From Ladders and Elevated Platforms
The access equipment must suit the job. A ladder may not provide the stable position needed for heavy drilling, forceful cutting, or work that requires both hands for long periods.
For covered workplaces, follow applicable OSHA ladder and fall protection rules. Use an appropriate work platform when the task requires greater stability. Do not carry loose powered tools while climbing in a way that prevents safe contact with the ladder.
Confined Spaces Require More Than Compact Tools
A small tool does not make a confined space safe. Some tanks, pits, vaults, and crawl spaces may meet OSHA’s definition of a confined space. The key factors include restricted entry or exit, space large enough for a person to enter, and a space not designed for continuous occupancy.
A permit-required confined space has additional hazards, such as a dangerous atmosphere, engulfment risk, or another serious recognized hazard. Not every small work area is a permit-required confined space. The correct classification depends on its actual conditions.
For regulated work, authorized entry may require hazard evaluation, permits, atmospheric testing, ventilation, attendants, and rescue planning. Tool selection must follow these controls, not replace them.
A homeowner should also avoid entering an area where the air, exit route, or other hazards are uncertain. Work involving suspected hazardous atmospheres or permit-required spaces belongs with trained personnel using a proper safety program.
Entry and exit
Determine whether entry is permitted and whether a clear, safe exit can be maintained.
Air quality
Have qualified personnel assess oxygen, toxic gases, and other atmospheric hazards when required.
Tool suitability
Confirm equipment ratings, exhaust needs, electrical protection, and ignition risks.
Emergency response
Do not enter or attempt an improvised rescue in a hazardous confined space.
Practical Tool Selection Examples for Common Work Areas
Real work areas show why access and environment should be assessed together. The following examples are general decision aids, not model recommendations. Each assumes that the site has been inspected and that the task is permitted.
The best option can change with hole size, material, required finish, available power, and the operator’s ability to control the tool. In some cases, improving the site is more useful than buying different equipment.
Inside a kitchen cabinet
Main limit: narrow depth and poor reach. Consider a compact driver, suitable offset attachment, or hand tool. Protect nearby surfaces and verify that hidden pipes or wiring are not in the tool path.
Between floor joists
Main limit: restricted drill alignment. A suitable right-angle drill may improve access. Confirm allowable drilling locations, structural restrictions, and reaction torque before use.
On a wet outdoor worksite
Main limit: moisture and electrical exposure. Use equipment rated for the conditions and the required protection. Delay work if the hazards cannot be controlled.
In an occupied indoor room
Main limit: dust, noise, and nearby people. Choose a method with effective source controls and isolate the work area as needed. Protect occupants from hazardous airborne material.
Above shoulder height
Main limit: fatigue, balance, and reach. Select a manageable tool and an appropriate work platform. Avoid operations that create large reaction forces from an unstable position.
In a small workshop
Main limit: bench area and material movement. Check infeed, outfeed, walkways, and the space required around guards. Smaller machinery is not suitable if it lacks the required capacity or controls.
At a remote repair site
Main limit: power and support services. Portable battery tools may help, but charging, lighting, weather protection, and emergency access still need a plan.
Check Tool Fit Before Starting the Job
A fit check helps identify problems before the tool is powered. Perform it with the tool disconnected from its power source, following the manufacturer’s safe setup instructions. Do not handle blades or bits while they can start unexpectedly.
Place the tool in the planned work position without operating it. Check the grip, line of sight, guard clearance, accessory movement, and safe exit path. If any part is blocked, change the setup rather than forcing the tool into position.
Next, secure the workpiece and establish the required environmental controls. Confirm that hoses, cables, and supports will not move into the cutting path. Inspect the equipment for damage and install the correct accessories.
A successful setup gives the operator a stable position, clear view, reliable control, and sufficient room for the full task. The tool should not need to rest against a pipe, wall, or other object that could cause an unintended force or movement.
After the work area is safe, conduct any manufacturer-approved functional check under controlled conditions. Stop immediately if the tool binds, vibrates unusually, produces unexpected noise, or cannot be controlled.
Check access
Confirm that the full tool and accessory assembly can reach the target.
Check motion
Confirm that all intended movement and withdrawal paths are clear.
Check control
Confirm that the required grip and posture can be maintained.
Check environment
Confirm that power, light, footing, ventilation, and dust controls are suitable.
Check shutdown
Keep the controls accessible and verify that power can be isolated safely.
What to Do When the Tool Does Not Fit
Do not remove a safety guard, defeat a switch, or use an unapproved attachment to gain space. Instead, stop and identify the actual limit. It may be the tool housing, the required movement, the workpiece position, or the operator’s posture.
Possible solutions include an approved smaller tool, a different task sequence, a workpiece fixture, or a safe change to the access arrangement. If no option meets the safety and job requirements, refer the task to a qualified professional.
Common Tool Selection Mistakes to Avoid
Many tool selection mistakes occur because buyers check performance specifications but overlook the work area. Motor power, speed, and advertised size are useful only when the tool can be operated correctly.
Another error is treating protective features as permission to ignore the environment. A GFCI does not make wet work safe in every case. A dust bag does not prove control of hazardous particles. A battery-powered motor does not remove ignition risks.
The safest correction is often to improve access or working conditions first. A better light, stable work support, or suitable dust extraction system may solve more problems than a different motor.
Choosing by size alone
A compact tool may lack the capacity, control features, or required guard for the job.
Ignoring loaded dimensions
Bits, batteries, handles, hoses, and guards can make the complete tool too large.
Assuming cordless means safe
Cordless equipment still presents electrical, mechanical, heat, and ignition hazards.
Forcing awkward posture
Poor balance and weak grip can increase fatigue and reduce tool control.
Removing safety equipment
Never remove required guards or defeat protective systems to make a tool fit.
Ignoring material hazards
Unknown coatings, insulation, dust, or building materials may require assessment before work.
Failing to plan maintenance
Check whether the tool can be inspected, cleaned, repaired, and stored safely after use.
Account for Setup, Maintenance, and Long-Term Use
Workspace fit should include more than the minutes spent cutting or drilling. The operator must also transport the tool, prepare it, change accessories, clean the work area, and store the equipment. These steps may be difficult when access is limited.
Consider the full cost of using a tool rather than only its purchase price. A lower-cost tool may need a separate adapter, larger battery, special dust collector, or additional work support. Those items can alter both cost and workspace needs.
Frequent work in tight areas may justify a dedicated compact or angled tool. For rare light tasks, a compatible accessory or a hand tool may be enough. This is a workload decision, not proof that one category is always more economical.
Maintenance matters as well. Moisture, dust, impact, and poor storage can reduce equipment life. Inspect tools as the manufacturer directs and remove damaged equipment from use. Do not attempt repairs beyond your training or the manufacturer’s approved procedures.
Transport
Check tool size, weight, case dimensions, and the route into the work area.
Consumables
Plan for bits, blades, filters, abrasive media, and other items the task will use.
Service access
Make sure required inspections and accessory changes can be done with power isolated.
Storage
Provide a dry, secure location that stays within the equipment’s storage limits.
Important Follow-Up Decisions After Tool Selection
Choosing a tool does not end the planning process. The next questions concern setup, hazard controls, and long-term use. A review of four tool-selection and right-angle drill pages found useful discussion of tool size, head design, attachments, and torque. Coverage of the wider operating environment was more limited in those reviewed pages.
The following questions are practical next needs inferred from the work process. They are not claims about search demand. Their value comes from the problems a user may face before, during, or after the job.
Can the operator control the tool after it fits?
Reader stage: before work. Basis: inferred need from clearance and reaction-force risks. Coverage in reviewed pages: partial. Priority: high. Benefit: prevents poor grip and unsafe posture. Answer basis: tool instructions and ergonomic guidance. Addressed in the clearance and fit-check sections.
What if the area is damp or has poor airflow?
Reader stage: site preparation. Basis: inferred need from electrical and airborne hazards. Coverage in reviewed pages: limited. Priority: high. Benefit: identifies conditions that can rule out ordinary equipment. Answer basis: OSHA electrical and silica guidance. Addressed in the power and environment sections.
Will attachments still fit during full tool movement?
Reader stage: equipment setup. Basis: inferred need from complete tool dimensions. Coverage in reviewed pages: partial. Priority: high. Benefit: prevents blocked motion and unsuitable purchases. Answer basis: tool geometry and manufacturer limits. Addressed in the clearance section.
What will the equipment need after use?
Reader stage: after work. Basis: inferred need from maintenance and storage tasks. Coverage in reviewed pages: limited. Priority: medium. Benefit: supports safer storage and long-term planning. Answer basis: manufacturer maintenance guidance. Addressed in the ownership section.
Frequently Asked Questions
Q
What Is the Most Important Factor When Selecting Tools for a Small Workspace?
The most important factor is whether the complete tool can perform the task while the operator maintains safe control. Check working clearance, grip, visibility, and the motion required by the accessory.
A compact body is useful only if the equipment also meets the job’s power and safety requirements. Never choose a smaller tool that needs an unsafe modification to complete the task.
Q
Are Cordless Tools Better for Restricted Work Areas?
Cordless tools can improve movement where cords would obstruct access or create a trip hazard. They can also be useful when fixed power is not available.
They are not automatically better for every restricted area. Their batteries add size and weight, and their runtime and operating conditions vary. A cordless tool may also be unsuitable for wet or hazardous locations. Compare the complete setup and the manufacturer’s limits.
Q
Can a Standard Drill Be Used in a Very Tight Space?
A standard drill may be used when its full dimensions, intended working motion, and required grip fit the area safely. It should not be forced sideways or operated with an unstable grip.
When straight access is blocked, a compatible right-angle attachment or dedicated angled drill may help. The alternative must still support the required bit, material, and torque. Verify the path behind the workpiece before drilling.
Q
How Does Poor Ventilation Affect Tool Selection?
Poor ventilation can allow dust, fumes, and other contaminants to build up. Some cutting, grinding, and drilling tasks need source controls and ventilation that match the material and environment.
A smaller tool does not solve an air-quality problem. The work method may need to change, or the area may need proper engineering controls and exposure assessment. Never use fuel-powered equipment indoors where exhaust gases can accumulate.
Q
When Should a Professional Assess the Workspace Before Work Begins?
Seek qualified help when the job involves uncertain electrical wiring, gas lines, structural parts, hazardous materials, a suspected dangerous atmosphere, or complex fall hazards. Professional assessment may also be needed when ordinary tools cannot be used without removing safety features.
For regulated workplaces, the employer must identify applicable requirements and provide the required controls and training. State and local rules may add requirements. When the risks cannot be identified or controlled, do not proceed with the task.
✦ Wrapping Up
Conclusion
Tool selection by workspace accessibility and operating environment begins with the work area, not the tool catalog. The right equipment must reach the task, fit the available space, and allow the operator to work with control. It must also suit the site’s power supply, weather, airflow, and other hazards.
A tool that is powerful in an open workshop may be unsuitable in a wet, narrow, or poorly ventilated location. A compact model may solve an access problem, but it cannot replace required guards, safe footing, or proper hazard controls.
Start by defining the job and inspecting the site. Measure the full working setup and compare the available options. Use the manufacturer’s instructions to confirm the tool’s limits. Where serious hazards remain, improve the conditions or obtain qualified help rather than forcing the work.
The most useful tool is not always the largest, strongest, or smallest. It is the one that can do the required work accurately while meeting the site’s access and safety needs.
💡 Key Takeaway
Before your next job, inspect the workspace, measure complete tool clearance, identify environmental hazards, and confirm safe control with the power disconnected. Choose equipment only after these checks pass.