Choose tools by matching the task, material, workspace, safety needs, and required finish before comparing power or price.
Across the United States, tool choice affects work in home shops, construction sites, repair garages, and small businesses. A tool that works well on a dry bench may be a poor fit for an outdoor job. The right choice depends on what you need to do and where you need to do it.
Tool selection by job requirements and working conditions starts with a clear task plan. You need to know the material, cut or hole size, work angle, available space, and source of power. You also need to check the risks that come with the job. These facts help narrow the options before you spend money.
The Occupational Safety and Health Administration, or OSHA, advises workers to use the right tool for the job, inspect tools before use, and follow the maker’s instructions. The National Institute for Occupational Safety and Health, or NIOSH, also stresses the need to match hand tools to the task and the user. These are sound starting points for both shop work and field work, though workplace rules have their own scope.
This guide gives you a clear way to choose hand tools, electric tools, and air-powered tools. It also covers wet sites, tight spaces, heavy work, tool fit, and long-term cost. The goal is to find a tool that meets the task without adding risks or needless expense.
What Does Tool Selection Based on Job Requirements Mean?
Tool selection means choosing equipment that can do a defined job within its safe operating limits. A suitable tool must work with the material, reach the work area, and meet the required result. It should also fit the user’s ability and the conditions on site.
For example, a small drill driver may work well for pilot holes in softwood. The same tool may not be right for repeated large holes in dense material. A drill made for heavier work may offer more suitable torque, speed control, and duty capacity. The correct choice still depends on the bit, hole size, and tool instructions.
The key difference is between a tool that can sometimes perform a task and a tool that is suitable for doing it as planned. A tool may complete one cut yet overheat during a long series of cuts. Another may have enough power but lack the space needed for safe handling.
Good selection treats the tool and the work area as one system. The workpiece, support, operator, accessory, power supply, and surroundings all affect the outcome.
Job requirement
The result the tool must produce, such as a hole of a set size, a straight cut, or a fastener tightened to a stated torque.
Working condition
The physical setting in which the task takes place, including space, surface, weather, light, and hazards.
Tool capacity
The size, load, speed, or type of work that the maker permits the tool to perform.
Tool compatibility
Whether the tool, accessory, power supply, and material can be used together as intended.
How to Identify Job Requirements Before Choosing Tools
Start with the work you need to finish, not the tools you already own. A brief written task plan can prevent the wrong choice. It also helps you spot limits before you start cutting, drilling, or fastening.
For a simple job, this plan may take only a few lines. For a job with many steps or serious hazards, it may need a formal work plan and hazard review. The detail should match the risk.
Use the following sequence to define the task. Each step removes options that may look useful but do not meet the real need.
Step 1: Name the task
State whether you must cut, drill, grind, shape, fasten, lift, clamp, or measure. Do not choose a tool until the action is clear.
Step 2: Identify the material
Record whether the workpiece is wood, metal, plastic, masonry, tile, or another material. Check its thickness and any coating.
Step 3: Define the finished result
Note dimensions, tolerances, surface finish, and whether marks or chips are acceptable.
Step 4: Count the work
Estimate how many holes, cuts, joints, or fasteners are needed. Repeated use can change the best tool choice.
Step 5: Check access
Measure the space around the workpiece. Include room for the tool body, handles, accessories, guards, and operator.
Step 6: Identify hazards
Check for hidden wires, pipes, live circuits, dust, fumes, unstable workpieces, and nearby people.
Step 7: Set the limits
Record the budget, available power, required skill, job deadline, and any site rules that apply.
Why Material Thickness and Size Matter
Material thickness can change the tool, blade, bit, and setup you need. A saw that cuts a thin board may lack the depth needed for thick stock. A drill may have the right chuck size but still lack the rated capacity for a large hole.
Measure the workpiece and compare it with the maker’s stated limits. Check cut depth at the required angle, not just the largest number on the box. Allow for any guide, shoe, or fixture that changes usable reach.
Why Accuracy Changes the Choice
Rough removal and fine fitting need different levels of control. A reciprocating saw can be useful for rough demolition. It is not the natural choice for a clean cabinet edge where a guided saw may be more suitable.
Accuracy also depends on the setup. A straightedge, clamp, fence, or jig may do more for repeatable results than a larger motor. Choose the full method, not just the tool name.
Match Tool Types to the Work You Need to Perform
Choose the tool family by the physical action required. This cuts down the options before you compare models. The final match must still meet the material and accessory limits stated in the manual.
A simple decision aid can help. The examples below describe common use cases, not a claim that any one tool works with all materials.
Small fasteners and light assembly
A hand screwdriver or controlled electric screwdriver can help with light fastening. Check the required torque and bit fit.
General holes in wood or metal
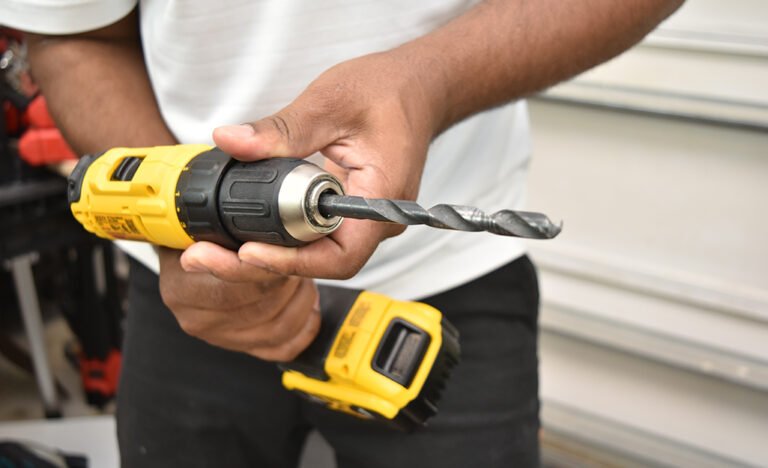
A drill driver with suitable bits and speed settings is often a useful starting point. Confirm the diameter and material limits.
Repeated drilling in concrete
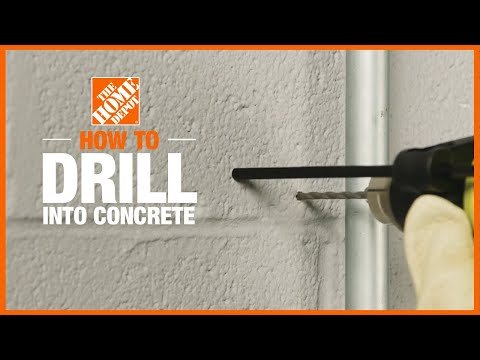
A hammer drill or rotary hammer rated for the hole size and material may be suitable. The exact task decides which type is needed.
Straight cuts in sheet goods
A circular saw with a suitable blade and guide can be used when the workpiece is well supported and the saw is rated for the material.
Curves in suitable sheet material
A jigsaw can provide more control around curves than a straight-cut saw. Blade choice and support remain critical.
Fine hand fitting
A hand plane, chisel, file, or other controlled hand tool may suit a small adjustment when the user has the skill to use it safely.
Large surface sanding
A suitable power sander may reduce time spent on broad areas. Dust control, abrasive type, and the required finish must guide the choice.
Hand Tools Versus Power Tools
Hand tools offer direct control and need no motor power. They can work well for small tasks, fine fitting, and some areas with little room. They may also avoid the noise and dust output of certain powered methods, though hand work can still create hazards.
Power tools can lower the manual effort required for repeated or high-force work. They may also increase speed. In return, they add risks from moving parts, noise, dust, stored energy, and unintended starts.
The better choice depends on the task size and the control needed. Do not use a power tool merely because it appears faster. Do not force a hand tool through work that requires too much effort or puts the user in an unsafe posture.
Do Not Ignore the Accessory
A good tool with the wrong blade or bit may still fail. The cutting edge must match the material, size, speed, and method of use. A wood blade is not a general substitute for a metal-cutting blade.
Check the accessory’s rated speed, diameter, mounting style, and tool approval. Grinding wheels, saw blades, drill bits, and driver bits are not interchangeable merely because they appear to fit. Never bypass a guard to mount an oversized accessory.
How Working Conditions Change the Right Tool Choice
Working conditions can rule out an otherwise suitable tool. Moisture, dust, poor access, unstable surfaces, and low light can affect safe operation. Assess the site before deciding what equipment to take.
OSHA guidance for electric power tools warns against use in damp or wet areas unless the tool is approved for that purpose. It also stresses sound cords, proper light, and removal of damaged tools from service. Workplace requirements depend on the setting and applicable rules.
Dry indoor workshop
Check ventilation, dust collection, clear floors, stable support, and safe cord routing. Controlled conditions do not remove the need for guards.
Outdoor work
Check rain, ground moisture, wind, temperature, sun exposure, and the condition of power connections before starting.
Tight space
Confirm that the complete tool and its guard fit. Avoid any setup that blocks the controls or forces an unsafe grip.
Overhead work
Give weight, balance, reach, eye protection, and support extra attention. Secure the work and protect people below.
Dusty site
Choose a method with suitable dust capture and exposure controls. Check whether dust may be harmful or combustible.
Sloped or unstable ground
Establish safe footing and secure the work before operating the tool. Change the setup if balance cannot be maintained.
Wet and Damp Conditions
Water raises the risk of electric shock and can damage tools and power connections. A ground-fault circuit interrupter, or GFCI, helps protect against certain ground-fault hazards. It does not make an ordinary electric tool safe to use in rain or water.
Use equipment that is approved for the actual environment. Check the tool manual, connectors, supply, and worksite rules. If the conditions exceed the tool’s permitted use, stop or change the method.
A battery-powered tool removes the trailing power cord but does not remove all electrical hazards. Battery packs, switches, and electronic parts still have limits for moisture and temperature.
Heat, Cold, and Dust
High heat can increase strain on motors and batteries. Cold weather can reduce the available output of some batteries. Temperature limits vary by tool and pack, so use the maker’s stated range for operation, charging, and storage.
Dust can block cooling paths and expose workers to harmful particles. Some tasks, such as cutting concrete or disturbing old coatings, require more than a basic dust bag. Plan suitable engineering controls, cleanup, and respiratory protection when required.
In a space with possible flammable vapor or combustible dust, an ordinary power tool may create an ignition risk. Do not assume a cordless tool is safe for such an area. A qualified site safety assessment and equipment suited to the classified conditions may be required.
Choosing Between Corded, Cordless, and Pneumatic Tools
The best power source is the one that meets the work demand and fits the site. Corded, cordless, and pneumatic tools each have useful roles. None is the best choice for every task.
Begin with power access and the expected time under load. Then check the space, cord or hose path, and maintenance needs. A tool with more power than the job needs may add weight, cost, or control demands with little benefit.
Corded electric tools
Useful when compatible electric power is near the work and long periods of operation are expected. Cord routing, electrical protection, and tool approval for the site must be checked.
Cordless tools
Useful where mobility and access matter. Check the battery platform, pack size, expected workload, charging plan, and permitted weather conditions.
Pneumatic tools
Useful where a suitable compressed-air system is available. Confirm pressure, air flow, hose size, couplings, and compressor duty capacity.
Manual tools
Useful for short or controlled tasks where the required force is manageable. They avoid a separate power source but may increase effort during repeated work.
How to Compare Cordless Battery Capacity
Battery capacity is often shown in amp-hours, or Ah. Energy can be estimated in watt-hours by multiplying nominal battery voltage by amp-hours. This is useful when comparing battery packs with different voltages.
For example, a hypothetical 18-volt, 4-Ah pack holds about 72 watt-hours of nominal energy. The calculation is 18 multiplied by 4. It does not mean the tool will deliver 72 watts for exactly one hour in real work.
Actual run time depends on load, speed, battery condition, temperature, electronic limits, and tool efficiency. Brand-specific voltage labels may also use different nominal and maximum values. Compare documented specifications on the same basis.
A second pack may reduce downtime, but it adds weight and cost to the kit. For long work sessions, plan charging and pack rotation around the actual task rather than guessing from the Ah label alone.
When a Pneumatic Tool Makes Sense
An air tool needs more than the correct pressure rating. It also needs enough air flow while the tool runs. A compressor that reaches the required pressure may still fail to support repeated use.
Compare the tool’s air demand with the compressor’s delivered air output at the stated pressure. Allow for other tools on the same line. Check hose loss, fittings, moisture control, and the safe pressure limits of all parts.
For a small home task, the compressor and hose setup may cost more time than the work itself. In a shop that already uses air tools, the same system may be a practical choice.
Match Tool Capacity, Speed, and Torque to the Job
Tool specifications are useful only when they relate to the work. Power ratings, torque, speed, and capacity measure different things. A high number in one category does not prove that the tool will perform better in every task.
Torque describes turning force. Speed describes how fast a shaft or cutting edge moves. Capacity describes the size or load the tool is designed to handle. The right mix depends on the material, accessory, and work method.
For drilling, the correct operating speed depends on bit diameter, bit type, and material. For sawing, blade design and cutting speed also matter. Follow the tool and accessory instructions instead of assuming that faster is always better.
Torque
Check whether the tool can handle the required load with control. More torque is not always useful for small fasteners or delicate work.
Speed control
Choose the speed range specified for the material and accessory. Adjustable speed can help when tasks vary.
Cutting capacity
Check the rated cut depth, width, and angle. Make sure guides and guards remain usable at the needed setting.
Duty capacity
Check any stated operating and cooling limits. A tool intended for short jobs may not suit long periods of heavy load.
Accessory rating
Confirm that the blade, wheel, bit, or attachment is approved for the tool and the planned operation.
Why the Most Powerful Tool May Be the Wrong Choice
A large tool may take more room, weigh more, and react more strongly if a bit binds. Its extra capacity may add no value when the task is small. Control and correct setup can matter more than maximum output.
For example, a compact driver with a suitable clutch may be easier to manage when assembling light furniture than a large impact wrench. For high-torque fasteners, the larger tool may be suitable only when the fastener, socket, and work method permit it.
Select enough capacity for the job, with a reasonable margin inside the maker’s limits. Do not treat spare power as permission to force the tool or use an unapproved attachment.
Consider Tool Weight, Grip, and Operator Fatigue
A tool must fit the person using it, not just the job. Heavy weight, poor balance, repeated motion, and awkward grip positions can make work harder and less controlled. These issues matter most when the tool is used for a long period.
NIOSH and California workplace safety guidance recommend matching hand tool design to the user and task. They emphasize neutral wrist positions, less force, and reduced pressure on the hand. A tool sold as ergonomic is not automatically a good fit for every user.
Try the operating grip with the tool powered off and the work area made safe. Check the complete working weight, including the battery or other required attachment. Assess whether both hands can reach the controls as intended.
Weight
Assess how the tool feels during the expected task, especially at shoulder height or above.
Balance
A well-balanced tool may be easier to position and control than one with similar weight placed far from the hand.
Grip fit
The handle should support a secure hold without painful pressure or extreme finger stretch.
Trigger access
Controls should be easy to reach without losing the intended grip or moving the wrist into an awkward position.
Vibration
For repeated use, compare documented vibration information and seek methods that reduce exposure time and force.
Work height
Adjust the workpiece position when possible. A better bench or support may solve a problem that a different handle cannot.
Why Work Direction Changes Handle Choice
A handle that feels right on a bench may feel awkward when the tool points at a wall. OSHA ergonomic guidance describes how handle orientation can help keep the wrist near a neutral position. Pistol-style and inline grips may suit different work directions.
The ideal position depends on the actual tool and task. Test the grip while standing in the planned work position. If the wrist must bend sharply or the body must overreach, adjust the work setup or choose a different tool design.
Apply Safety Limits Before Comparing Tool Prices
Safety requirements are selection filters, not optional features. A low price does not make a tool suitable when it lacks the required guard, rated capacity, or environmental approval. Remove unsafe choices before you compare cost.
Inspect the tool before use. Look for cracks, loose parts, damaged cords, missing guards, poor switches, and signs of unusual wear. Remove damaged equipment from service until it has been assessed and repaired by a qualified person where appropriate.
Consider the hazards created by the whole operation. A blade can throw chips, a grinder can produce sparks, and sanding can release fine dust. Plan protection based on the material, tool, and exposure, not a generic checklist alone.
Guards and controls
Confirm that all required guards, switches, and safety features are present and work as intended.
Workpiece support
Use suitable clamps, fixtures, or supports so the work remains stable without putting hands near moving parts.
Personal protection
Select eye, hearing, respiratory, and other protection based on the hazards. Avoid loose clothing and entanglement risks.
Electrical conditions
Check supply voltage, cord condition, grounding requirements, GFCI protection where required, and environmental approval.
Hidden services
Locate potential wiring, plumbing, gas lines, and other services before cutting or drilling into walls, floors, or ground.
Training
Use equipment only when the operator understands its controls, limits, safe setup, and response to faults.
When to Stop and Seek Qualified Help
Some jobs require more than tool knowledge. Structural changes, energized electrical work, gas-system work, and tasks involving unknown buried services can create severe risks. A qualified professional should assess those jobs before work starts.
Old paint, asbestos-containing materials, and certain forms of dust may require special controls. In the United States, applicable federal, state, and local rules can vary by task and worksite. Do not treat a standard consumer tool as proof that a hazardous job is safe for DIY work.
For workplace use, employers must assess and follow the standards that apply to their operations. OSHA has different provisions for construction and general industry. Manufacturer instructions and site-specific safety procedures also matter.
Practical Tool Selection Examples for Common Jobs
Real tasks show why one tool cannot be best for every setting. The examples below are decision guides. They are not records of hands-on tests, and actual equipment limits must be checked before use.
In each case, the material and work area narrow the tool choice. The next step is to verify the accessory and safe setup.
Case 1: Build a wooden shelf indoors
A drill driver, suitable bits, clamps, measuring tools, and a saw rated for the stock may cover the task. The clean indoor setting makes dust collection and workpiece support key concerns. Precise layout and sound fastening matter more than having the highest-power drill.
Case 2: Drill repeated holes in a concrete wall
Confirm the concrete type, hole diameter, depth, and number of holes. A suitable rotary hammer may be more practical than a standard drill for demanding work. Check hidden services, tool capacity, bit approval, and effective dust controls.
Case 3: Assemble a cabinet in a tight room
A compact screwdriver or drill driver may offer better access than a long tool. Check whether a right-angle design is approved for the fastening load. Use clamps and a stable work position rather than forcing the tool into a narrow gap.
Case 4: Cut boards at an outdoor site
Measure board size, plan support, and check the weather. A compatible saw and blade may be suitable if the work area is dry and the equipment is approved for the conditions. Keep cables clear of the cut and use proper electrical protection.
Case 5: Remove rough material during demolition
A reciprocating saw may suit some rough cuts. First confirm that the material contains no live services or hazards that make cutting unsafe. Blade choice, clear access, and control of falling pieces are essential.
Case 6: Perform repeated overhead fastening
Favor a tool with manageable weight, good balance, suitable torque control, and a secure grip. Use safe access equipment and work support. Reduce time spent with the arms raised when possible.
How to Handle a Job With More Than One Material
Mixed-material work often needs more than one tool or accessory. Wood, steel, tile, and masonry can require different cutting methods. A single motor may support several tasks, but no accessory should be used outside its approved application.
Break the project into separate operations. List the material, tool, and accessory for each step. This can reveal when an extra bit is enough and when a different tool is the safer choice.
Compare Buying, Renting, and Total Tool Cost
The lowest purchase price is not always the lowest job cost. Tool selection should include setup time, accessories, maintenance, storage, and expected use. A low-cost tool may meet a short task, while frequent work may justify a more durable setup.
Renting can be useful for rare tasks that need a specialized tool. It may also let you use equipment without paying for long-term storage or upkeep. The rental agreement, accessory costs, transport, and training needs still matter.
To compare options, estimate the cost of completing the work rather than focusing only on the tool itself. Keep assumptions clear because real job time and tool performance can vary.
Purchase cost
Include the tool, required battery or charger, approved accessories, and any fixture needed for safe work.
Operating cost
Account for energy, blades, bits, abrasives, filters, and routine service.
Time cost
Include setup, cutting or drilling time, cleanup, pack changes, and breaks required for safe use.
Repair and replacement
Check whether common parts and service are available. Do not assume that a longer warranty proves greater durability.
Rental cost
Include the rental period, pickup or delivery, insurance or fees where applicable, and required accessories.
Example: Does a Faster Tool Justify Its Cost?
Consider a hypothetical job with 30 holes. Assume a manual method takes two minutes per hole. Total work time would be 60 minutes.
Now assume a powered method takes 20 seconds per hole and needs 15 minutes for setup and cleanup. Drilling takes 10 minutes, so the total is 25 minutes. The difference is 35 minutes.
At an assumed labor value of $30 per hour, 35 minutes is worth $17.50. If a suitable tool rental costs $40 and serves no other purpose, the saved labor time alone would not cover the rental. The choice may still change when worker strain, quality, or a larger number of holes is considered.
These figures are only a worked example, not test data. Actual rates and time must be measured for the job. Safety should never be traded away to meet a cost target.
How to Check Whether Your Tool Choice Is Correct
A tool choice is not complete until the equipment and work method are checked. Review the manual, ratings, accessories, and work setup before starting. For tasks that allow it, a controlled trial on scrap material can help confirm the result.
Do not use a trial cut to test an unsafe tool, unknown wiring, damaged equipment, or conditions outside the maker’s instructions. The trial is meant to confirm an already suitable method, not prove that an unapproved method is acceptable.
A successful check should show that the tool performs the required task without abnormal behavior. The workpiece should remain secure, the tool should stay controllable, and the cut or hole should meet the stated result.
Check the manual
Confirm the material, operating mode, accessory, rated capacity, and environmental limits.
Inspect the tool
Check guards, controls, cords, batteries, mounts, and visible damage before use.
Prepare the work area
Set up support, lighting, dust controls, safe access, and a clear path around the task.
Make a controlled trial when appropriate
Use suitable scrap material and approved settings. Look for stable cutting, correct size, and an acceptable finish.
Review the result
Check dimensions, surface quality, tool temperature, vibration, and any warning signs noted in the manual.
Correct the cause
If the result is poor, stop safely. Recheck setup, accessory condition, tool capacity, and the material before changing the method.
Signs That the Tool Is Not Suited to the Task
Unusual noise, smoke, sparking beyond normal tool behavior, repeated stalls, and sudden vibration can signal a problem. They may result from damage, a poor accessory match, excess load, or another fault. Do not assume the cause from one symptom.
Stop using the tool when abnormal operation appears. Disconnect its power source using the safe procedure in the manual and allow moving parts to stop. Do not touch a hot or damaged part until it is safe to do so.
Check for obvious causes only after the tool is made safe. If the problem remains or involves electrical parts, guards, battery damage, or other critical components, have qualified service personnel assess it.
Common Mistakes to Avoid During Tool Selection
Many poor tool choices begin with a simple assumption. A familiar tool feels convenient, a larger motor sounds better, or a low price seems hard to pass up. None of these factors proves that the tool fits the job.
Use the following checks to avoid mistakes that can waste time, damage material, or create safety hazards.
Choosing by brand alone
Compare the documented function and limits of each tool. Brand reputation does not replace a task match.
Ignoring the material
Do not assume a bit or blade works on every material. Check the material rating before use.
Using power as the only measure
Extra motor output does not guarantee accurate cuts, safe control, or longer service life.
Forgetting workspace access
Measure clearance for the full tool, guard, hand position, and workpiece movement.
Ignoring tool condition
A damaged or poorly maintained tool can change an otherwise suitable choice into an unsafe one.
Using the wrong accessory
Never rely on physical fit alone. Speed, mounting style, material, and tool approval must all match.
Buying for one rare task
Consider rental or a suitable service provider when a specialized tool will see little future use.
Skipping the hazard review
A tool may meet all performance needs yet remain wrong for an energized, wet, dusty, or unstable work area.
Questions That Can Change Your Tool Decision
Tool choice often changes after the first plan is made. A hidden limit may appear when you check the work area, choose an accessory, or estimate run time. These follow-up questions are useful because they connect the first choice with safe setup and later use.
A review of general power tool buying guides from AO, Screwfix, and Argos shows useful coverage of tool types, materials, and power sources. The added decision points below focus on worksite restrictions, task continuity, and what to do when a tool does not fit the space. These are inferred reader needs, not claims of verified search demand or omissions across the entire web.
Can the tool operate safely in the available space?
Reader stage: Before setup. Basis: Inferred from clearance and operator-control needs. Reviewed guide coverage: General tool-fit advice, with limited job-specific clearance steps. Reader benefit: Avoids an unsafe grip or blocked guard. Evidence basis: OSHA ergonomic guidance and tool instructions. Priority: High. Placement: Working conditions and task planning.
What happens if the power source cannot support the full job?
Reader stage: Before purchase or rental. Basis: Inferred from run-time and air-demand checks. Reviewed guide coverage: Battery and power-source basics are addressed, while full-workload checks are less developed. Reader benefit: Reduces delays and poor equipment matching. Evidence basis: Rated battery energy, compressor output, and maker limits. Priority: High. Placement: Power-source selection.
How do I know the tool is unsuitable after setup?
Reader stage: During a controlled check. Basis: Inferred from tool inspection and failure signs. Reviewed guide coverage: Safety features are discussed, but fault response is not always tied to selection. Reader benefit: Helps users stop before repeating a bad method. Evidence basis: OSHA tool safety guidance and manufacturer operating limits. Priority: High. Placement: Choice verification.
Should I rent a specialized tool or buy one?
Reader stage: Before spending. Basis: Inferred from rare-use tasks and total cost. Reviewed guide coverage: Purchase costs and accessories are discussed, but a task-based rental calculation is less prominent. Reader benefit: Avoids spending on equipment with little future use. Evidence basis: Transparent cost and time comparison. Priority: Medium. Placement: Cost analysis.
Frequently Asked Questions
Q
What is the most important factor when choosing a tool for a job?
The most important factor is whether the tool can perform the required task within its approved limits. Material, work size, access, and safety conditions must all match. Price and convenience come after those checks.
Q
Is a cordless tool always better for outdoor work?
No. Cordless tools remove the trailing power cord and can help with mobility, but they still have weather and temperature limits. A suitable corded tool may work well in an approved outdoor setup with proper electrical protection. Neither type should be used outside its rated conditions.
Q
How do I select a tool for a small or confined workspace?
Measure the full operating clearance first. Include the guard, handles, accessory, and space needed for safe movement. Select a tool that fits without forcing your wrist or blocking the controls. If the tool cannot be used safely, change the work method or seek qualified help.
Q
Should I buy a more powerful tool for future jobs?
Only when the extra capacity meets a realistic future need. More power may add weight, cost, or control demands. Compare the likely tasks with the tool’s rated capacity and consider renting special equipment for rare work.
Q
How often should I review whether a tool is still suitable?
Review suitability whenever the material, task, attachment, operator, or work conditions change. Inspect tools before use and follow the maker’s maintenance schedule. A tool that worked well on an earlier job may not fit the next one.
✦ Wrapping Up
Conclusion
The right tool is the one that meets the job requirements and fits the working conditions. Start with the task, material, and required result. Then check the work area, tool capacity, power source, and safe setup.
A good choice does not always mean buying the largest or most costly tool. A small hand tool may suit a short, precise task. A powered tool may be more practical for repeated work. The deciding factor is whether the full setup can complete the job safely and well.
Before starting, confirm the maker’s instructions and inspect the equipment. Check that the accessory, workpiece support, and power source match the plan. If the conditions change, review the choice again rather than forcing the same method.
For hazardous or specialized work, use the advice of qualified professionals and follow the rules that apply to the site. No general buying guide can replace a task-specific safety assessment.
💡 Key Takeaway
Write down five facts before choosing a tool: the task, the material, the required result, the work conditions, and the safety limits. Reject tools that fail any required condition. Then compare the remaining options for control, total cost, and ease of use.
Compare digital caliper vs tape measure accuracy, ease, and best uses so you pick the right tool for projects and precision—read our concise guide now.