Install a tool accessory only when its size, mounting style, speed rating, and intended use match the tool. Disconnect the power source, inspect the parts, follow the correct locking steps, and verify secure attachment before operation.
In American garages, home workshops, farms, and construction sites, power tools handle many jobs. A drill may need a new bit. A circular saw may need a fresh blade. An angle grinder may need a cutting wheel or sanding disc. Each change needs care because a poorly fitted accessory can slip, wobble, break, or come loose during use.
Tool accessory installation is more than placing one part inside another. The accessory must match the tool, sit in the correct position, and lock in place as the manufacturer designed. A part that appears to fit may still be unsafe if its speed rating, size, or mounting system is wrong. This guide explains how to install, remove, inspect, and secure common tool accessories while reducing avoidable risks.
Source: autozone.com
Understand Tool Accessory Compatibility Before Installation
Accessory compatibility is the first step in a safe installation. The tool and accessory must share the correct mounting system and operating limits. A drill bit, saw blade, grinding wheel, and sanding pad each have different fit requirements.
Start with the tool manual. Check its approved accessory list and compare the information with the markings on the replacement part. Do not rely on appearance alone. Two accessories may look alike but use different shanks, bore sizes, drive connections, or speed limits.
The key rule is simple: physical fit does not prove safe use. An accessory must also suit the tool’s power, speed, intended material, and design.
Mounting size
Check the shank diameter, arbor hole, thread size, square drive, hex connection, or collet size. These parts must match the holder.
Operating speed
Check the accessory’s maximum RPM rating against the tool’s operating speed. Never run an accessory beyond its marked limit.
Accessory dimensions
Check the allowed diameter, thickness, length, and depth. An oversized part may not fit behind the guard or inside the tool’s working range.
Material and task
Use a blade, bit, wheel, or disc made for the material and operation. A wood blade is not a general-purpose metal cutting blade.
Mounting system
Confirm whether the tool uses a chuck, collet, threaded spindle, quick-release collar, locking pin, or another approved connection.
Check The Accessory Rating And Tool Limits
A rotating accessory must be rated for the speed of the tool that drives it. This matters most with grinders, polishers, and other high-speed tools. A wheel with a lower maximum RPM than the grinder can break apart during use.
Also check the accessory’s size and condition. Do not enlarge an arbor hole, remove material to force a fit, or use a wheel that is too large for the guard. If the markings are missing or unreadable, do not guess. Find the correct product information or replace the accessory.
Read the label
Look for maximum RPM, diameter, thickness, bore size, material type, and any use restrictions.
Check the tool manual
Confirm that the accessory is approved for the exact tool model and mounting system.
Know The Difference Between Similar Mounts
A keyed drill chuck, keyless chuck, SDS holder, 1/4-inch hex drive, and square-drive impact holder are not interchangeable. Each uses a different way to hold the accessory. Using the wrong adapter may reduce grip or place extra stress on the tool.
The same rule applies to threaded grinder wheels and quick-lock systems. Use the correct flange, nut, and guard for the mounting design. Never mix parts just because their threads or outer shapes appear similar.
Prepare The Tool And Work Area Before Changing Accessories
Prepare the tool before touching its accessory holder. Accidental startup is one of the main risks during installation and removal. A trigger can be pressed by mistake, and a battery tool can start if its switch is activated.
Turn the tool off and isolate its power source. Unplug corded tools and remove detachable batteries from cordless tools. For pneumatic tools, shut off the air supply, disconnect the hose, and release trapped pressure as directed by the manual.
Wait until every moving part stops. Let hot blades, bits, wheels, and work surfaces cool before handling them. Keep sharp edges away from your hands.
Unplug corded tools
Remove the plug from the outlet. Do not depend on the switch alone to prevent accidental startup.
Remove cordless batteries
Take out the battery pack before changing bits, blades, attachments, or other removable parts.
Isolate air-powered tools
Close the air supply and disconnect the hose. Release stored pressure before removing a pneumatic attachment.
Inspect the work area
Clear clutter, secure loose items, and keep children and bystanders away from the work area.
Wear suitable protection
Use eye protection and other task-specific PPE. Use care when handling sharp or hot accessories.
Gather The Correct Tools And Parts
Most accessory changes need only a few items. These may include the supplied chuck key, spindle wrench, hex key, approved mounting nut, replacement accessory, and the tool manual.
Keep the correct parts together. A missing flange or retaining clip can affect how the accessory sits in the holder. Do not replace a special locking part with a random washer, nut, or bolt.
Use supplied tools
Use the wrench, key, or release tool made for the holder whenever the manufacturer provides one.
Keep hardware in order
Place removed washers, flanges, nuts, and clips on a clean surface so they can be returned to their correct positions.
Protect Your Hands During Preparation
A stationary blade or wheel can still cut skin. Use suitable hand protection when handling sharp parts, but never wear loose gloves near a rotating accessory. Gloves can catch in moving parts and pull a hand toward the tool.
Keep long hair tied back and remove loose jewelry. Do not hold a small workpiece by hand while fitting or testing an accessory. Use a clamp or vise when the job calls for one.
Install Common Tool Accessories Correctly
The correct installation method depends on the tool’s holder. Some accessories slide into a chuck. Others attach through a spindle, flange, collar, or retaining ring. Follow the model-specific manual instead of using one method for every tool.
Clean the mounting surfaces before fitting the accessory. Dust, metal chips, rust, and dried material can stop a part from sitting flat. A small obstruction can create poor alignment or prevent a locking feature from engaging.
Source: glazingsuppliesdirect.com
Clean the holder
Remove loose dirt and debris with a suitable cleaning method. Do not push dirt deeper into a sealed holder.
Inspect the mounting parts
Check the spindle, chuck jaws, collar, flange, thread, and retaining parts for wear or damage.
Align before tightening
Place the accessory straight and make sure its mounting surface sits correctly.
Drill Bits And Keyless Chucks
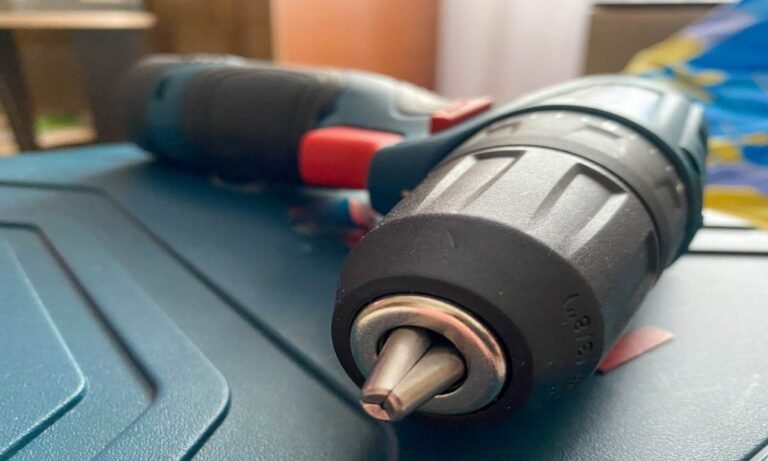
Open the chuck jaws enough to accept the correct bit. Insert the bit so the jaws can grip its proper shank. Keep the bit centered and avoid clamping only on its tip.
Close the chuck by turning its sleeve in the direction shown in the manual. Tighten it firmly using the tool’s designed method. A keyed chuck needs its matching chuck key. A keyless chuck uses its sleeve and may have a ratcheting or locking action.
Check that the bit sits straight. If it leans to one side, open the chuck and reposition it. Do not use a bent bit or damaged chuck jaws.
Check the grip
Make sure the chuck jaws hold the shank evenly and do not grip a smooth or unsuitable part of the bit.
Check alignment
Look for visible runout or a tilted bit before reconnecting power.
Impact Driver Bits And Attachments
Many impact drivers use a 1/4-inch hex quick-release holder. Pull the locking collar back if the design requires it, insert the approved bit, and release the collar. The locking part should return to its normal position.
Give the stationary bit a gentle pull to check that it is retained. Use impact-rated bits and approved holders for impact work. A standard bit may not withstand repeated impact loads.
Right-angle and offset attachments need the correct connection. If the attachment uses a collar, pull it back, align the attachment, and release it as the manual directs. Never use an attachment that does not lock fully.
Use the correct bit
Match the hex shank and impact rating to the driver and the job.
Check the release collar
Make sure it returns to its locked position and retains the accessory.
Circular Saw Blades
A circular saw blade needs the correct outer diameter, arbor bore, thickness, and cutting type. Its rotation arrow must match the direction shown on the saw. Do not assume the printed side of the blade always faces outward.
Place the blade against the correct inner flange. Fit the outer flange in its specified direction and tighten the blade fastener using the approved tool. Check that all required washers and flanges are present.
Release the lower blade guard and confirm that it moves freely. It must return to its protective position as designed. Never operate a saw with a damaged or stuck guard.
Match the rotation arrows
The blade and saw must have matching rotation directions.
Use the correct arbor
The blade bore must match the saw spindle or an approved mounting system.
Check the lower guard
Confirm that the guard moves freely and returns to cover the blade.
Angle Grinder Wheels And Discs
Grinder accessories need special care because they rotate at high speed. Check the wheel type, diameter, thickness, bore, maximum RPM, and intended operation. A grinding wheel, cutoff wheel, flap disc, and wire brush may need different guards or mounting parts.
Fit the correct inner and outer flanges in the required direction. Use the spindle lock and supplied wrench when the manual calls for them. Tighten the mounting nut as specified. Excessive force can damage the wheel or make later removal difficult.
Keep the guard in place and adjust it for the task. Install the side handle in the correct position. Never use a cracked wheel, damaged disc, or accessory with a missing part.
Match the RPM rating
The accessory’s maximum RPM must not be lower than the grinder’s operating speed.
Use the correct guard
Fit the guard approved for the wheel type and operation.
Do not force the mount
Never enlarge the bore or use an incorrect flange to make a wheel fit.
Sanding Pads, Belts, And Router Bits
Sanding accessories need a matching backing pad or belt system. Align hook-and-loop discs with the pad so they sit flat. Check that the disc does not extend beyond the approved working area. For belt sanders, use the correct belt size and tracking system.
Router bits need the correct shank size for the collet. Insert the shank to the depth specified by the manufacturer, then tighten the collet with the correct wrench. Do not allow the shank to bottom out unless the tool instructions specifically require it.
A loose sanding disc can vibrate or tear away. A poorly held router bit can shift under load. Check both the holder and accessory before use.
Check pad alignment
Make sure the sanding disc is centered and attached across its intended contact area.
Match router shanks
Use the correct shank and collet combination without forcing a smaller or larger part.
Verify Secure Attachment Before Restoring Power
A successful installation needs more than a tight-looking connection. The accessory must be fully seated, correctly aligned, and retained by the intended locking system. Check each point before putting the tool back into service.
Start with a visual inspection. Look for gaps, tilted parts, missing hardware, uneven contact, and damaged locking features. Compare the final assembly with the tool manual or its parts diagram.
Next, perform a gentle manual retention check while the tool remains disconnected. Hold the accessory as the manual allows and check for unwanted movement. Do not force the part or place your fingers near sharp edges.
Check full seating
The accessory should sit in its intended position without a visible gap or obstruction.
Check the locking feature
Confirm that the collar, latch, chuck, nut, retainer, or clamp is fully engaged.
Check alignment
Look for a straight bit, flat disc, correct blade position, and even mounting contact.
Check the guard
Make sure the guard is present, secure, correctly adjusted, and free to move where required.
Remove loose tools
Take away chuck keys, wrenches, adjustment keys, and other loose items before operation.
Know The Signs Of A Proper Lock
A locking collar may click or return to its original position. A keyless chuck may reach its designed ratcheting stop. A pneumatic tool may need a retaining clip or retainer to prevent the working attachment from coming out.
These signs depend on the tool design. A click alone does not prove that every connection is safe. Look at the actual locking parts and follow the model’s instructions.
If the accessory moves, the collar stays open, or the holder does not reach its normal position, stop. Remove the accessory and inspect the connection again.
Perform A Safe Functional Check
Once the manual checks pass, restore power only when you are ready to test the tool. Keep the work area clear and hold the tool in its intended position. Use the guard, side handle, and required PPE.
If the manufacturer calls for a no-load check, follow its exact procedure. Watch for unusual vibration, wobble, rubbing, noise, or movement. Stop at once if anything seems wrong.
Never place your hand near a moving accessory to test its fit. Never use a test run to compensate for a loose mounting part. A connection that fails a manual check must be corrected before operation.
Remove Tool Accessories Safely And Without Damage
Safe removal follows the same basic rule as installation: isolate the power source first. Turn off the tool, unplug it or remove its battery, and wait for all moving parts to stop. For air-powered equipment, disconnect the supply and release pressure as directed.
Allow hot accessories to cool. Use the correct release mechanism or supplied wrench. Support the accessory as it comes free so it does not fall, strike another part, or cut your hand.
Keep removed parts in order. This makes later installation easier and helps prevent missing washers, retaining clips, and mounting nuts.
Stop and isolate
Disconnect the tool from its power source before touching the accessory or holder.
Wait and cool
Allow moving parts to stop and hot accessories to cool.
Release the lock
Use the spindle lock, chuck sleeve, release collar, retaining ring, or approved wrench.
Support the accessory
Hold the stationary accessory securely while removing it from the holder.
Inspect after removal
Check the accessory and mounting parts for wear, cracks, and signs of overheating.
Remove Drill Bits And Quick-Change Attachments
Open a keyless chuck by turning its sleeve in the direction shown in the manual. For a keyed chuck, use the correct key to loosen the jaws. Remove the bit only after the jaws release it.
For a quick-change hex holder, pull back the release collar if required and remove the bit. Let the collar return to its normal position. Check the spring and locking area for dirt or wear.
Remove Saw Blades And Grinder Wheels
For a saw blade, use the spindle lock and correct blade wrench. Remove the fastener and outer flange in the order shown in the manual. Keep fingers clear of the teeth and support the blade as it comes off.
For a grinder wheel, wait for a complete stop and use the approved spindle lock and wrench. Do not strike the wheel, pry against the guard, or use an impact wrench unless the manufacturer specifically permits it.
Some quick-lock systems use a release lever or special collar. Wait until the accessory has stopped completely before operating the release. Do not force a jammed mechanism.
Troubleshoot Loose, Stuck, Or Misaligned Accessories
An accessory that will not fit, lock, or release needs inspection before further use. Do not apply more force as the first response. A small amount of dirt may be easy to remove, but worn locking parts or damaged threads need repair or replacement.
Start with the safest checks. Disconnect power, remove the accessory if possible, and inspect the holder. Look for dirt, rust, burrs, damaged threads, worn jaws, and broken locking tabs. Compare the parts with the tool manual.
Accessory will not enter the holder
Check the shank size, mounting type, and holder condition. Remove dirt and use only a compatible accessory.
Accessory feels loose
Check the locking collar, chuck jaws, retaining clip, flange, and mounting hardware. Replace worn parts before use.
Accessory sits at an angle
Remove it and inspect the mounting surface. Look for debris, a bent shank, a damaged bore, or an uneven flange.
Accessory will not release
Check the release mechanism and use the correct tool. Do not strike or twist the holder with improvised tools.
Tool vibrates after installation
Stop immediately and inspect the accessory for damage, poor seating, incorrect size, and worn mounting parts.
What To Do With A Stuck Accessory
A stuck accessory may result from heat, corrosion, damaged threads, or a locking mechanism that has not fully released. First, make sure the tool is disconnected and cool. Read the removal instructions for the exact holder.
Use only an approved release method. If the manual allows a specific wrench or removal aid, use it as directed. Do not hammer the spindle, clamp a rotating shaft with pliers, or apply uncontrolled heat.
If the accessory remains stuck, stop and seek service. A damaged spindle or holder can be more costly and dangerous than replacing the accessory.
When To Replace The Holder Or Accessory
Replace an accessory when it has cracks, bends, broken teeth, missing segments, damaged threads, or other defects that affect safe use. Do not repair a damaged rotating accessory with glue, welding, or improvised fasteners.
A tool holder may also need service if its jaws no longer grip evenly, a release collar will not lock, or a spindle has visible damage. Do not return the tool to use until the fault has been corrected.
Common Installation Mistakes And Important Safety Limits
Many accessory problems start with small shortcuts. A worker may reuse a worn flange, skip a guard, or assume that a part is compatible because it fits. These choices can lead to poor control, accessory failure, or injury.
Use the correct accessory and the complete mounting system. Keep guards in place. Never change a tool’s safety design to make an incompatible part fit.
For covered US workplaces, OSHA 29 CFR 1910.243 addresses guards for portable circular saws and abrasive wheels. It also requires tool retainers for pneumatic equipment that could eject its working attachment without one. Employers and workers should check the rules that apply to their tools and work setting.
Forcing an accessory
Forcing a bit, blade, or wheel can damage the holder and create poor alignment. Stop if the part does not fit freely.
Ignoring speed limits
A wheel or disc that is not rated for the tool’s speed can break apart during use.
Reversing mounting hardware
Incorrect flange or washer direction can affect clamping and accessory stability.
Using damaged parts
Cracked wheels, bent bits, broken teeth, and worn locking tabs should not remain in service.
Removing safety guards
A missing or damaged guard can expose the operator to fragments, moving parts, and contact hazards.
Using improvised adapters
An unapproved adapter may alter the fit, balance, or retention of the accessory.
Overtightening hardware
Excess force can damage threads, flanges, wheels, or locking parts. Use the method specified by the manufacturer.
Testing a loose accessory
Never run a tool to see whether a visibly loose part will settle into place.
Know When Professional Service Is Needed
Some problems go beyond routine accessory replacement. A damaged spindle, broken locking collar, cracked housing, failed guard, or worn chuck may need qualified repair.
Stop using the tool if it has unusual vibration, electrical faults, damaged cords, leaking air connections, or a failed safety control. Do not remove a safety feature or make a structural change to keep the tool running.
For workplace equipment, follow the employer’s inspection and repair process. Remove unsafe equipment from service until it has been checked and repaired.
Seek repair
Use qualified service when the spindle, chuck, guard, locking system, or housing is damaged.
Stop operation
Do not continue if an accessory slips, wobbles, cracks, or fails to lock.
Follow workplace rules
Use the required inspection, maintenance, and equipment removal procedures.
Maintain Accessories And Mounting Parts For Reliable Use
Good maintenance helps accessories fit and lock as designed. Clean the holders after use and remove dust or debris that can affect the connection. Use a cleaning method that is safe for the tool and does not damage its seals or moving parts.
Inspect accessories before each use. Look for cracks, bends, worn teeth, loose segments, damaged shanks, and other defects. A dropped accessory deserves a fresh inspection, even if it looks fine at first glance.
Store blades, bits, wheels, and discs in a dry place. Protect sharp edges and delicate mounting surfaces. Keep each accessory with its size and rating information when possible.
Clean the mounting system
Remove dust and chips from chucks, collars, flanges, and other approved contact areas.
Check wear
Look for loose jaws, worn threads, weak springs, damaged retaining clips, and cracked accessories.
Store parts correctly
Keep accessories dry and protected from impact, moisture, and contact with other hard parts.
Keep useful records
Record accessory changes, repairs, and repeated fit problems for tools used in regular work.
Replace worn components
Use approved replacement parts when a holder or locking system no longer works correctly.
Create A Simple Accessory Inspection Routine
A short inspection before each job can prevent many installation problems. Check the accessory, holder, locking parts, and guard. Make sure the correct accessory is fitted for the task.
For tools used every day, add a planned maintenance check. Review repeated problems and replace worn parts before they fail. Keep the tool manual close to the equipment so users can check the correct mounting method.
Before use
Check fit, condition, rating, and secure attachment.
After use
Clean the holder, inspect the accessory, and store parts safely.
During planned service
Review wear, retention, guard condition, and any recurring installation faults.
Frequently Asked Questions
Q
How do I know if a tool accessory is securely attached?
Check that the accessory sits fully in the holder and that the correct locking feature is engaged. Look for an even fit, proper alignment, and no visible gaps. With the power disconnected, perform the manual retention check allowed by the manufacturer.
A click or locking sound may help confirm engagement, but it is not enough by itself. If the accessory moves, wobbles, or fails to lock, remove it and inspect the connection.
Q
Can I use any accessory that fits my power tool?
No. Physical fit does not prove compatibility. The accessory must also match the tool’s mounting system, speed rating, size limits, material, and intended operation.
Check the tool manual and accessory markings before installation. Do not use an unapproved adapter or force a part into the holder.
Q
Why does my drill bit keep slipping in the chuck?
A slipping bit may result from incorrect shank placement, loose chuck jaws, dirt, worn gripping surfaces, or a damaged bit. Disconnect the drill, remove the bit, and inspect the chuck and shank.
Reinstall the correct bit and tighten the chuck using the designed method. If the jaws still fail to hold the bit, the chuck may need repair or replacement.
Q
How often should I replace tool accessories?
Replace an accessory when it reaches its wear limit or develops damage that affects safe use. The correct interval depends on the accessory, material, workload, operating speed, and manufacturer guidance.
Inspect accessories before each use. Do not keep using cracked wheels, bent bits, broken saw teeth, damaged shanks, or worn locking parts.
Q
What should I do if a tool accessory becomes stuck?
Turn off and disconnect the tool. Wait for moving parts to stop and hot parts to cool. Check the manual for the correct release method and use the approved wrench or removal tool.
Do not hammer the spindle, apply uncontrolled heat, or force the holder with pliers. If the accessory will not release, seek qualified service to avoid damaging the tool.
✦ Wrapping Up
Conclusion
Safe tool accessory installation starts with compatibility and ends with a careful attachment check. The accessory must match the tool’s mounting system, speed, size, and intended use. The power source must be isolated before any installation or removal work begins.
Use the correct holder, locking parts, flanges, and retainers. Inspect every connection and keep required guards in place. Never force a part or continue using an accessory that slips, wobbles, or shows damage.
Good removal and maintenance habits matter just as much as proper installation. Clean the mounting surfaces, inspect worn parts, and store accessories with care. When a locking system or tool component is damaged, stop and arrange proper repair.
💡 Key Takeaway
Before your next accessory change, unplug the tool or remove its battery, check the accessory rating and mounting size, inspect the holder, follow the model-specific installation steps, and verify the lock and guard before restoring power.
Find essential gear for new pros – what tools do electricians need beginners to start safely and confidently. Quick guide with affordable picks and pro tips.
Compare brushed drill vs brushless drill to find the best power, runtime, and value for your projects. Read our clear guide to choose the right drill fast.