Tool consumables should be replaced when they reach a defined wear limit, lose acceptable performance, damage work quality, or show signs of unsafe condition. Track their use, inspect them often, and plan replacements before failure.
Across the United States, workshops, construction sites, manufacturing plants, automotive garages, and home improvement projects depend on tools that work well every day. Cutting blades, drill bits, sanding discs, grinding wheels, filters, and other consumable parts wear down as people use them. If a worn part stays in service too long, it can slow work, damage materials, and create safety risks. Replacing every part after a fixed number of hours is not always the best answer. Different jobs, materials, speeds, and working conditions lead to different wear rates.
A good replacement plan uses visible wear, work quality, machine behavior, and recorded service life. It sets a clear point for inspection, a planned change point, and a hard limit for unsafe parts. This approach helps workers avoid both early replacement and risky overuse. It also makes it easier to plan stock and control operating costs.
This guide explains how to recognize common wear indicators, measure useful life, and build a practical replacement plan. It covers both small workshops and larger U.S. work sites. It also explains how to tell normal wear from a setup problem, when to stop work, and what information to record after each replacement. The goal is simple: keep tools productive without using worn or damaged consumables beyond their safe limits.
What Tool Consumable Life Really Means
Tool consumable life is the amount of useful work a replaceable part can perform before it needs service or replacement. The part may still look usable when its performance starts to fall. For this reason, useful life should include work quality and safety, not just the point when a part breaks.
Common tool consumables include drill bits, saw blades, router bits, sanding belts, abrasive discs, grinding wheels, cutting wheels, milling inserts, brushes, filters, and other parts that wear during normal use. Each type has a different job. Each type also has its own signs of wear.
A consumable does not have one fixed life in every setting. A drill bit may last longer in soft wood than in hard steel. A saw blade may wear faster when it cuts dirty or abrasive material. A sanding disc may clog quickly when it works on a soft, sticky coating. The same part can also have a different life under different speeds, feed rates, pressure, and cooling conditions.
Klingspor explains service life through practical measures such as the number of cuts made by a cutting wheel or the number of workpieces processed by an abrasive belt or mop disc. It also identifies abrasive grain and bond properties as factors that affect life. These measures show why each consumable needs a suitable way to track use. citeturn386552view0
Useful work output
Count the cuts, holes, parts, or surface area completed before the consumable reaches its replacement limit.
Physical condition
Inspect cutting edges, abrasive surfaces, shanks, backing materials, and other parts for wear or damage.
Work performance
Watch for slower work, poor accuracy, rough finishes, extra heat, and rising machine load.
Safe operating condition
Check whether the consumable remains within its approved size, speed, mounting, and condition limits.
Service Life Is Not the Same as Calendar Life
Calendar life measures how long a part has been stored or owned. Service life measures how much useful work it has done. These values are not the same. A blade that sits unused for months may still need inspection for rust, damage, or poor storage. A sanding disc used for several hours each day may reach its wear limit much sooner.
Some consumables also have storage limits or expiry dates. Follow the maker’s instructions for those parts. A calendar date must not replace a required condition check. Likewise, a part that looks new should not be used if storage damage or an expired service limit makes it unsuitable.
Understand the Three Replacement Limits
A useful replacement system has three levels. The first is an inspection trigger. It tells the worker to check the part more closely. The second is a planned change point. It tells the worker to replace the part before work quality or output becomes unacceptable. The third is a hard discard limit. It means the part must leave service because it is damaged, unsafe, or beyond a stated manufacturer limit.
These limits should be clear to everyone who uses the tool. A worker should not have to guess whether a part is still fit for use. Written rules also help different shifts make the same decision.
Inspection trigger
A change in sound, cutting speed, finish, vibration, or visible condition calls for a closer check.
Planned change point
The consumable reaches the shop’s approved quality or performance limit.
Hard discard limit
Cracks, serious damage, unsafe mounting, or a maker’s stated discard limit require removal from service.
Common Wear Indicators by Consumable Type
Wear indicators depend on the type of consumable and the work it performs. A dull cutting edge behaves differently from a clogged sanding disc. A worn filter may reduce airflow, while a damaged grinding wheel may create an immediate safety risk.
Do not use one visual rule for every part. Combine physical inspection with performance checks. A consumable may need replacement even when its damage is not easy to see.
Drill Bits and Cutting Tools
Drill bits often show wear through rounded cutting lips, chipped edges, discoloration, and damage to the point. A worn bit may need more pressure to enter the material. It may also produce excess heat, poor hole quality, or unusual vibration. In metalwork, chips may change shape or color as cutting conditions worsen.
Cutting tools used in milling and machining can show flank wear, edge chipping, cracks, or other damage. Flank wear is the gradual loss of material along the cutting edge’s relief face. As it grows, the tool may cut less accurately and leave a poorer finish. Severe edge damage calls for removal or approved reconditioning.
Visual signs
Rounded lips, chipped edges, cracked cutting points, and unusual discoloration.
Performance signs
More feed pressure, higher heat, poor hole size, rough cuts, and longer cycle times.
Action
Inspect the bit and holder. Replace damaged bits and follow the approved sharpening limits for reusable types.
Saw Blades and Cutting Edges
Saw blade wear can affect both cutting speed and finish quality. Common signs include dull or damaged teeth, rough cut surfaces, increased burrs, excess heat, and changes in vibration or sound. A blade may also begin to cut out of square. This can point to blade wear, tooth damage, heat, poor alignment, or a setup issue.
A technical handling guide for carbide-tipped industrial saw blades lists rising motor current, rough cut surfaces, chips sticking to tooth edges, vibration, noise, increased burrs, and continuous sparks as possible wear indicators. These examples apply to the described industrial blade process, not every saw or blade. citeturn386552view2
Inspect the blade with the machine disconnected from power. Look for cracked bodies, damaged teeth, loose tips, warping, and other defects. Do not assume that sharpening can repair every blade. Some damage requires replacement or a qualified blade service.
Poor cutting quality
Rough edges, more burrs, burn marks, and cuts that no longer meet the required finish.
Machine changes
Rising current, unusual vibration, extra noise, or longer cutting time.
Visible damage
Cracks, missing teeth, chipped carbide tips, or a warped blade body.
Sanding Discs, Belts, and Abrasive Sheets
Abrasives wear through grain loss, loading, glazing, tearing, and backing damage. Loading occurs when dust, paint, resin, or other material fills the spaces between abrasive grains. The surface then loses its ability to cut cleanly. Glazing occurs when the working surface becomes smooth and less effective.
A worn or clogged disc may leave uneven scratches, swirl marks, or other defects. It may also produce more heat and require extra pressure. These signs can harm the finish and create more rework. For automotive surface preparation, 3M advises replacing abrasive discs when they show wear or clogging because continued use can contribute to unwanted scratch patterns. citeturn985712view0
Check the abrasive face, backing, attachment system, and edges. Replace a disc if it tears, loses its bond, or no longer gives the required finish. Do not use a damaged backing pad or an unsuitable disc to keep an abrasive in service.
Loading
Dust or work material blocks the abrasive surface and reduces cutting action.
Glazing
The abrasive face becomes smooth and produces less useful cutting action.
Surface defects
Pigtails, uneven scratches, burn marks, and poor finish quality appear.
Physical damage
The backing tears, the edge breaks, or the attachment no longer holds securely.
Grinding Wheels and Cutting Wheels
Grinding wheels wear as abrasive grains and bonding material are used. The wheel may lose diameter, become uneven, develop damage, or stop cutting as expected. A wheel that needs too much pressure or creates unusual heat should be checked. However, performance changes alone do not prove that the wheel is worn. The machine, work material, and operating method also matter.
Cracks, chips, damaged mounting areas, and other defects are serious warning signs. Never use a wheel with a suspected crack. Check its markings, rated operating speed, size, and compatibility with the machine. The maximum machine speed must not exceed the wheel’s marked maximum speed.
Grinding wheels also need proper guards and mounting parts. A wheel must fit its spindle correctly. Do not force it onto the shaft or use damaged flanges. The U.S. OSHA abrasive wheel standard sets requirements for inspection, mounting, guarding, and related equipment. citeturn950883view0
Wear
Reduced diameter, uneven wear, and loss of cutting performance within the maker’s allowed limits.
Damage
Cracks, chips, broken edges, or damaged mounting areas require removal from service.
Operating changes
Unusual vibration, heat, or sound requires an immediate stop and inspection.
Filters, Brushes, and Other Replaceable Parts
Dust filters and collection bags wear in a different way from cutting tools. A clogged filter can reduce airflow and weaken dust collection. Visible dust escaping from the system may also point to a damaged filter, poor seal, or installation problem. Use the machine’s filter indicator and service instructions where available.
Brushes used in electric motors have a limited working length. Some tools have a maker-defined minimum brush length or a wear indicator. Replace brushes before they reach the stated limit. Unusual sparking, poor motor operation, or intermittent power may also require inspection, but these signs can have other causes.
Driver bits and small fastening accessories can show rounded tips, twisted shanks, cracks, or poor fit. These signs can lead to slipping and damaged fasteners. Replace damaged bits instead of applying more force.
Filters
Reduced airflow, a blocked filter, a damaged seal, or visible dust bypass.
Motor brushes
Length at or near the maker’s minimum limit, damaged surfaces, or abnormal operation.
Driver bits
Rounded tips, cracks, twisted shanks, and repeated fastener slipping.
How to Confirm Wear Before Replacing a Consumable
A performance problem does not always mean a consumable has reached the end of its life. Poor alignment, incorrect speed, excess feed pressure, loose clamping, and unsuitable materials can produce similar symptoms. Replacing a good part without checking these factors wastes money and may leave the real problem in place.
Use a short diagnostic process. Start with safety, then inspect the part and the machine. Compare current results with a known good setup. If the problem remains after the basic checks, use the manufacturer’s wear limits to decide whether replacement is due.
ISCAR identifies rising spindle load, vibration, noise, poor machining accuracy, reduced surface finish, burrs, flank wear, edge chipping, and cracks as signs that a cutting tool may have reached its wear limit. These are useful warning signs, but each needs to be judged in the context of the operation. citeturn386552view1
Stop and isolate the tool
Disconnect power or remove the battery before inspecting, cleaning, or changing a consumable. Follow the tool’s lockout and safety instructions where required.
Inspect the consumable
Look for cracks, chips, rounded edges, loading, glazing, loose parts, wear limits, and other visible defects.
Check the setup
Review alignment, mounting, speed, feed, pressure, clamping, and the condition of related tool parts.
Review the work material
Confirm that the consumable suits the material, thickness, hardness, and finish requirement.
Compare performance
Check cycle time, cutting force, machine load, surface finish, and output quality against a reliable baseline.
Separate Normal Wear From Process Problems
Normal wear usually develops over repeated use. The cutting rate may fall over time, the edge may become rounded, or the finish may slowly worsen. A sudden change needs a different response. It may point to a broken tooth, poor mounting, a workpiece problem, or a machine fault.
Check one factor at a time. For example, if a drill bit suddenly produces poor holes, inspect the bit and its holder. Then check the material, drill speed, feed pressure, and workpiece support. Do not change several settings at once because that makes the real cause harder to find.
If a new consumable performs well under the same setup while the old one does not, wear becomes a more likely cause. This comparison is useful, but it is not proof by itself. A new part can also hide a mounting or alignment problem for a short time.
Gradual decline
Often points to normal wear, abrasive loading, or a slowly changing process condition.
Sudden failure
May point to impact damage, a broken edge, poor mounting, or a machine fault.
Repeated early wear
Calls for a review of material choice, speed, feed, alignment, and operating technique.
Build a Practical Tool Consumable Replacement Plan
A replacement plan should use real operating data. It should tell workers what to inspect, when to change a part, how many spares to keep, and what to record. The best plan does not depend on memory or guesswork.
Start by listing each consumable and its approved use. Record the part number, size, material compatibility, tool model, and manufacturer limits. This helps prevent the wrong part from being fitted during a busy shift.
Next, choose a useful way to measure life. Count cuts for cutting wheels, holes for drill bits, workpieces for sanding discs, and processed area for some industrial abrasives. For filters, use operating hours, pressure readings, airflow, or the maker’s service indicator. Choose a measure that reflects actual work.
Identify each consumable
Record its name, part number, size, application, compatible tool, and material.
Choose a life measure
Use cuts, holes, workpieces, hours, surface area, or another suitable output measure.
Set inspection rules
Define when workers should inspect the part and which wear signs require replacement.
Record every change
Log the date, operating count, condition, reason for replacement, and any process changes.
Measure Average Consumable Life
A simple life calculation helps estimate how much work a consumable can perform. Divide the total accepted work output by the number of consumables used. Keep the material, machine, and process as similar as possible when comparing results.
For example, suppose a shop uses five sanding discs to finish 250 similar panels. The average output is 50 panels per disc. This is a planning baseline, not a promise that every disc will last for 50 panels. Differences in coating, dust, pressure, and work technique may change the result.
Record the individual results as well as the average. If the five discs finish 42, 46, 51, 55, and 56 panels, the average is 50 panels. The lower results matter because they show that some discs reach their limit sooner. A shop should not plan every job around the best result.
Basic formula
Average life = Total accepted work output divided by the number of consumables used.
Useful comparison
Compare parts used on the same material and under similar operating conditions.
Planning rule
Use a conservative operating limit that leaves enough room for variation and meets the manufacturer’s instructions.
Set Replacement Triggers and Inspection Intervals
Use the recorded results to set a planned replacement point. Do not wait until a consumable fails during a job. For a quality-critical operation, change the part before it starts producing unacceptable work. For a safety-critical part, follow its hard discard limit even if performance still appears normal.
Inspection frequency should match the risk and rate of wear. A high-use cutting tool may need a check at the start of each shift and after unusual vibration or impact. A lightly used hand tool may need a check before each job. Follow any inspection schedule stated by the manufacturer or required by workplace rules.
Review the replacement trigger when the process changes. A new material, different machine, higher production rate, or new consumable type can change useful life. Old records may no longer reflect current conditions.
Daily or shift checks
Use for high-use parts and consumables that can create immediate quality or safety problems.
Use-based checks
Inspect after a set number of cuts, holes, workpieces, or operating hours.
Event-based checks
Inspect after a jam, impact, unusual vibration, overheating event, or other abnormal condition.
Calculate Replacement Costs
The price of one consumable does not show its full operating cost. A lower-priced part may wear out sooner or produce more rejected work. A higher-priced part may deliver more accepted output and reduce changeovers.
Use cost per accepted work unit to compare similar options. Divide the purchase price by the number of accepted work units produced before replacement. Include setup time, changeover time, rework, and disposal costs when those items affect the decision.
For example, imagine one abrasive disc costs $12 and finishes 48 accepted panels. Its consumable cost is $0.25 per panel. Another disc costs $18 and finishes 90 accepted panels. Its cost is $0.20 per panel. These figures are hypothetical, but they show why the purchase price alone can give the wrong answer.
Cost formula
Consumable cost per accepted unit = Purchase price divided by accepted output.
Add hidden costs
Include downtime, rework, rejected material, labor, and changeover time when relevant.
Compare like with like
Use the same material, work standard, machine, and operating conditions for a fair comparison.
Plan Spare Stock and Reordering
Replacement planning also means having the right spare parts available. Running out of a common consumable can stop work even when the main tool is in good condition. Keeping too much stock can tie up money and create storage problems.
Use average consumption and supplier lead time to set a reorder point. Add safety stock to cover changes in demand, shipping delays, or unexpected damage. Review these values when the work schedule or supplier changes.
For example, a shop uses 12 cutting discs per week. Its normal supplier lead time is two weeks. It also wants six discs as safety stock. The reorder point is 30 discs: 24 discs for expected use during lead time plus six spare discs. This is a simple example, so actual stock levels should reflect demand variation and delivery reliability.
Reorder formula
Reorder point = Expected use during supplier lead time plus safety stock.
Use stock records
Track actual consumption, open orders, damaged stock, and parts already assigned to jobs.
Protect stored parts
Keep consumables in suitable conditions and use older stock first when the maker’s storage rules allow it.
Safety Rules and Common Replacement Mistakes
A replacement plan must never encourage workers to use damaged parts. Cost savings do not justify a cracked wheel, broken cutting edge, damaged shank, or unsafe mounting system. Remove suspect parts from service and follow the maker’s inspection and disposal instructions.
In the United States, OSHA 29 CFR 1910.215 covers abrasive wheel machinery in general industry. It includes requirements for machine guarding, work rests, wheel mounting, inspection, and related equipment. The standard requires close inspection and a ring test before mounting covered abrasive wheels. It also requires checking that the machine spindle speed does not exceed the maximum operating speed marked on the wheel. citeturn950883view0
The ring test uses a gentle tap with a light, nonmetallic object. A cracked wheel can produce a dead sound instead of a clear tone. However, OSHA also notes that organic-bonded wheels do not produce the same clear metallic sound as some other wheel types. Follow the applicable manufacturer’s instructions and do not treat a ring test as a substitute for visual inspection.
Safety requirements vary by machine and workplace. The OSHA general industry standard is not a universal instruction for every abrasive product. Check the exact machine, wheel type, work setting, and applicable rules before use.
Never use cracked or damaged parts
Remove damaged wheels, blades, bits, and other unsafe consumables from service.
Keep machine guards and other required safety devices in place and in good condition.
Inspect before fitting
Check new and stored consumables for damage before installation. A new part is not automatically a safe part.
Keep records
Document damage, abnormal wear, repeated failures, and the steps taken to correct the cause.
Mistakes That Shorten Consumable Life
Using the wrong consumable for the material is a common source of early wear. A cutting edge made for one material may perform poorly on another. The same problem can occur when workers use the wrong abrasive grade or an unsuitable blade tooth design.
Excess pressure can also shorten life. A worker may press harder when a tool starts to cut slowly, but this can increase heat and damage the consumable. The better response is to inspect the part and check the operating settings.
Poor storage can damage parts before they reach the machine. Moisture, dust, impact, heat, and poor support may affect certain consumables. Follow the storage instructions and keep cutting edges protected when they are not in use.
Using the wrong part
Check size, material compatibility, tool model, and intended operation before installation.
Ignoring early warning signs
Do not keep using a part that produces poor quality, unusual vibration, or excess heat.
Using excess force
Correct the setup or replace a worn consumable instead of forcing the tool through the work.
Poor storage
Protect consumables from moisture, impact, contamination, and unsuitable temperatures.
When to Seek Qualified Service
Some wear problems need more than a routine replacement. A blade that repeatedly runs out of square may point to spindle, flange, or alignment problems. A grinder that produces unusual vibration may have a wheel, bearing, or mounting fault. A motor that overheats after a new consumable is fitted may need electrical or mechanical inspection.
Stop the machine and seek qualified service when damage involves the spindle, arbor, guard, drive system, electrical parts, or other safety-critical components. Do not try to repair a cracked abrasive wheel or modify a blade beyond its approved service limits. Use qualified repair staff or the manufacturer’s service network when the cause is uncertain.
Frequently Asked Questions
Q
How do I know when a tool consumable needs replacement?
Look for visible damage, worn cutting edges, reduced cutting speed, rough finishes, excess heat, vibration, noise, and higher machine load. Compare these signs with the manufacturer’s wear limits. Replace the part when it reaches the approved change point or shows a condition that makes continued use unsafe.
Q
Should tool consumables be replaced after a fixed number of hours?
Not always. Operating hours can help track use, but they do not measure every type of wear. A cutting blade may be better tracked by cuts, while a sanding disc may be tracked by completed workpieces. Use a measure that matches the job, then compare it with condition and quality checks.
Q
Can a worn tool consumable be sharpened or restored?
Some consumables can be sharpened, dressed, or reconditioned. Others are designed for one service life and must be replaced. The answer depends on the part, its construction, its condition, and the manufacturer’s approved service limits. Never attempt to restore a cracked or structurally damaged part.
Q
Why do new consumables sometimes wear out too quickly?
Early wear may result from the wrong consumable, unsuitable material, poor alignment, incorrect speed, excessive pressure, poor cooling, or weak storage conditions. Inspect the machine and process before assuming the replacement part is defective. Keep records of part numbers and operating conditions to find repeated problems.
Q
How much replacement stock should a workshop keep?
Base stock levels on average use, supplier lead time, demand changes, and the cost of downtime. A useful starting point is to calculate expected use during the delivery period and add suitable safety stock. Review the reorder point when demand, delivery times, or work schedules change.
✦ Wrapping Up
Conclusion
Tool consumable life is best managed through regular inspection, clear wear indicators, and reliable operating records. Blades, bits, abrasives, wheels, filters, and other replaceable parts all have different signs of wear. A good plan matches the inspection method and life measure to the part and the job.
Do not wait for a consumable to fail during work. Watch for changes in quality, speed, sound, vibration, heat, and physical condition. Check the machine setup before replacing parts for performance problems, but remove damaged or unsafe items from service at once.
Use recorded service life to set replacement triggers, estimate operating costs, and plan spare stock. Review the data whenever materials, tools, suppliers, or working conditions change. A simple and consistent system can reduce waste, prevent avoidable downtime, and help protect workers and finished products.
💡 Key Takeaway
Start with your five most-used consumables. Record their part numbers, approved applications, current condition, and average work output. Set an inspection trigger and a clear replacement limit for each one. Then use actual consumption and supplier lead times to build a practical stock and replacement schedule.
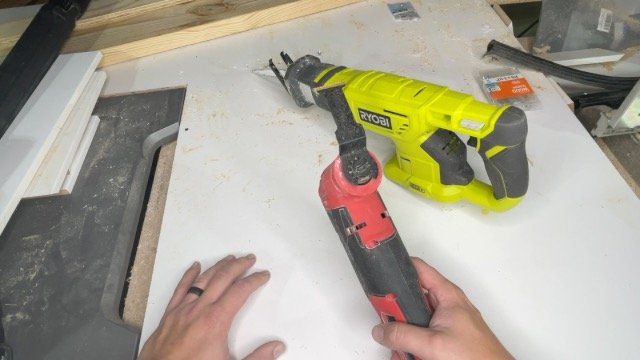
Compare oscillating tool vs reciprocating saw to pick the right cutter for your project—speed, precision, and blade choices explained to help you decide fast.