Orbital sander for broad, fast smoothing; detail sander for tight corners and delicate edges.
I’ve used both tools for years, on cabinets, trim, and DIY furniture. This article explains orbital sander vs detail sander with clear, practical advice. You will learn how each tool works, when to pick one over the other, common mistakes, grit choices, and real-world tips from hands-on experience. Read on to make a confident buying or project decision.
How orbital sanders and detail sanders work
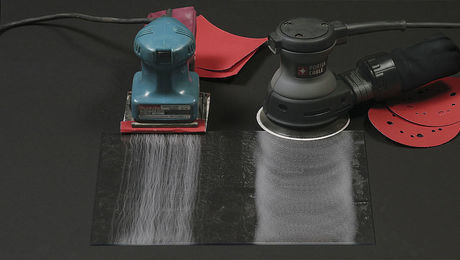
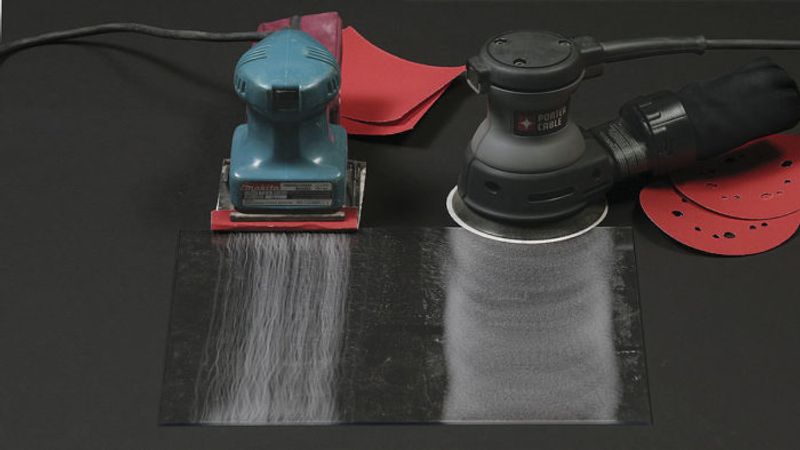
Orbital sanders move the sanding pad in a circular or tiny elliptical motion. This motion removes material quickly and leaves a relatively smooth finish when used correctly. Orbital sander vs detail sander often comes down to motion: orbital models are built for surface area and speed.
Detail sanders have triangular or pointed pads. They vibrate in small, fast motions. That shape and motion let them reach corners, grooves, and tight spaces that orbital sanders cannot access.
Both tools come in corded and cordless forms. Most have hook-and-loop sanding pads for easy paper changes. Dust collection varies widely, so plan for dust control when you compare orbital sander vs detail sander.

Key differences at a glance
- Size and shape: Orbital sanders are usually round or square. Detail sanders use a triangular pad for tight spots.
- Motion and finish: Orbital sanders provide broader, faster sanding. Detail sanders deliver precise, slower sanding for edges.
- Material removal: Orbital sanders remove more material quicker. Detail sanders remove less material and offer more control.
- Reach: Detail sanders access corners and profiles easily. Orbital sanders do not fit into very tight gaps.
- Surface quality: Orbital sander vs detail sander trade-off: orbital for speed, detail for precision.
- Dust control: Many orbitals have better dust systems. Detail sanders often have smaller dust boxes that fill fast.
- Price and versatility: Orbital sanders often cost more but cover more tasks. Detail sanders are cheaper and specialized.

When to choose an orbital sander vs detail sander
Use an orbital sander when you need to sand tabletops, doors, cabinets, or large flat panels. It saves time and produces an even finish when paired with the right grit progression.
Choose a detail sander for baseboards, window sills, carved moldings, and tight corners. It lets you remove small amounts of paint or finish without damaging adjacent surfaces.
For many projects, the practical approach is to own both tools. Start with an orbital sander on the main surfaces. Finish with a detail sander around edges and in crevices. This hybrid approach covers most woodworking and renovation needs and showcases the best of orbital sander vs detail sander.

Quick user questions (PAA-style)
Q: Will an orbital sander do corners?
A: Not well. Orbital sanders are best for flat areas and will struggle in tight corners.
Q: Can I use the same sandpaper for both?
A: Often yes, if the paper fits both pads. But sizes and shapes differ, so buy sheets or cut-to-fit discs for detail work.
Q: Do detail sanders leave swirl marks?
A: Less often than orbital sanders, but poor technique or very coarse grit can cause visible scratches.

Sandpaper types, grits, and pads
Choose the right grit for the job. Start coarse for heavy removal, then move to finer grits for smoothing and finishing.
- Coarse grits 40–80: Use for paint removal and shaping. Orbital sander vs detail sander both can use coarse grit, but use caution to avoid gouging.
- Medium grits 100–150: Good for general sanding and smoothing rough spots.
- Fine grits 180–240: For final sanding before finish or paint.
- Very fine grits 320+: For sanding between finish coats.
Pad types matter. Foam pads reduce pressure points and give a smoother finish. Hard pads remove material faster but can mark soft wood. Most orbitals use round or square hook-and-loop discs. Detail sanders use small triangular sheets. Keep extra sheets on hand to match both tools.
:max_bytes(150000):strip_icc()/SPR-palm-sander-vs-orbital-sander-8610618-hero-a279efa0b9fc44aeb1aad6aa7d70263e.jpg)
Practical tips, safety, and common mistakes
- Secure your work. Clamp small pieces to prevent movement and accidents.
- Keep the sander moving. Hold still and you may create dips.
- Don’t press too hard. Let the tool do the work. Excess pressure reduces control and shorts tool life.
- Wear a mask and eye protection. Sanding creates fine dust that is harmful to breathe.
- Test on scrap. Try grits and pads on a leftover piece to see the finish.
- Change paper early. Clogged paper reduces efficiency and scratches.
- Check for heat. Overheating can burn the workpiece or gum the paper.
Common mistakes include skipping grit steps, using too coarse a grit on soft wood, and ignoring dust collection when comparing orbital sander vs detail sander. I once burned a tabletop by holding a coarse disc in one spot for too long. Learn from that: move steadily and check progress often.

Costs and value: what to expect
Expect to pay more for quality orbital sanders with strong dust collection and durable motors. Entry-level orbital sanders can start around a modest price. Mid-range and pro models cost more but last longer and perform better.
Detail sanders are usually inexpensive. They are a good value for hobbyists and for finishing work. If your budget allows, pick a cordless orbital with good battery life and pair it with an affordable detail sander.
Factor in accessories: extra pads, a variety of grit sheets, and a vacuum adapter. These add value and reduce time spent cleaning up dust after every session. When weighing orbital sander vs detail sander, consider total cost of ownership, not just the sticker price.
Personal experience and lessons learned
I’ve sanded kitchen cabinets with an orbital sander, then switched to a detail sander for corners. That workflow saved hours and produced a clean finish. On a carved chair, the detail sander reached grooves where the orbital could not.
One lesson: never rely on one tool for every task. A cheap orbital sander left swirl marks on oak until I switched grits and pads. Another time, the detail sander’s paper tore when I used too coarse a grit on rough plywood. Now I match grit to the material and keep backups.
Trust your eyes. Sand lightly, inspect often, and step back to view the piece from different angles. Small corrections early save big fixes later.
:max_bytes(150000):strip_icc()/102152229-8ba187db6fe949d49d53fe99c409b2ac.jpg)
Frequently Asked Questions of orbital sander vs detail sander
What is the main difference between an orbital sander and a detail sander?
The main difference is shape and reach. Orbital sanders cover broad flat areas fast. Detail sanders reach corners and tight spots with precision.
Can I use a detail sander instead of an orbital sander for large surfaces?
You can, but it will take much longer and may leave uneven results. Detail sanders are built for precision, not speed across big panels.
Which sander is better for finishing furniture?
Use an orbital sander for initial smoothing and a detail sander for edges and tight joints. The combo gives the best finish.
Does an orbital sander remove paint faster than a detail sander?
Yes. Orbital sanders remove paint faster due to larger contact area and higher material removal rates. Detail sanders work slowly in confined spaces.
Are there safety differences between the two tools?
Both create dust and require eye and respiratory protection. Orbital sanders may vibrate more and need firmer handling; detail sanders can cause user fatigue in small, precise work.
Do I need both tools for home projects?
Owning both is ideal. An orbital sander saves time on flat surfaces while a detail sander finishes edges and complex shapes cleanly.
Conclusion
Choosing between an orbital sander vs detail sander comes down to the task. Use an orbital for speed on flat surfaces and a detail sander for tight spots and trim. My advice: buy or borrow both. Start with an orbital to remove major material, then switch to a detail sander for neat edges and corners.
Take action: plan your next sanding job, gather the right grits, and try the hybrid approach. If you found this helpful, leave a comment with your project or question, or subscribe for more hands-on tool guides.