Inspect every tool before use. Check its body, handle, working parts, power source, guards, and controls. If you find damage that could cause harm or failure, remove the tool from service until a qualified person repairs and checks it.
Across the United States, workers use hand tools and power tools on construction sites, in auto repair shops, factories, farms, and home workshops. A small defect can turn a normal task into a serious accident. A loose hammer head, a split power cord, or a damaged saw guard can put the user and nearby workers at risk. A short inspection helps catch these problems before work starts.
A pre-use inspection is a simple check of a tool’s condition and safety parts. It helps identify cracks, loose parts, worn edges, damaged cords, leaks, and other signs of failure. OSHA requires tools to be kept in safe condition. Specific inspection rules also apply to certain types of equipment and work. This guide explains how to check common tools, how to spot defects, and what to do when a tool fails inspection. It separates legal duties from good inspection habits that can improve workplace safety.
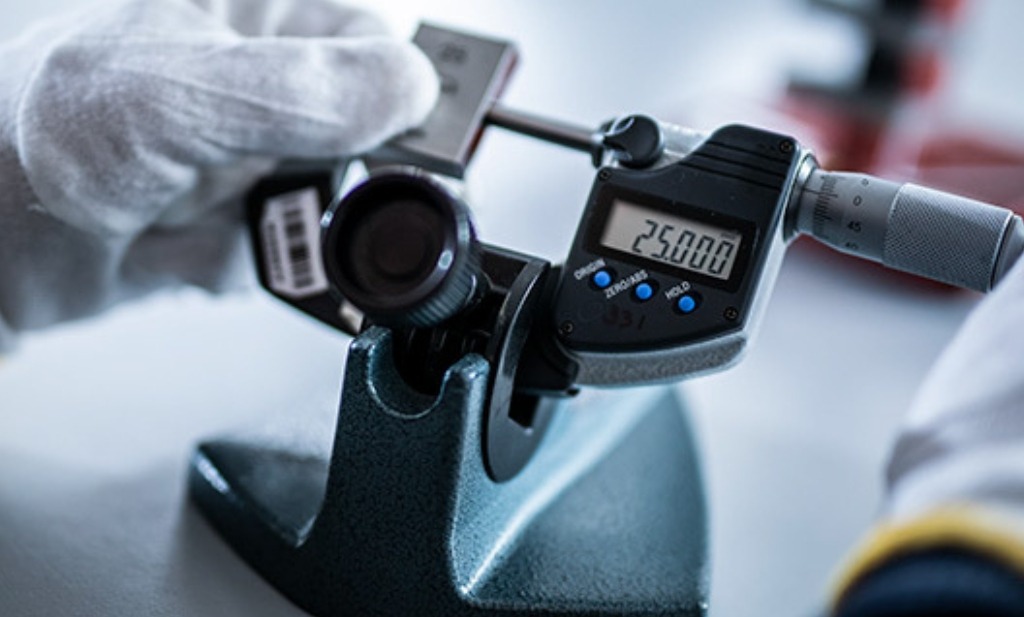
Source: gulfcoastcalibration.com
What Is a Pre-Use Tool Inspection?
A pre-use tool inspection is a check made before a tool starts work. Its purpose is to find damage, wear, loose parts, or missing safety features. The check can be visual, physical, or functional. The exact method depends on the tool and the task.
Think of the inspection as a safety gate. A tool must pass that gate before it reaches the work area. A clean tool is not always a safe tool. A new tool can also have damage from shipping, storage, or poor handling.
In the United States, OSHA places clear duties on employers. Under 29 CFR 1910.242(a), employers are responsible for the safe condition of tools used by workers. Under 29 CFR 1926.300(a), hand and power tools used in construction must be kept in a safe condition. Construction employers must not issue or allow unsafe hand tools under 29 CFR 1926.301(a).
Visual inspection
Look for cracks, dents, rust, loose parts, damaged cords, worn edges, leaks, and missing guards.
Physical inspection
Check whether handles, heads, grips, fittings, and approved attachments are secure. Do not force or twist parts to test them.
Functional inspection
When the tool and its manual permit it, check the switch, trigger, safety lock, and normal operation in a controlled area.
Special inspection
Some tools need extra checks, such as abrasive wheel inspection, electrical tests, pressure checks, or calibration.
Inspection Is Not the Same as Maintenance
Inspection finds a problem. Maintenance helps prevent or correct one. For example, checking a drill chuck for damage is an inspection. Cleaning and servicing the chuck are maintenance tasks.
A tool may pass a visual check but still need service. A motor can have an internal fault that is not visible from the outside. A torque wrench can look normal but give the wrong reading. These limits make regular maintenance and testing important.
Inspection
Finds visible damage, wear, missing parts, and unsafe conditions.
Maintenance
Keeps parts clean, adjusted, lubricated, and in good working order.
Calibration
Checks whether a measuring tool gives results within its required accuracy limits.
How to Inspect a Tool Before Use
A good inspection follows the same basic order each time. Start with the tool and the task. Then check the body, working parts, power source, safety features, and controls. This order helps workers avoid missing a defect.
Step 1: Identify the tool and its job
Make sure the tool is designed for the task. Check its capacity, size, speed rating, and approved attachments. A tool that is too small or not designed for the job may fail under load.
Step 2: Make the tool safe to inspect
Switch it off and disconnect its power source when required. Unplug corded tools, remove batteries, shut off air or hydraulic supply, and release stored energy according to the manual. Never place your hands near moving parts during an inspection.
Step 3: Check the outer body
Look for cracks, dents, broken covers, loose screws, rust, oil, and signs of heat. Pay close attention to areas near handles, guards, joints, and moving parts.
Step 4: Check the working part
Inspect blades, bits, jaws, teeth, wheels, cutting edges, and other attachments. Look for chips, cracks, bends, heavy wear, and poor fit. Make sure the accessory is approved for the tool.
Step 5: Check the power source
Look over cords, plugs, batteries, air hoses, fuel lines, and hydraulic fittings. Stop if you find exposed wires, swollen batteries, loose plugs, damaged hoses, or fluid leaks.
Step 6: Check safety parts and controls
Make sure guards, shields, handles, switches, locks, and safety clips are present and secure. Do not use a tool with a missing or damaged safety part.
Step 7: Make a controlled function check
If the manual allows it, test the tool in a safe area. Watch for unusual sound, vibration, smoke, smell, heat, or movement. Stop at once if the tool acts in an unsafe way.
Check the Handle and Tool Body
The handle gives the user control. It must be strong, clean, and secure. A loose handle can cause a tool to slip or fly away during use.
Check wooden handles for cracks, splinters, and signs of decay. Check plastic and rubber handles for splits, deep cuts, and loose sections. Metal bodies should not have bends or cracks near areas that carry force.
Also look for oil, grease, and dirt. A dirty grip can slip from the hand. Clean the tool only by a method that will not damage its parts or labels.
Stop-use signs
A loose hammer head, split handle, cracked body, broken grip, or sharp edge that can cut the hand.
Good condition
The body is sound, the handle is secure, and the grip allows firm control.
Inspect Blades, Bits, Jaws, and Cutting Edges
The working part makes contact with the material. Damage here can cause poor cuts, slips, broken parts, or flying debris. Check it before each job, especially after a hard impact.
A saw blade should have no cracks, missing teeth, or signs of severe wear. A drill bit should be straight and free from chips that affect its use. Pliers and wrenches should grip well and should not have badly worn or bent jaws.
A dull edge is not always a safety defect by itself, but it can make a worker use more force. That can raise the risk of slipping or losing control. Replace or service worn parts as the maker directs.
Blades
Look for cracks, missing teeth, bends, and damage to the cutting edge.
Drill bits
Look for bends, chips, worn tips, and damaged shanks.
Wrenches and pliers
Check jaws, teeth, pivots, and moving joints for wear and looseness.
Screwdrivers
Check tips for rounding, chips, bends, and loose handles.
Inspect Guards, Switches, and Safety Controls
Guards keep hands and other body parts away from dangerous areas. They can also help control flying chips and broken parts. Check that each required guard is present, secure, and able to move as designed.
Test the switch and trigger only when it is safe to do so. The switch should not stick or turn on by itself. A trigger lock must work as the maker intended. Do not tape down a switch or bypass a safety feature.
OSHA 29 CFR 1926.300(b) requires guards on power-operated tools designed to use them. It also addresses guards for exposed moving parts. A missing guard is not a minor repair to put off until later.
Guard damage
Look for cracks, loose mounts, missing parts, bent covers, or guards that do not return to their safe position.
Switch damage
Look for broken buttons, stuck triggers, damaged cords near the switch, or signs that the switch does not stop the tool.
Safety locks
Check that locks and safety devices work as designed. Never bypass them to keep a tool running.
Common Defects in Hand Tools
Hand tools often show clear signs of wear. Their handles, heads, jaws, and working edges take force each time a worker uses them. Check these parts with care because a small defect can cause a tool to slip, break, or strike the user.
OSHA 29 CFR 1926.301 gives specific rules for hand tools in construction. It bars the use of unsafe hand tools. It also addresses sprung wrench jaws, mushroomed impact-tool heads, and cracked or loose wooden handles.
Hammer and sledge defects
Check for loose heads, cracked handles, chipped faces, and mushroomed striking edges. A loose head can fly off during a strike.
Wrench defects
Look for sprung jaws, rounded teeth, cracks, and damaged adjustment parts. A wrench that slips under load can injure the hand.
Pliers defects
Check for worn gripping teeth, loose pivots, bent handles, and cracked joints.
Screwdriver defects
Look for rounded or broken tips, bent shafts, loose handles, and cracks near the shaft.
Chisel defects
Check for mushroomed heads, chips, cracks, and damaged cutting edges.
Knife and saw defects
Look for loose blades, cracked handles, broken teeth, damaged blade locks, and worn safety covers.
File defects
Check for broken teeth, cracks, and missing or loose handles. Do not use a file without a suitable handle when the design requires one.
When Is a Hand Tool Unsafe?
A hand tool is unsafe when damage can affect control, strength, or safe use. A small surface mark may be cosmetic. A crack near a handle joint or a loose striking head is a different matter.
Do not judge a tool only by how it looks. Consider the force it must carry and the result if it breaks. If the condition is unclear, set the tool aside and ask a trained person to assess it.
Remove from service
Do this for cracked handles, loose heads, bent shafts, broken parts, and worn jaws that can slip.
Repair or replace
Use a proper replacement part or a new tool when the damaged part cannot be safely repaired.
Common Defects in Power Tools
Power tools need more checks than many hand tools. They combine moving parts with electricity, batteries, air, fuel, or hydraulic pressure. A fault in one part can affect the whole tool.
Check the tool while it is off and disconnected. Never open an electrical housing or work on live parts unless you are qualified and the task calls for it under the proper safety controls.
Cracked housing
A crack can expose live parts or allow dust and water to enter. Remove the tool from service if the crack affects the housing or safe use.
Damaged power cord
Look for cuts, frayed insulation, crushed areas, exposed wires, and loose connections. Do not use a cord with damaged insulation.
Damaged plug
Check for missing or bent pins, cracks, loose parts, and heat marks. Never remove the grounding pin to make a plug fit.
Battery damage
Look for swelling, cracks, leaks, corrosion, and damaged terminals. Do not charge or use a damaged battery pack.
Motor problems
Watch for unusual noise, heavy vibration, smoke, a burning smell, or unexpected heat. Stop use and arrange a proper check.
Loose attachments
Check chucks, blades, discs, wheels, and other parts for proper fit. Use only accessories approved for the tool.
Missing guards
A missing or damaged guard can expose the user to moving parts and flying material. Do not operate the tool until the guard is restored.
Electrical Cords and Plugs
Electrical cord damage is one of the most important defects to find. The outer cover protects the wires inside. A cut or crushed area can expose a worker to electric shock or fire.
OSHA 29 CFR 1910.334(a)(2) requires visual inspection of portable cord-and-plug equipment and extension cords before use on any shift. The rule covers outside damage and signs of possible internal damage, such as a pinched or crushed cord. It also states that damaged items must be removed from service until repairs and required tests make them safe.
Do not wrap a damaged cord in tape and return it to work. Tape does not restore the cord’s approved design or safety rating. Have a qualified person replace or repair it by an approved method.
Check the full cord
Look from the plug to the tool body. Check for cuts, flattening, fraying, burns, and exposed wire.
Check the plug
Make sure the pins are present, straight, and secure. Look for cracks and signs of heat.
Check grounding
Keep the grounding path intact where the tool design requires it. Never cut off or remove the third prong.
Battery-Powered Tool Defects
Battery tools avoid some cord hazards, but they have their own risks. A damaged battery can leak, short, overheat, or catch fire. Check both the battery and the tool contacts.
A battery that looks swollen, cracked, wet, or badly corroded should not be used. Keep damaged packs away from heat and metal objects. Follow the maker’s instructions for safe isolation and disposal.
Battery case
Look for swelling, cracks, dents, leaks, and signs of heat.
Terminals
Look for corrosion, loose contacts, dirt, and damaged metal parts.
Tool connection
Check that the pack locks into place and does not move or fall out during normal handling.
Pneumatic and Hydraulic Tool Defects
Air and hydraulic tools use stored pressure. A damaged hose or loose fitting can release energy without warning. Inspect hoses, couplings, seals, and connection points before use.
Check for cuts, bulges, cracks, leaks, and loose fittings. Never try to find a high-pressure hydraulic leak with your hand. A fine fluid jet can enter the skin and cause a serious injury. Shut down and release pressure by the approved method before service.
OSHA 29 CFR 1926.302 requires pneumatic tools to be secured to their hoses by positive means. It also requires safety clips or retainers on pneumatic impact tools to prevent attachments from being expelled.
Air hoses
Check for cuts, blisters, worn covers, loose couplings, and damaged fittings.
Retainers
Check that required clips and retainers are secure and in good condition.
Hydraulic lines
Look for fluid leaks, damaged covers, worn fittings, and signs of pressure damage.
Inspect Abrasive Wheels and Cutting Accessories
Abrasive wheels need special care because a broken wheel can send pieces flying at high speed. A wheel may look sound but still have a crack. The inspection must cover the wheel, mounting parts, guard, and machine speed.
OSHA 29 CFR 1926.303(c)(7) requires abrasive wheels to be closely inspected and ring-tested before mounting to check for cracks or defects. Follow the applicable standard and the wheel maker’s test method. Do not guess how to perform this test.
The wheel must fit the spindle. Never force it onto the shaft. Check the wheel rating against the machine speed. A wheel that is not rated for the machine can break during use.
Wheel condition
Look for cracks, chips, damage, signs of moisture, and other defects.
Wheel rating
Check that the marked speed rating is suitable for the machine.
Mounting parts
Check the spindle, flanges, and nut for damage and correct fit.
Safety guard
Make sure the required guard is secure and correctly positioned.
Work rest
For applicable bench and floor grinders, check that the work rest is secure and correctly adjusted.
Never Ignore a Damaged Wheel
Do not mount a wheel that has a crack or other sign of damage. Do not try to repair a cracked wheel. Do not use a damaged wheel because the job is nearly done.
If the wheel fails inspection, mark it as unusable and keep it away from working stock. Replace it with a wheel that matches the tool and task.
Correct action
Remove the damaged wheel from service and replace it with a suitable, undamaged wheel.
Unsafe action
Never glue, tape, grind away, or otherwise try to fix a cracked abrasive wheel.
How Often Should Tools Be Inspected?
The best routine is to make a basic check before each use. This helps catch damage that may have happened during the last job, storage, or transport. A check is also wise after a tool is dropped, hit, repaired, or exposed to harsh conditions.
However, inspection frequency is not the same for every tool under every OSHA rule. General-industry electrical rules in 29 CFR 1910.334 set a visual inspection requirement for portable cord-and-plug equipment and extension cords before use on any shift. Equipment that stays connected and is not exposed to damage does not need another check until it is moved.
Other tools have their own rules. For example, OSHA 29 CFR 1926.302(e) requires powder-actuated tools to be tested each day before loading. Abrasive wheels used in construction must be closely inspected and ring-tested before mounting. Employers should also follow tool manuals, site rules, and any stricter local requirements.
Before each use
Check the tool for visible damage, loose parts, worn working edges, and unsafe conditions.
Before each shift
Inspect portable cord-and-plug equipment and extension cords as required by the applicable OSHA general-industry electrical rule.
After a drop or impact
Check the body, handle, housing, shaft, guards, and working parts for new damage.
After repair
Confirm that the repair is complete and that required tests have been passed before the tool returns to service.
Before mounting an abrasive wheel
Inspect and ring-test the wheel as required by the applicable rule and manufacturer instructions.
After long storage
Check for rust, moisture, battery damage, worn seals, blocked parts, and other signs of poor storage.
What Should an Inspection Record Include?
A simple record helps a workplace track tool condition. It also helps managers find repeat faults and plan repairs. The record does not need to be complex, but it should show what was checked and what happened next.
A written record is useful for shared tools, high-risk equipment, and tools that need formal checks. The exact record and retention rules depend on the workplace, equipment, and applicable standard.
Tool details
Record the tool name, model, serial number, or asset ID.
Inspection details
Record the date, time, inspector, and type of check.
Findings
Describe any crack, leak, worn part, damaged cord, missing guard, or other defect.
Action taken
Record whether the tool passed, was removed from service, or was sent for repair.
Return to service
Record the repair and the required checks that confirmed safe operation.
What to Do When You Find a Defect
Stop using a tool when you find damage that could affect safe operation. Do not wait for the tool to fail during work. Do not let another worker use it without knowing about the problem.
The safest response is to remove the tool from service, identify the defect, and arrange a proper repair or replacement. CCOHS also advises workers to tag defective powered tools as out of service and have them repaired by a qualified person.
A damaged tool should not return to the work area just because someone has tightened a screw or covered a crack. The repair must restore the tool to a safe condition. Any required tests must be completed before use.
Step 1: Stop the work
Release the trigger or switch off the tool. Keep people clear of the danger area.
Step 2: Isolate the energy
Unplug the tool, remove the battery, or shut off and release stored pressure by the correct method.
Step 3: Label the tool
Attach a clear DO NOT USE or OUT OF SERVICE label. Do not leave the defect hidden.
Step 4: Report the problem
Tell the supervisor, tool manager, or safety lead. Record what failed and when it was found.
Step 5: Arrange repair or replacement
Send the tool to a qualified repair person or replace it when repair is not safe or practical.
Step 6: Check before return
Confirm that the repair is complete and that all required inspections and tests have passed.
When Should a Tool Be Replaced?
Some tools can be repaired with approved parts. Others should be replaced. The choice depends on the type of damage, the tool design, the repair method, and the maker’s guidance.
A tool with a broken safety housing, badly damaged frame, or failed part that cannot be replaced safely may need to be discarded. A tool with a damaged cord may be repairable by a qualified person using an approved replacement. Never make this choice by price alone.
Repair may be suitable
The fault is known, the correct parts are available, and a qualified person can restore the tool to its safe condition.
Replacement may be safer
The main body is cracked, key safety parts cannot be restored, or the tool cannot pass the required checks.
Common Tool Inspection Mistakes
An inspection only works when workers take it seriously. A rushed check can miss a hidden fault. A tool that worked yesterday may be unsafe today after a fall, impact, or poor repair.
The aim is not to find a reason to stop every tool. It is to find defects that matter and act before they cause harm. Use the manual and workplace rules when a defect is hard to judge.
Checking only the outside
A clean body does not prove that a motor, switch, bearing, or internal part is safe. Use the checks required for that tool.
Ignoring small cracks
A small crack near a handle, guard, or load-bearing part can grow under force. Do not guess that it is harmless.
Using damaged cords
Tape does not restore damaged insulation or make an unsafe cord fit for use.
Testing with the wrong method
Do not run a tool with its guard removed or apply force to see whether a weak part breaks.
Ignoring loose parts
A loose head, chuck, wheel, or fitting can move or come off during work.
Using the wrong accessory
An attachment with the wrong size, fit, or speed rating can fail even when it looks undamaged.
Failing to report defects
A defect that is not recorded may affect the next worker who uses the same tool.
Returning a repaired tool too soon
A repair is not proof of safe operation. Complete the required checks before the tool is released.
Why a Normal Sound Does Not Prove a Tool Is Safe
A tool can start and run while still having a serious fault. Damaged insulation, a weak guard, a worn bearing, or a poor connection may not be easy to hear.
A function check is only one part of the inspection. It cannot replace a close visual check, a required electrical test, or a professional service check. If there is doubt about the tool, keep it out of use until the problem is resolved.
Visual check
Finds damage that can be seen from the outside.
Function check
Helps find faults in normal controls and operation when the test is safe and approved.
Technical test
Finds faults that need proper test equipment or a qualified person.
How to Decide Whether a Tool Passes Inspection
A tool should pass only when it is fit for the task and all required safety parts are in place. If a defect could cause loss of control, electric shock, fire, flying parts, or unexpected movement, the tool should not be used.
Use the decision guide below as a basic workplace aid. It does not replace the manufacturer’s instructions, a formal inspection program, or a required professional test.
PASS: Safe condition confirmed
The body, handle, working parts, power source, guard, and controls are in good condition. The tool is suitable for the task and has no known defect that affects safe use.
HOLD: More review needed
The condition is unclear, a required check is missing, or a part needs review by a trained person. Keep the tool out of use until the question is resolved.
FAIL: Remove from service
The tool has a crack, damaged cord, missing guard, loose head, leaking pressure line, unsafe control, or other defect that can cause harm.
Example: Inspecting a Corded Circular Saw
A worker picks up a circular saw before cutting wood in a U.S. home repair workshop. The worker first checks the body, handle, base plate, blade, cord, plug, guard, and trigger. The blade has no visible damage, and the guard moves as designed.
The worker then finds a cut in the power cord near the plug. The saw may still turn on, but that does not make it safe. The worker disconnects it, labels it out of service, and reports the defect. The saw stays out of use until a qualified person completes the approved repair and required checks.
This example shows why inspection must come before operation. A tool that appears to work can still have a defect that creates a serious risk.
Inspection result
FAIL because the cord has visible damage.
Correct action
Disconnect, tag, report, repair, and verify before returning the saw to service.
A Simple Pre-Use Checklist
A short checklist can make inspections easier for workers and supervisors. Adjust it to match the tool type and the work being done. Add any checks required by the manufacturer or workplace safety plan.
Tool identity
Is this the correct tool for the task?
Body and handle
Are there cracks, bends, loose parts, or damaged grips?
Working part
Are the blade, bit, jaw, wheel, or cutting edge sound and suitable?
Power source
Are cords, plugs, batteries, hoses, and fittings free from damage?
Safety parts
Are guards, shields, clips, and handles in place?
Controls
Do switches and triggers work as designed?
Test and result
Has any required safe function check been completed, and has the tool passed?
When to Seek Qualified Help
Some defects are easy to spot, but their cause may be hard to find. A cracked handle may be clear. A motor that heats up, a switch that works only at certain angles, or a hydraulic line that leaks under pressure needs a more careful check.
Do not open electrical housings, repair live circuits, alter safety devices, or change pressure parts unless you have the training and authority to do so. Electrical testing and repair should be handled by qualified people under the correct safety procedures.
For high-risk equipment, follow the tool maker’s service rules and the workplace inspection plan. If the tool has been in a serious impact, fire, flood, or other damaging event, do not assume that a normal visual check is enough.
Electrical faults
Get qualified help for damaged internal wiring, failed grounding, burning smells, or repeated electrical trips.
Mechanical faults
Get qualified help for bent shafts, bearing damage, loose internal parts, or unusual vibration.
Pressure faults
Get qualified help for hydraulic leaks, damaged pressure hoses, and failed safety fittings.
Use the required calibration or verification service when a tool’s accuracy affects the work.
Safety device faults
Do not bypass or alter guards, switches, locks, or interlocks. Arrange proper repair.
Frequently Asked Questions
Q
Should tools be inspected before every use?
Yes. A quick pre-use check is a good safety practice for hand tools and power tools. It helps find damage from storage, transport, or the last job. Specific OSHA rules may set different inspection periods for certain equipment. For example, general-industry rules require visual checks of portable cord-and-plug equipment and extension cords before use on any shift.
Q
What are the most common signs of a defective tool?
Common signs include cracks, loose handles, worn jaws, bent shafts, broken guards, damaged cords, swollen batteries, leaking hoses, and unusual vibration. Smoke, burning smells, and unexpected heat also need attention. Remove a tool from service when a defect can affect safe operation.
Q
Can I use a tool with a small crack?
Do not assume that a small crack is safe. Its risk depends on its location, the tool design, and the force the part must carry. A crack in a handle, housing, guard, or load-bearing part can lead to failure. Keep the tool out of service until a qualified person decides whether it can be safely repaired.
Q
Can I repair a damaged power cord with electrical tape?
No. Tape does not restore the cord’s approved insulation and safety design. A damaged cord must be removed from service. A qualified person should replace or repair it using an approved method and complete any required safety checks before use.
Q
Does a tool inspection replace calibration?
No. Inspection checks the tool’s physical condition and visible safety features. Calibration checks whether a measuring tool gives results within the required accuracy range. A torque wrench, pressure gauge, or other precision tool may look fine but still give incorrect results. Follow the required calibration schedule and the manufacturer’s guidance.
Q
Who should repair a defective power tool?
A qualified person should repair a defective power tool. The required skill depends on the fault and tool type. Electrical faults, internal motor damage, pressure systems, and safety controls may need trained service staff. Workers should not make improvised repairs or return a defective tool to service without the required checks.
✦ Wrapping Up
Conclusion
Tool inspection before use is a basic step in safe work. It helps workers find damage before a tool fails. A careful check should cover the body, handle, working part, power source, guards, and controls. The right method also depends on the type of tool and the task.
In the United States, OSHA rules require tools to be kept in safe condition. Some equipment also has specific inspection and test rules. Employers should match their inspection plans to the tool, work setting, maker’s instructions, and applicable safety requirements.
Never ignore a loose part, damaged cord, missing guard, cracked handle, or leaking hose. Stop work, isolate the tool, and report the problem. A proper repair and a final safety check can help prevent the same defect from reaching the next worker.
💡 Key Takeaway
Before starting your next job, take a few minutes to inspect each tool. Check its body, handle, working part, power source, guards, and controls. Mark any unsafe tool OUT OF SERVICE, report the defect, and keep it out of use until a qualified person has repaired and checked it.
Tool Feed Pressure and Contact Management starts with steady support, the right feed rate, and safe contact. Learn how to set, spot, and fix poor control.
Compare static pressure gauge vs differential pressure gauge to choose the right instrument for accurate readings, better control, and smarter decisions.