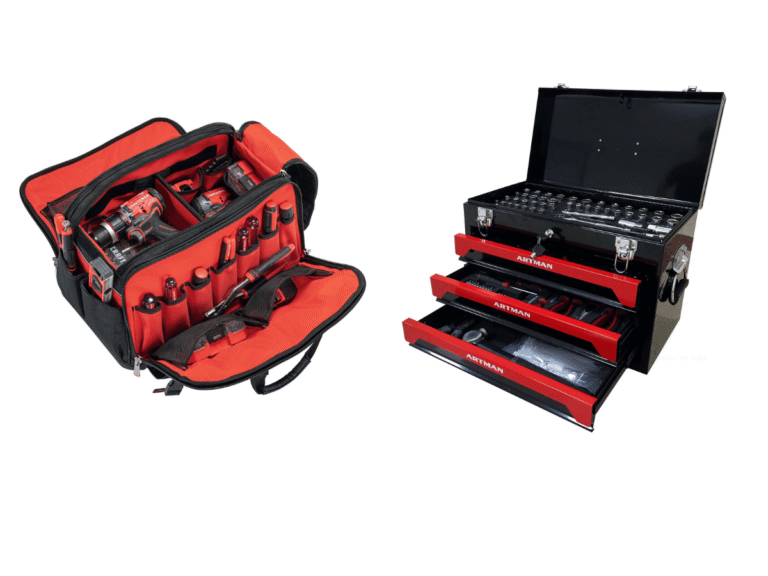
Clean each tool according to its material, power source, and intended use. Remove dirt and grease, use suitable cleaning products, dry all surfaces, protect exposed metal, and inspect the tool before storage. Always disconnect power before cleaning.
Across the United States, tools are used every day in home garages, construction sites, woodworking shops, automotive repair centers, factories, and gardens. Each setting exposes equipment to different forms of dirt. A mechanic may deal with oil and grease, while a carpenter faces sawdust and wood resin. Garden tools often collect wet soil, plant sap, and grass.
These materials need different cleaning methods. A metal wrench can handle a damp cloth and mild soap, but an electric drill needs extra care around its motor and air vents. A measuring tool may need a soft, dry cloth, while a garden pruner may need a safe way to remove sticky plant residue.
Good cleaning does more than improve the look of a tool. It helps prevent rust, keeps moving parts free from dirt, protects electrical parts, and makes defects easier to spot. It can also help prevent dirt and residue from spreading between work areas.
This guide explains how to clean common tool types in American homes and workplaces. It covers hand tools, cutting tools, electric tools, air tools, measuring devices, garden equipment, and automotive tools. The main rule is simple: use the least aggressive cleaning method that removes the dirt without harming the tool.
Source: pinterest.com
1. Prepare Tools Before Starting the Cleaning Process
The safest cleaning process starts before the first wipe. Identify the tool, check its power source, and find out which parts can handle moisture or cleaning products. A general cleaning method may work for a metal hand tool but can damage an electric tool or a precision instrument.
Read the owner’s manual when available. Look for instructions about approved cleaners, lubrication points, removable parts, and areas that must stay dry. If the manual is missing, check the manufacturer’s support information rather than guessing.
Set up a clean work area with enough light and space. Keep dirty tools away from clean equipment, food, and personal items. If the tool has sharp edges or chemical residue, use protective equipment suited to the task.
Source: slideshare.net
Protective equipment
Use safety glasses and suitable gloves when dirt, sharp edges, dust, or cleaning chemicals may cause injury. Check the product safety data sheet for chemical handling requirements.
Cleaning supplies
Prepare clean cloths, soft brushes, suitable stiff brushes, mild soap, a vacuum, approved cleaning products, and a dry towel. Use separate cloths for oily and clean surfaces.
Power isolation
Unplug corded equipment, remove cordless batteries, switch off gas-powered equipment, and disconnect air supplies before cleaning.
Work area
Choose a stable, well-lit area with good airflow. Keep sparks, flames, and hot surfaces away from flammable cleaning products.
A Basic Cleaning Sequence
Start by removing loose dirt with a dry cloth, brush, or suitable vacuum. This prevents loose grit from scratching surfaces when you wipe the tool. Remove detachable parts only when the manual allows it.
Apply a suitable cleaner to a cloth or brush rather than spraying it into openings. Work on dirty areas with gentle pressure. Pay attention to joints, grooves, handles, and other places where debris can collect.
Remove cleaner residue when required, then dry the tool fully. Apply lubricant or corrosion protection only to the parts that need it. Finish by checking the tool for damage, missing parts, and signs of wear.
Step 1: Remove loose debris
Brush away dust, chips, soil, and loose material before using liquid cleaners.
Step 2: Remove stuck dirt
Use an approved cleaner and a suitable brush or cloth to loosen grease, sap, or other residue.
Step 3: Dry and protect
Remove moisture, apply approved lubrication where needed, and let the tool reach a fully dry condition.
Step 4: Inspect and store
Check the tool’s working parts, handles, guards, cables, and surfaces before putting it away.
Choose Cleaning Products Carefully
A cleaner must match the material being cleaned. Strong solvents can damage plastic housings, rubber grips, paint, protective coatings, and electrical insulation. Abrasive pads can also remove useful surface coatings or damage precise metal surfaces.
For many ordinary hand tools, mild soap and water work well. Grease may need a material-safe degreaser, while sticky plant residue may need a cleaner approved for garden equipment. Follow the product label and never mix cleaning chemicals.
Mild soap
Useful for many non-electrical metal and plastic surfaces when the tool can safely get wet.
Degreaser
Useful for oily tools and mechanical parts. Check material compatibility before use.
Soft brush
Useful for removing dust and dirt from grooves without scratching delicate surfaces.
Approved lubricant
Useful for protecting exposed metal or maintaining moving parts when specified by the manufacturer.
2. Cleaning Procedures for Hand Tools
Hand tools usually need simple cleaning, but the method depends on their shape and material. Wrenches, pliers, hammers, screwdrivers, and sockets often collect dust, oil, metal chips, and grime during regular work.
Start by wiping away loose dirt with a clean cloth. Use a small brush to reach joints, teeth, grooves, and narrow openings. For stubborn grease, use a compatible degreaser on a cloth and wipe away the remaining residue.
If a hand tool can safely get wet, wash it with mild soap and water when needed. Rinse away soap residue and dry the tool at once. Do not leave steel tools wet on a bench or in a toolbox.
Source: au.pinterest.com
Wrenches and sockets
Remove oil and dirt with a brush and suitable degreaser. Clean the jaws, open ends, socket openings, and drive connections. Dry each part before storage.
Pliers and cutters
Clean the jaws, cutting edges, and pivot joint. Remove sticky residue without forcing dirt deeper into the joint. Apply a small amount of approved lubricant to the pivot if required.
Hammers and mallets
Wipe the head and handle. Remove loose dirt around the head-to-handle connection. Check for cracks, loose heads, damaged grips, and mushroomed striking surfaces.
Screwdrivers
Clean the shaft and handle with a suitable cloth. Remove grease from the tip so it can grip the screw correctly. Check the tip for damage and the handle for cracks.
How to Prevent Rust on Hand Tools
Rust forms when iron or steel reacts with moisture and oxygen. Dirt, salt, and chemical residue can make corrosion worse. Tools used outdoors or in damp garages may need more frequent cleaning and protection.
After cleaning, dry all exposed metal surfaces. Apply a thin film of suitable tool oil to bare steel when the tool will be stored for a long time. Wipe away excess oil before the next use, especially on handles and gripping surfaces.
Do not assume every tool needs oil. Some surfaces have special coatings, and some tools have dry-running parts. Follow the manufacturer’s guidance.
Remove moisture
Dry metal surfaces before putting tools into drawers, cases, or storage cabinets.
Protect bare metal
Use a compatible rust-prevention product where the manufacturer allows it.
Check storage conditions
Keep toolboxes and cabinets dry. Avoid leaving tools on damp floors or near water sources.
3. Cleaning Procedures for Cutting and Sharp Tools
Cutting tools need careful cleaning because their edges can cause serious injuries. This group includes utility knives, hand saws, chisels, scissors, pruning shears, and other tools with sharp working edges.
Before cleaning, secure the tool on a stable surface. Keep the cutting edge pointed away from your body and hands. Remove loose dirt with a brush, then use a suitable cloth to remove grease, sap, or adhesive residue.
Avoid running a cloth along the sharp edge. Wipe in a controlled direction that keeps your hands away from the blade. If the tool has a removable blade, follow the manual when removing or replacing it.
Hand saws
Brush dust and wood chips away from the teeth. Use an approved cleaner for resin or sap. Dry the blade and protect it from corrosion without leaving a slippery coating on the handle.
Chisels
Wipe the blade and handle carefully. Remove pitch and adhesive with a compatible cleaner. Keep the cutting edge covered during storage.
Utility knives
Retract or remove the blade according to the tool design. Clean the handle and blade holder without touching the exposed cutting edge.
Scissors and shears
Remove residue from the blades and pivot. Dry the joint and use approved lubricant if the manufacturer recommends it.
Pruning tools
Remove plant sap, soil, and plant debris. Clean and dry the blades, then use an appropriate disinfectant when plant disease control requires it.
Cleaning Is Not the Same as Sharpening
Cleaning removes dirt and residue. Sharpening restores the cutting edge. A clean blade can still be dull, chipped, or damaged. Inspect the edge after cleaning and sharpen it only with the correct method.
Do not use a grinder or powered sharpener unless the tool and its blade are suitable for that method. Excess heat can affect the metal, while poor sharpening can change the original cutting angle.
Inspect the edge
Look for chips, cracks, deep nicks, and uneven wear.
Maintain the original angle
Use the sharpening method and angle recommended for the specific blade.
Cover the blade
Use a suitable sheath or blade guard after cleaning and sharpening.
4. Cleaning Procedures for Electric and Cordless Power Tools
Electric power tools need more care than ordinary hand tools because water and cleaning chemicals can damage motors, switches, wiring, and electronic parts. Common examples include drills, circular saws, routers, sanders, grinders, and impact drivers.
Always disconnect the tool before cleaning. Unplug corded models and remove the battery from cordless models. Allow hot parts to cool. Remove accessories only when the manufacturer’s instructions allow it.
Begin with a dry cloth, soft brush, or suitable vacuum to remove dust from the housing. Pay special attention to ventilation openings, switch areas, adjustment controls, and accessory connections. Use a damp cloth with mild soap only where the manual allows it.
Never immerse a power tool in water. Do not spray cleaning products directly into the motor housing, switch, battery contacts, or electrical openings. Keep the battery and charger clean and dry according to their own instructions.
Source: pinterest.com
Corded drills
Unplug the drill. Wipe the housing, clean the ventilation slots, and remove dust around the chuck. Inspect the cord and plug for cuts, exposed wires, or heat damage.
Cordless drills
Remove the battery before cleaning. Wipe the body and handle, clear the vents, and check the battery connection area for dirt or corrosion. Do not wash the battery pack.
Circular saws
Disconnect power and wait for the blade to stop and cool. Remove sawdust from the base, blade guard, and accessible dust passages. Clean the blade according to its material and manual.
Random orbital sanders
Remove the sanding disc when appropriate. Clear dust from the pad, dust ports, and housing. Check the dust bag or collection system and replace damaged filters.
Angle grinders
Disconnect power and let the tool cool. Remove dust from the guard, vents, and accessible exterior surfaces. Check the wheel and guard for damage before use.
Cleaning Power Tool Ventilation Slots
Ventilation slots allow air to move through many electric tools. Fine wood dust, metal particles, and construction debris can block these openings. Restricted airflow may cause overheating and poor performance.
Use a soft, dry, non-metallic brush or a suitable vacuum attachment to remove loose debris. Follow the tool manual if compressed air is permitted. Never force objects into the motor housing or remove internal covers unless you are qualified to service the tool.
Some manufacturers permit dry compressed air for cleaning. However, workplace users must also follow applicable safety rules. OSHA’s general-industry standard, 29 CFR 1910.242(b), permits compressed air for cleaning only below 30 psi with effective chip guarding and appropriate personal protective equipment. A brush or vacuum is often the simpler option.
Keep vents open
Remove visible dust without pushing debris deeper into the tool.
Protect your eyes and lungs
Use suitable eye protection and respiratory protection when cleaning dusty equipment.
Avoid excess moisture
Keep water and liquid cleaners away from ventilation openings and internal electrical parts.
Cleaning Batteries and Chargers
Battery packs and chargers require separate care. Wipe their outside surfaces with a dry cloth or the cleaning material approved by the manufacturer. Check for cracked cases, damaged terminals, swelling, unusual heat, or signs of leakage.
Do not immerse battery packs or chargers. Never use metal objects to scrape battery contacts. If a battery is swollen, leaking, or visibly damaged, stop using it and follow the manufacturer’s instructions for safe handling and disposal.
Battery contacts
Keep them clean and dry. Do not use abrasive tools or liquids unless specifically approved.
Charger openings
Remove dust with a dry cloth or suitable brush. Keep the charger disconnected while cleaning.
5. Cleaning Pneumatic and Hydraulic Tools
Pneumatic tools use compressed air, while hydraulic tools use pressurized fluid. Both types contain working parts that may be damaged by dirt, water, or incorrect lubrication. Examples include air impact wrenches, nailers, pneumatic sanders, hydraulic jacks, and shop presses.
Disconnect pneumatic tools from the air supply before cleaning. Release stored pressure according to the manufacturer’s instructions. Wipe the housing and clean accessible openings with a suitable brush. Check couplers and fittings for damage.
Some air tools require special pneumatic oil. Others use different lubrication systems or require no user-added oil. Do not pour oil into every air tool by habit. Follow the manual for the correct type and amount.
Hydraulic equipment needs special care because its internal system operates under pressure. Wipe the exterior and remove dirt around accessible surfaces. Do not loosen hydraulic fittings, open pressurized lines, or add fluid without following the approved service procedure.
Air impact wrenches
Disconnect the air hose, release pressure, wipe the housing, and clean the drive area. Lubricate only as specified by the manufacturer.
Pneumatic nailers
Disconnect the air supply and remove remaining fasteners according to the manual. Clean the nose area and exterior. Never place fingers near the firing mechanism.
Air sanders
Remove dust from the housing and air passages. Check the air inlet, hose connections, and exhaust area for debris or damage.
Hydraulic jacks
Wipe dirt and grease from the outside. Inspect for fluid leaks, damaged seals, and corrosion. Keep dirt away from fill ports and other openings.
Hydraulic presses
Clean the frame and accessible surfaces. Check the ram and work area for debris. Follow the service manual for any internal maintenance.
Why Air and Hydraulic Systems Need Special Care
Dirt entering an air tool can increase wear on internal parts. Moisture in an air supply can also contribute to corrosion. Drain compressors and moisture traps according to their instructions, and inspect air hoses and fittings on a regular schedule.
Hydraulic systems depend on clean fluid and sound seals. External dirt should not enter the reservoir during service. If a jack or press leaks, loses pressure, or moves unevenly, stop using it until a qualified person checks the fault.
Keep connections clean
Wipe air couplers and hydraulic service areas before connecting or opening them.
Use correct lubrication
Do not substitute ordinary machine oil for a specified pneumatic or hydraulic product.
Watch for leaks
Remove equipment from service if it shows fluid leaks, damaged hoses, or pressure loss.
6. Cleaning Measuring Tools and Electrical Test Instruments
Measuring tools need a clean surface to provide reliable readings. Dirt between measuring faces can affect the result, while moisture and harsh cleaners may damage delicate parts. This group includes tape measures, rulers, calipers, micrometers, levels, squares, multimeters, and clamp meters.
Use a soft, clean, lint-free cloth for most routine cleaning. Remove dust and fingerprints without scratching the measuring surface. For stubborn residue, use only a cleaner approved by the instrument manufacturer.
Avoid soaking precision instruments or spraying cleaner into their joints, displays, switches, or electronic housings. Do not use steel wool or rough abrasive pads on measuring faces. Store delicate instruments in their cases when they are not in use.
Source: slideshare.net
Tape measures
Wipe the blade and housing. Remove dirt from the blade slot without forcing moisture inside the case. Let a damp blade dry before retracting it for storage.
Digital calipers
Clean the measuring faces and beam with a lint-free cloth. Keep liquids away from the display and electronic controls.
Micrometers
Clean the measuring faces gently. Keep abrasive particles away from the spindle and anvil. Use the storage case supplied with the instrument.
Levels and squares
Wipe the body and measuring edges. Check for dents, bent sections, loose components, and damage to the vial.
Multimeters and clamp meters
Turn the instrument off and disconnect the test leads. Clean the exterior with the approved cloth and mild cleaner. Keep the case, display, and terminals dry.
Check Accuracy After Cleaning
Cleaning does not restore calibration. A measuring tool can look clean and still give incorrect results because of impact damage, wear, or internal faults. Check the instrument against a known reference when the task or quality system requires it.
If a caliper has damaged measuring faces or a meter has a cracked case, do not rely on it for important work. Have the instrument checked, repaired, or recalibrated by a qualified service provider when needed.
Check measuring faces
Look for dirt, chips, corrosion, and visible wear.
Check displays and controls
Look for damaged screens, loose buttons, and signs of moisture.
Protect calibration
Store precision instruments in suitable cases and avoid impact or temperature extremes.
7. Cleaning Garden and Outdoor Power Tools
Garden tools collect soil, mud, grass, plant sap, fertilizer, and moisture. These materials can cause corrosion, stiff joints, and poor cutting performance. Outdoor equipment also faces dirt from rain, dust, and changing weather.
Clean ordinary digging tools after use. Remove soil with a brush or scraper, then wash the metal parts if the tool allows it. Dry the blade, shaft, and handle before storage. Apply suitable protection to exposed steel when needed.
Pruning tools need more care because sap and plant residue can collect around their cutting edges and pivots. Remove the residue with an approved cleaner. If disease control is needed, use a suitable disinfectant after cleaning and follow its label directions.
Source: au.pinterest.com
Shovels and spades
Remove soil with a stiff brush or scraper. Wash stubborn dirt from suitable metal parts, dry fully, and check the handle connection.
Hoes and rakes
Remove soil, grass, and plant material from the head and teeth. Dry the metal parts and inspect the handle for cracks or loose fittings.
Pruning shears
Remove sap and plant residue from the blades and pivot. Dry the tool and use suitable blade protection when required.
Chainsaws
Disconnect the power source, allow the engine to cool, and clean the accessible bar, chain brake, and exterior according to the manual. Keep debris away from the air intake.
String trimmers
Remove grass and plant debris from the cutting head and guard. Check the spool, line, and air openings without exposing internal electrical parts to water.
Leaf blowers
Remove leaves and dust from the intake screen, housing, and vents. Wipe the handle and controls with a suitable cloth.
Cleaning Wooden Handles
Wooden handles can absorb moisture and may crack, swell, or rot if stored while wet. Wipe them clean and allow them to dry in a ventilated area. Do not leave wooden tools standing in water or resting on damp ground.
If the manufacturer recommends a wood treatment, apply it according to the product instructions. Rags containing drying oils, including boiled linseed oil, can heat up and catch fire if stored in a pile. Handle and dispose of those rags according to the product label and local fire-safety guidance.
Check for cracks
Inspect the handle for splits, splinters, and loose connections.
Keep wood dry
Store handles away from standing water and excessive humidity.
Use approved treatment
Apply a suitable wood treatment only when the tool manufacturer recommends it.
8. Cleaning Automotive and Mechanical Workshop Tools
Automotive tools often collect engine oil, grease, brake dust, road dirt, and metal particles. These materials can make handles slippery and hide damage. A mechanic should clean tools before returning them to a toolbox or shared work area.
Wrenches, sockets, ratchets, and extensions can usually be cleaned with a suitable degreaser and cloth. Use a small brush to remove residue from teeth, drive openings, and joints. Wipe away cleaner residue and dry the tools before storage.
Special tools need extra care. Torque wrenches, diagnostic meters, compression testers, and precision gauges may have calibration or sealing requirements. Clean only the accessible surfaces and follow the instructions for each device.
Keep brake dust and other potentially hazardous workshop debris under control. Do not blow unknown dust into the air with compressed air. Use an appropriate vacuum or cleaning method based on the material and workplace safety requirements.
Ratchets
Clean the exterior and drive head. Avoid flooding the internal ratchet mechanism with degreaser. Lubricate only as specified.
Torque wrenches
Wipe the body and adjustment controls. Avoid immersion and harsh chemicals. Store the tool at the setting recommended by its manufacturer.
Automotive diagnostic tools
Clean displays, buttons, and housings with approved materials. Protect connectors and electrical contacts from moisture.
Floor jacks and stands
Wipe away dirt and excess grease. Check for leaks, damaged wheels, bent parts, and faulty locking mechanisms. Never use damaged lifting equipment.
Brake service tools
Remove dust and residue with a method approved for the material. Keep contaminated cleaning materials separate and follow workplace rules for hazardous waste.
Avoid Contamination During Mechanical Work
A clean tool helps prevent unwanted material from entering an engine, transmission, brake system, or other mechanical assembly. Keep cleaned tools on a clean surface instead of placing them beside dirty parts.
Use separate cloths for oil, grease, and clean components. If a tool has been exposed to fuel, solvents, or another hazardous substance, follow the relevant safety data sheet and workplace disposal procedure.
Separate clean and dirty tools
Use different trays or work surfaces to prevent cross-contamination.
Control chemical residue
Remove cleaning products and excess lubricant before using tools on sensitive components.
Inspect lifting equipment
Do not return a leaking or damaged jack or stand to service.
9. Cleaning Shared-Use, Salon, and Specialty Tools
Some tools need more than ordinary dirt removal. Equipment used by several workers or tools that touch skin may require a specific cleaning and disinfection process. Examples include salon tools, grooming equipment, reusable service instruments, and certain healthcare devices.
First, identify the intended use and the type of contamination. A brush used on a workbench does not need the same process as an instrument that may contact skin or blood. Follow the manufacturer’s instructions and the rules that apply to the workplace or profession.
Cleaning removes visible dirt and organic material. Disinfection uses an appropriate product to reduce harmful microorganisms. Sterilization is a separate process that is required for certain instruments and cannot be replaced by ordinary wiping or household cleaning.
For tools used in healthcare or regulated personal-care settings, follow the applicable professional reprocessing procedure. Use only products approved for the intended application, at the stated concentration and contact time. Never assume that a cleaner suitable for metal workshop tools is safe for skin-contact equipment.
Source: slideshare.net
Salon tools
Remove visible hair, skin debris, and product residue before applying the required disinfecting process. Follow local licensing rules and product-label instructions.
Reusable healthcare instruments
Use the validated cleaning, disinfection, or sterilization process required for the instrument. Follow the manufacturer’s reprocessing instructions.
Shared workshop tools
Remove visible dirt and grease from shared handles and contact surfaces. Use a compatible disinfectant only when the task or workplace policy requires it.
Electronic specialty tools
Use manufacturer-approved wipes or cloths. Keep liquid away from displays, switches, ports, and internal electronics.
Why the Cleaning and Disinfection Steps Matter
Applying disinfectant over heavy dirt may reduce its effectiveness. CDC guidance for healthcare cleaning distinguishes soil removal from disinfection and emphasizes correct product use. The product must be suitable for the surface and remain wet for the contact time stated on its label.
Some disinfectants can corrode metals or damage rubber, plastics, coatings, and adhesives. Never mix bleach with ammonia or acids. When the tool requires sterilization, use the approved process rather than trying to achieve the same result with an ordinary surface cleaner.
Clean first
Remove visible soil and residue before disinfection when the procedure requires separate steps.
Follow the product label
Use the correct concentration, application method, and contact time.
Check material compatibility
Make sure the cleaning or disinfecting product will not damage the tool.
10. Drying, Lubricating, and Storing Tools After Cleaning
Cleaning is not complete until the tool is dry and ready for safe storage. Moisture left in joints, sockets, cases, and metal surfaces can lead to corrosion. Water trapped inside a power tool can also damage electrical parts.
Use a clean, dry cloth to remove surface moisture. Allow parts to air-dry in a clean, ventilated place when necessary. Make sure hollow spaces, joints, and removable components are dry before putting them back together.
Lubrication should match the tool’s design. Pivots, sliding parts, and exposed steel may need a suitable lubricant, but not every tool needs added oil. Too much lubricant can attract dust, contaminate workpieces, and make handles slippery.
Dry metal surfaces
Remove water and cleaning residue before storage. Pay attention to joints, teeth, and narrow openings.
Lubricate moving parts
Use the specified oil or grease in the correct amount. Keep lubricants away from grips and surfaces that need friction.
Protect sharp edges
Use blade covers or sheaths to prevent injury and damage to cutting edges.
Separate delicate tools
Keep measuring instruments and electronic devices in protective cases rather than loose in a toolbox.
Control humidity
Store equipment in a dry, ventilated space. Consider suitable humidity control for valuable metal tools and precision instruments.
Create a Simple Tool Storage Routine
Give each tool a storage location. A toolbox, cabinet, pegboard, or fitted case can keep equipment organized and reduce contact damage. Store heavy tools so they cannot fall, and keep sharp tools covered.
Do not put damp tools into closed cases. Keep batteries and chargers in the conditions stated by their manufacturers. Store flammable cleaning products and lubricants in their proper containers and away from heat or ignition sources.
Clean before storing
Remove dirt, oil, and debris after the task rather than allowing residue to harden.
Use separate storage
Keep precision devices, cutting tools, and electrical equipment in suitable protective spaces.
Check stored tools
Inspect equipment periodically for rust, leaks, moisture, and damage.
11. Common Tool Cleaning Mistakes to Avoid
Many tool problems come from cleaning methods that are too aggressive. A powerful cleaner may remove dirt quickly but can also damage paint, plastic, rubber, seals, and protective coatings. A pressure washer may remove mud from a shovel but force water into a motor, bearing, or electrical connection.
The safest approach is to use the mildest method that works. Start with dry cleaning, then move to a suitable liquid cleaner only when necessary. If the result is poor, check whether the cleaner is compatible instead of adding more chemical or force.
Cleaning while connected to power
This can cause accidental starting or electric shock. Disconnect the power source before cleaning.
Soaking every tool in water
Water can damage electrical parts, bearings, sealed joints, wooden handles, and precision components.
Using strong solvents on plastic
Harsh chemicals can weaken, soften, discolor, or crack plastic and rubber components.
Using high-pressure water on power tools
Water can enter vents, seals, switches, and motor housings. Do not pressure-wash a tool unless the manufacturer expressly permits the method.
Using excessive compressed air
High-pressure air can drive chips into skin or eyes and spread hazardous dust. Use a vacuum or brush when possible.
Applying too much oil
Excess lubricant attracts dirt and can make grips, handles, and work surfaces slippery.
Storing tools while wet
Trapped moisture can cause corrosion, odors, and damage to wooden or electronic parts.
Ignoring damage found during cleaning
A clean tool is not automatically a safe tool. Check for cracked housings, damaged cords, loose handles, and worn working parts.
What to Do When Dirt Will Not Come Off
Do not immediately reach for a grinder, strong acid, or aggressive solvent. Identify the material causing the buildup. Dried soil, grease, tree sap, paint, concrete, and adhesive each need a different approach.
Try a compatible cleaner and allow it to work for the time stated on its label. Use a suitable brush or non-damaging scraper. If the residue remains, check the tool manual or contact the manufacturer before using a stronger product.
If corrosion has caused deep pitting, if a cutting edge is cracked, or if a tool housing is damaged, cleaning may not restore safe operation. Replace the tool or arrange a qualified repair.
Dried grease
Use a material-safe degreaser and a brush. Remove all chemical residue afterward.
Plant sap
Use a cleaner approved for the blade and handle material. Dry and protect the cutting parts afterward.
Light surface rust
Use a suitable non-damaging abrasive or rust treatment on compatible metal surfaces, then clean and protect the area.
Dried paint or adhesive
Check material compatibility before using a solvent or scraper. Avoid damaging seals, plastic, and protective finishes.
12. How Often Should Different Tools Be Cleaned?
Cleaning frequency depends on how often a tool is used, what it touches, and where it operates. A tool used in a dusty construction site needs more attention than one kept in a clean home workshop. A tool exposed to water, fertilizer, salt, chemicals, or plant disease may need immediate cleaning.
The following schedule is a practical starting point, not a replacement for the manufacturer’s maintenance plan. Heavy use, workplace rules, and special contamination may require more frequent cleaning.
Hand tools
Wipe after each use. Remove grease and stuck dirt before storage. Apply rust protection when needed.
Cutting tools
Remove residue after every use. Clean and dry the blade before storage. Inspect the edge regularly.
Electric power tools
Remove visible dust after use. Check vents and collection systems during routine maintenance.
Pneumatic tools
Wipe after use and follow the manual for lubrication, air inlet care, and moisture control.
Measuring instruments
Wipe after use, especially when exposed to dust, oil, or moisture. Check accuracy at the required calibration interval.
Garden tools
Remove soil, sap, and plant debris after use. Clean immediately after exposure to corrosive materials or plant disease.
Automotive tools
Remove grease and workshop residue after each job. Keep tools used on clean assemblies free from contamination.
Shared-use instruments
Follow the required cleaning and disinfection schedule for the tool’s intended use and workplace.
Signs That a Tool Needs Immediate Cleaning
Some signs should not wait until the end of the week. Visible mud, wet soil, chemical residue, grease on grips, blocked vents, and plant sap around blades are all reasons to clean a tool promptly.
Also pay attention to unusual odors, sticky controls, gritty movement, and rust spots. These signs may point to contamination that can affect performance or lead to further damage.
Visible buildup
Dirt, chips, grease, dust, or plant material has collected on the tool.
Poor movement
A joint, pivot, adjustment, or moving part feels stiff or gritty.
Blocked openings
Dust or debris is covering ventilation slots, air passages, or collection ports.
Moisture exposure
The tool has been used in rain, wet soil, or another damp environment.
13. Inspect Tools After Cleaning and Before Returning Them to Service
Cleaning creates a good chance to find problems that dirt may have hidden. A wrench may have worn jaws, a hammer may have a loose head, and a power tool may have a damaged cord. Check the tool before returning it to use.
Look at the working parts, handles, guards, connections, and housing. Make sure moving parts work as intended without unusual resistance. Confirm that the tool is dry and that no cleaner or lubricant remains on a surface where it could affect grip or performance.
If the tool fails inspection, remove it from service. Attach a clear warning or place it in a separate repair area so another worker does not use it by mistake. Do not try to fix electrical, hydraulic, or complex mechanical faults unless you have the right training and authorization.
Physical condition
Check for cracks, chips, bends, corrosion, missing parts, and loose connections.
Electrical condition
Check plugs, cables, battery housings, switches, and insulation for visible damage.
Working condition
Confirm that the tool moves, adjusts, locks, and operates as intended without unusual noise or resistance.
Safety features
Check guards, locks, handles, and other protective parts for correct condition and fit.
Storage readiness
Make sure the tool is dry, clean, correctly lubricated, and protected against damage.
When Cleaning Is Not Enough
Some faults require repair or replacement rather than more cleaning. Deep rust, broken insulation, damaged battery cases, leaking hydraulic systems, cracked blades, and loose striking heads can create serious risks.
Take damaged equipment out of service and follow the manufacturer’s repair instructions. Use an authorized service center when the fault involves internal electrical parts, safety controls, calibration, or pressurized systems.
Remove from service
Stop using tools with visible damage or unsafe operating conditions.
Arrange qualified repair
Use trained personnel for electrical, hydraulic, and complex mechanical faults.
Replace when necessary
Replace tools when structural damage, severe corrosion, or unavailable parts make safe repair impractical.
Frequently Asked Questions
Q
What is the best way to clean different types of tools?
The best method depends on the tool’s material and design. Use a brush and cloth for loose dirt, mild soap for compatible surfaces, and a suitable degreaser for oily equipment. Electric tools need dry cleaning or carefully controlled wiping around their housings and vents. Always follow the manufacturer’s instructions.
Q
Can I use soap and water to clean all hand tools?
No. Soap and water work for many ordinary metal and plastic hand tools, but some tools contain wood, electronics, sealed joints, or sensitive surfaces. Avoid soaking tools that may trap water. If you wash a compatible metal tool, dry it fully before storage to reduce rust.
Q
How do I clean power tools without damaging them?
Unplug the tool or remove its battery first. Let hot parts cool, then use a dry cloth, soft brush, or suitable vacuum to remove dust. Clean the exterior with a slightly damp cloth only when the manual permits it. Keep liquid away from the motor, vents, switches, battery contacts, and other electrical openings.
Q
Is compressed air safe for cleaning workshop tools?
Compressed air can spread dust and send chips toward the eyes or skin. A vacuum or brush is often safer. For covered U.S. general-industry workplaces, OSHA standard 29 CFR 1910.242(b) allows compressed air for cleaning only below 30 psi and with effective chip guarding and appropriate personal protective equipment. Always check workplace rules and the tool manufacturer’s instructions.
Q
How can I prevent rust after cleaning metal tools?
Remove dirt and moisture, dry the tool completely, and store it in a dry place. Apply a thin layer of compatible tool oil or corrosion protection to exposed steel when recommended. Avoid excess oil on grips and working surfaces, and inspect stored tools regularly for signs of corrosion.
Q
Should tools be disinfected after cleaning?
Not every tool needs disinfection. Ordinary workshop tools generally need suitable dirt and residue removal. Tools used in healthcare, salon services, grooming, or other skin-contact work may require a separate disinfection or sterilization process. Follow the applicable professional rules, product label, and manufacturer’s instructions.
✦ Wrapping Up
Conclusion
Tool cleaning is a basic part of safe and effective equipment care. However, one cleaning method does not work for every tool. Hand tools can often be cleaned with a brush and mild soap, while power tools, measuring instruments, pneumatic equipment, and hydraulic tools need more controlled methods.
The best routine starts with power isolation and a check of the manufacturer’s instructions. Remove dirt with suitable tools, use compatible cleaning products, dry every part, and apply lubrication only where needed. Finish by inspecting the equipment before putting it back into service.
A clean tool is easier to inspect, safer to handle, and less likely to suffer damage from trapped dirt or moisture. Regular care also helps keep workshops, garages, construction sites, and outdoor work areas organized. Small cleaning tasks after each job can prevent larger maintenance problems later.
💡 Key Takeaway
Create a cleaning routine for each tool category in your workshop. Keep a suitable brush, clean cloths, approved cleaners, and protective equipment nearby. Disconnect power before cleaning, remove all dirt and moisture, inspect for defects, and store every tool in a dry and protected place.
Compare tool bag vs tool box to find the best storage for your tools. Get pros, cons, and expert tips to pick durability, portability, and organization.
Compare pex crimp ring vs cinch clamp to learn which gives stronger, leak-free joints, faster installs and lower costs—get expert tips to choose confidently.