Laser level wins for precision; chalk line wins for speed, simplicity, and low cost.
I’ve used both tools on job sites and home projects for over a decade. This article compares laser level vs chalk line in plain terms. I’ll explain how each tool works, where each shines, and how to pick the right tool for your project. Expect hands-on tips, real mistakes I made, and clear steps to choose between a laser level vs chalk line based on accuracy, cost, ease, and site conditions.
What is a laser level?
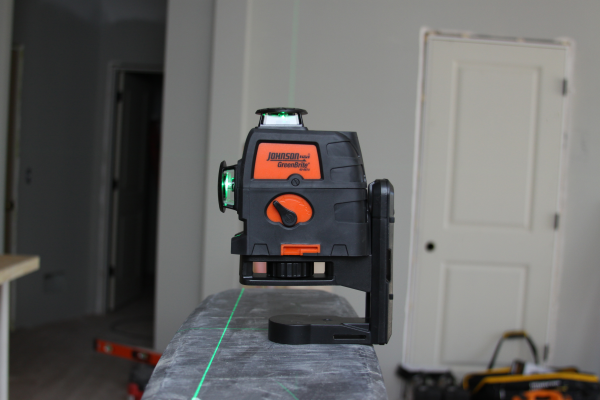
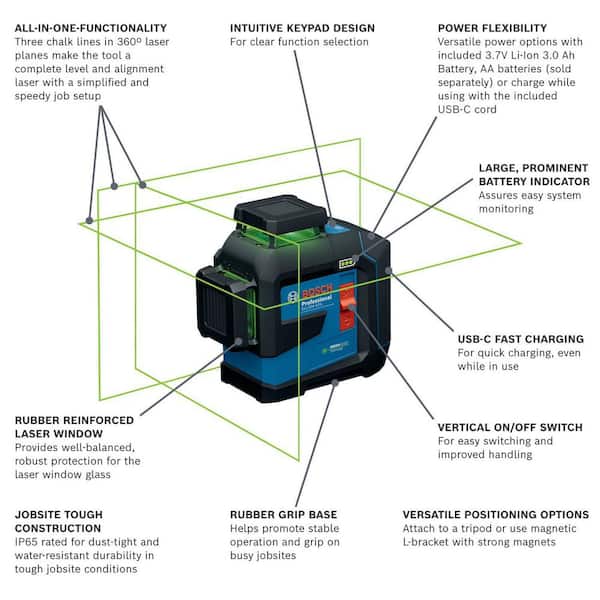
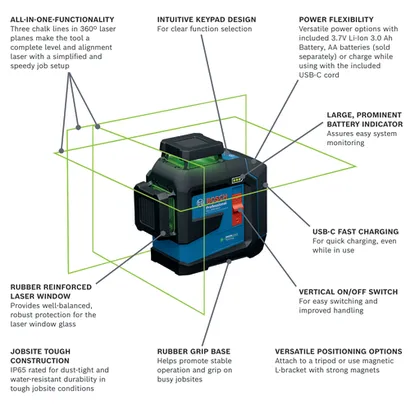
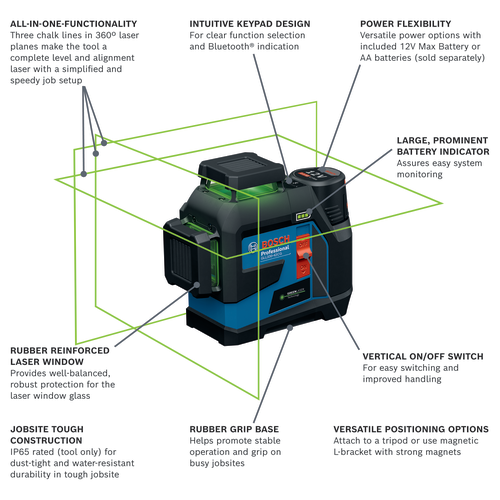
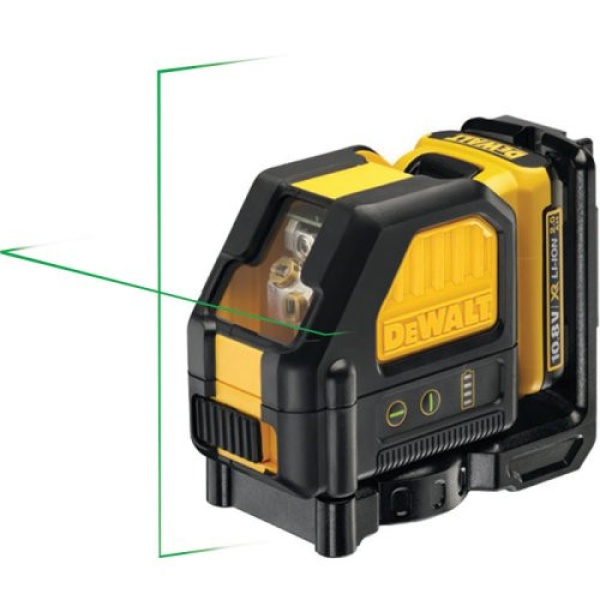
A laser level projects a straight line or plane of light. It uses a laser diode and internal leveling mechanism. Models include line lasers, dot lasers, and rotary lasers for wide coverage. Professionals use them for tile layout, cabinetry, framing, and long runs where a precise reference is needed.
What is a chalk line?
A chalk line is a simple tool that snaps a visible chalk mark between two points. It consists of a reel, string, and colored chalk powder. You pull the string tight, snap it, and get a straight line on surfaces. It has been a go-to for carpenters, roofers, and DIYers for generations.
Key differences: laser level vs chalk line
Laser level vs chalk line differs in power, cost, setup, and durability. Lasers give continuous visible lines without touching the surface. Chalk lines give a fleeting visible mark that can fade or be brushed away. Lasers work better indoors and in controlled light. Chalk lines work in dusty, dirty, or outdoor conditions where lasers may be less visible or require a receiver.
- Accuracy
Lasers typically offer millimeter-level accuracy over long distances. Chalk lines are accurate for short runs but depend on layout and snap technique. - Visibility
Laser lines are easier to see indoors. Chalk lines show up on rough or absorbent surfaces. - Speed
Chalk lines are fast for quick layout. Lasers save time for repetitive, precise tasks.
Source: boschtools.com
Use cases and best applications
Choosing between laser level vs chalk line often depends on the task.
- Interior finishing
Use a laser level for cabinets, drop ceilings, and tile. The repeatable line makes alignment fast. - Framing and rough carpentry
Chalk line works well for wall layout, rafter alignment, and roof chalking. - Long runs and site surveys
Rotary lasers handle long distances on job sites when paired with a receiver. - Quick one-off marks
Chalk line is ideal when you need a simple straight guide and won’t return to the mark.
Personal note: I once used a chalk line on wet siding and lost the mark halfway through installation. After that I started using a laser plus chalk backup for exterior work.

Source: amazon.com
PAA-style questions
Is a laser level better than a chalk line for tile?
A laser level is better for tile because it gives a continuous, precise line and helps maintain consistent grout joints across the field.
Can chalk lines be used on painted surfaces?
Yes, chalk lines work on painted surfaces, but the mark may be faint or difficult to remove cleanly on fresh paint.
Do lasers work outdoors?
Lasers work outdoors if you use a high-output rotary laser and a receiver. Direct sunlight reduces visibility of standard line lasers.
Accuracy, range, and setup comparison
Accuracy and range are where laser level vs chalk line diverge most.
- Setup time
Laser levels need calibration, tripod placement, and sometimes power. Chalk lines need two anchor points and a tight snap. - Range
Lasers reach tens to hundreds of feet. Chalk lines are limited by string length, usually 100 feet or less. - Repeatability
Laser lines can be left running and used repeatedly. Chalk lines fade and require re-marking.
From experience, for a 30-foot layout I trust a line laser more. For a 10-foot rough-cut, a chalk line saved me setup time and gave adequate accuracy.
Source: 365equipmentandsupply.com
Pros and cons (side-by-side)
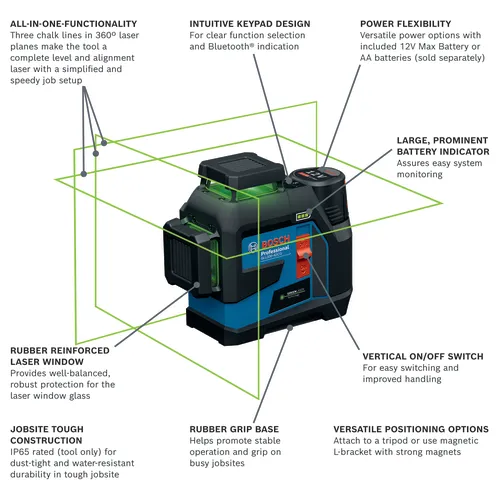
Here is a quick pros and cons view to help decide between laser level vs chalk line.
- Laser level pros
High precision, repeatable, excellent for interior finishes, reduces human error. - Laser level cons
Higher cost, requires batteries or power, visibility issues in bright light, needs protection. - Chalk line pros
Cheap, fast, simple, works on rough and dirty surfaces, no power needed. - Chalk line cons
Marks fade, less precise for long runs, depends on user skill to snap straight.
Source: boschtools.com
Cost, maintenance, and safety
Cost and upkeep often decide which tool you buy.
- Upfront cost
Laser levels range from affordable to professional-grade expensive. Chalk lines are inexpensive. - Maintenance
Lasers need battery care, calibration checks, and lens protection. Chalk lines need refilling and string replacement. - Safety
Lasers are safe at common power levels but avoid direct eye exposure. Chalk dust can be an irritant; use low-dust chalk or a mask if you’re sensitive.
I once ruined a laser by dropping it on concrete. That taught me to buy a lockable hard case. For chalk lines I buy low-dust chalk and carry spares.
How to choose: decision guide
Follow a brief checklist to pick between laser level vs chalk line.
- Assess precision needs
If you need millimeter accuracy or repeatable lines, choose a laser level. - Consider environment
Bright outdoor sites favor chalk lines or a rotary laser with receiver. - Think about budget
For single-use or occasional jobs, a chalk line is cost-effective. - Evaluate speed vs repeatability
Chalk line is faster once. Laser saves time across repeated checks. - Plan for maintenance
If you want low upkeep, chalk line edges out lasers.
Practical tip: For renovation jobs I carry a small line laser and a chalk line. The laser gives precision for trim, and the chalk line works where power is limited.
Practical tips and common mistakes
Real-world tips from my shop work.
- Test layout twice before cutting or anchoring.
- Use a tripod with a laser to reduce wobble.
- Keep chalk lines taut and anchor securely.
- Avoid relying only on laser batteries; carry spares.
- When working in sunlight, use a laser receiver or switch to chalk lines.
A mistake I made was trusting a laser on uneven ground without re-leveling. Always re-check after moving the device.
Accessories and upgrades that matter
Small gear improves both tools.
- Laser accessories
Tripod, magnetic mounts, target plates, and receivers for outdoor use. - Chalk line accessories
Low-dust chalk, spare string, chalk refills, and chalk line anchors.
Upgrading a cheap laser to a lockable tripod made my setups much faster. A good receiver added outdoor functionality to a mid-range rotary laser.
Environmental and material considerations
Different surfaces and conditions affect performance.
- Rough surfaces
Chalk lines show better on rough wood and masonry. - Reflective or bright surfaces
Laser lines can wash out on shiny surfaces or in sunlight. - Wet conditions
Chalk lines may wash away if wet. Lasers keep projecting but need protection.
Balance these factors to decide between laser level vs chalk line depending on job and material.
Frequently Asked Questions of laser level vs chalk line
Which is more accurate, a laser level or a chalk line?
A laser level is generally more accurate, especially over long distances and for repeatable lines. Chalk lines are accurate for short runs but depend on user technique.
Can a chalk line replace a laser level indoors?
A chalk line can work for simple indoor tasks, but it lacks the precision and continuous reference a laser provides. For finish work, a laser level is usually a better choice.
Are rotary lasers better for outdoor projects?
Yes, rotary lasers with receivers are the best option for outdoor jobs and long-range leveling. Standard line lasers struggle in bright sunlight without a receiver.
How often should I calibrate a laser level?
Calibrate a laser level according to the manufacturer or after any drop or heavy use. A quick check before critical layouts is a good habit.
Is chalk dust harmful?
Chalk dust can irritate the lungs and eyes if inhaled or very dusty. Use low-dust chalk and a mask if you work in enclosed spaces often.
Conclusion
Choosing between laser level vs chalk line comes down to precision needs, environment, and budget. Use a laser for precise, repeatable indoor layouts and a chalk line for quick, low-cost, or rough outdoor tasks. Mix both tools when needed: lasers for finish work and chalk lines for rough layout. Try a small laser and a reliable chalk line in your toolkit to cover most jobs. If you work on more projects, invest in a quality laser and the right accessories. Share your experiences or ask a question below to get tailored advice.