Tool repeatability improves production efficiency by helping workers achieve the same result across repeated operations. Stable tools, fixed setups, clear work instructions, proper maintenance, and regular quality checks reduce defects, rework, setup delays, and wasted material.
Across the United States, manufacturing plants, woodworking shops, metal fabrication businesses, automotive facilities, and professional workshops depend on tools that deliver consistent results. A tool may work well during its first operation but produce different results after several hours of use. Small changes in position, pressure, speed, alignment, or tool condition can affect the final product. These changes can create extra work and raise production costs.
Tool repeatability means getting a similar result when the same tool performs the same task under similar conditions. It applies to hand tools, power tools, machine tools, measuring devices, cutting systems, and production fixtures. A repeatable process helps workers follow a known method instead of making fresh adjustments during every operation.
Production efficiency depends on more than how fast a machine runs. A fast tool that creates defects can cost more than a slower tool that produces good parts on the first attempt. The better goal is to achieve a steady cycle, reduce variation, protect tool condition, and maintain the required quality level.
This guide explains how to improve tool repeatability, identify common sources of variation, build stable setup routines, and measure the effect on production. It also covers maintenance, troubleshooting, safety, and practical ways to track progress without relying on guesswork.
What Tool Repeatability and Production Consistency Mean
Tool repeatability describes how well a tool or tool-based setup produces the same result during repeated work. The operator uses the same tool, method, material conditions, and setup. The results should stay within an acceptable range.
Production consistency describes how steady the complete process remains over time. It includes tool performance, operator actions, material quality, machine settings, and inspection methods. A repeatable tool supports consistency, but the full production process must also remain under control.
These terms are related to accuracy, but they do not mean the same thing. Accuracy describes how close a result is to the intended value. Repeatability describes how closely repeated results agree with one another. A tool can produce very similar results every time and still be set incorrectly.
Repeatability
The same tool produces closely grouped results when used under the same defined conditions.
Reproducibility
The process produces similar results when conditions change, such as when another trained operator performs the same task.
Accuracy
The measured or produced result is close to the intended target.
Production consistency
The complete work process maintains stable output, quality, and operating conditions over time.
Why Repeatability Is Different From Accuracy
Consider a drill press that makes five holes at nearly the same position. If all five holes are slightly outside the required location, the operation is repeatable but not accurate. The setup is stable, yet the reference point needs correction.
Now consider a machine that makes one accurate hole but places the next four holes at different positions. This process may achieve the target once, but it lacks repeatability. Both conditions need attention before the process can deliver dependable production.
Repeatable and accurate
The tool produces similar results close to the required target.
Repeatable but inaccurate
The results stay close together but share the same setup error.
Accurate on average but inconsistent
The average result may meet the target while individual parts vary too much.
Repeatability in Measuring Tools
Calipers, micrometers, torque tools, gauges, and digital measuring devices also need repeatable performance. If a measuring device gives different readings for the same feature, workers may adjust a good process or accept a poor one.
The NIST/SEMATECH Engineering Statistics Handbook covers measurement repeatability, reproducibility, stability, calibration, and uncertainty. These ideas help separate tool variation from errors caused by the inspection method or measuring device. The handbook was published in 2003, so it should be treated as a technical reference rather than a current equipment specification. 【turn762953view1】
Check the measuring device
Confirm that it is suitable for the required measurement range and resolution.
Use the same method
Keep contact points, measuring force, and positioning consistent.
Check calibration status
Follow the required calibration schedule and use suitable reference standards.
How Tool Repeatability Improves Production Efficiency
Repeatable tools make production easier to plan because workers spend less time correcting previous work. A stable setup also reduces the need to measure, adjust, and test every operation from the beginning.
The largest gains often come from preventing small losses that occur throughout a shift. A loose fixture may cause repeated alignment checks. A worn cutting tool may increase finishing time. An inconsistent torque setting may require extra inspection and repair.
When these problems occur across hundreds of parts, the lost time can become significant. Better repeatability helps the production team use labor, materials, and machine capacity more effectively.
Less setup time
Known reference points and fixed settings reduce repeated adjustments when starting a job.
Lower scrap rates
Stable tool positioning and operating conditions help prevent parts that fall outside specifications.
Less rework
Workers spend less time correcting holes, cuts, joints, dimensions, and fastener settings.
Better production planning
A steady process makes cycle times and labor needs easier to estimate.
Improved tool utilization
A clear maintenance and inspection routine helps keep usable tools available when needed.
More predictable output
Production teams can plan around a stable rate of acceptable parts rather than an uncertain number of completed operations.
A Practical Example of Repeatability Savings
Consider a hypothetical US woodworking shop that changes a cutting setup 40 times each month. Its old setup routine takes 18 minutes. A standard fixture, clear reference marks, and a documented setup checklist reduce the time to 12 minutes.
The shop saves 6 minutes per changeover. Across 40 changeovers, that equals 240 minutes, or 4 hours each month. This is a hypothetical calculation, not a measured industry result.
The benefit may grow if the improved setup also reduces test cuts, material waste, and inspection delays. The shop should measure those changes separately rather than assume that every saved setup minute becomes productive machine time.
Old setup time
18 minutes per changeover.
New setup time
12 minutes per changeover.
Monthly changeovers
40 changeovers.
Total time saved
240 minutes, equal to 4 hours per month.
Common Causes of Poor Tool Repeatability
Poor repeatability usually comes from several small problems rather than one major fault. A machine may be sound, but a worn fixture, loose connection, incorrect accessory, or inconsistent work method can change the result.
The first step is to identify where the variation begins. Compare the tool, setup, material, operator method, and measuring system before replacing equipment. This approach helps avoid spending money on a new tool when a simple setup correction may solve the problem.
Tool wear
Blunt blades, worn drill bits, damaged cutting edges, loose bearings, and worn drive parts can change performance.
Poor workholding
Loose clamps, worn jaws, damaged stops, and unstable fixtures allow the workpiece to move.
Incorrect setup
Wrong depth settings, inconsistent tool offsets, poor alignment, and missing reference marks can create repeated errors.
Different feed pressure, handling methods, work positions, and adjustment habits may change the final result.
Material variation
Changes in thickness, hardness, moisture, grain direction, or surface condition can affect the operation.
Poor measurement
An unsuitable gauge, inconsistent contact pressure, or overdue calibration can hide real production problems.
Environmental changes
Temperature, vibration, dust, moisture, and unstable power or air supply may affect certain tools and machines.
How Tool Wear Changes Production Results
Cutting tools lose their original edge as they process material. A worn blade may need more feed force and may leave a rougher surface. A worn drill bit may produce heat, wander from its intended position, or require more time to complete a hole.
Wear does not always create an immediate failure. It can first appear as a gradual change in cycle time, finish quality, vibration, sound, or dimensional results. Tracking these signs helps the team act before defects become common.
The correct replacement point depends on the tool, material, operation, and manufacturer instructions. A single replacement interval should not be applied to every tool.
Watch the output
Look for changes in finish, dimensions, cutting time, and operating force.
Check the tool condition
Inspect edges, attachments, bearings, holders, and other wear points.
Record tool use
Track operating hours, part counts, material types, and replacement dates where useful.
How to Build a Repeatable Tool Setup Process
A repeatable setup process gives every trained operator a clear method for preparing a tool. It replaces memory-based adjustments with fixed references, known settings, and simple checks.
The process should be easy to follow during a normal production shift. It should also make it clear when a tool is ready for use and when the operator must stop and report a problem.
Start with one machine or production task. Record the current setup time, first-part quality, common adjustment points, and main reasons for delay. Use this information to build a better routine.
Step 1: Define the required result
List the important dimensions, finish, position, torque, depth, or other output requirements.
Step 2: Inspect the tool
Check its condition, attachments, power source, guards, and operating controls before setup.
Step 3: Prepare the work area
Remove unnecessary items, organize accessories, and place approved measuring tools within reach.
Step 4: Establish fixed references
Use suitable stops, fences, guides, fixtures, templates, or machine reference points.
Step 5: Set the operating conditions
Follow the approved settings for speed, depth, pressure, feed, or torque.
Step 6: Run a controlled first piece
Produce a test part using the approved safe method and inspect the required features.
Step 7: Record and approve the setup
Document the confirmed settings and obtain the required quality approval before normal production.
Use Fixtures, Jigs, and Reference Stops
Fixtures and jigs help control the position of a workpiece during an operation. A reference stop gives the operator a known starting point. These devices can reduce the need to measure and align each new part by hand.
For example, a woodworking shop can use a fixed fence and stop block to repeat a cut length. A metal shop may use a fixture to hold a part in a known position during drilling or milling. An assembly area may use a locating jig to help place components in the same position.
A fixture must suit the part and operation. A damaged or poorly designed fixture can create a repeated defect. Inspect locating surfaces, clamps, stops, and contact points as part of the setup routine.
Use clear reference points
Make the correct locating surface easy to identify.
Control workpiece movement
Use suitable clamping and support for the material and operation.
Keep fixtures in good condition
Remove debris and check for wear, damage, and loose components.
Verify the first part
Confirm that the fixture produces the required result before releasing the job.
Create Simple Standard Work Instructions
A useful work instruction explains what to check, what to set, and what result to confirm. It should use plain words and show the correct reference points. Pictures can help when two similar settings are easy to confuse.
Keep the instructions close to the work area or within the approved digital work system. Include the tool model or identification number when different tools use different settings. Record revisions so operators do not follow an outdated setup.
Tool identification
Name the approved tool, accessory, fixture, and measuring device.
Setup values
Record the required settings and acceptable limits.
Inspection points
Show which features must pass before production begins.
Problem response
Explain when to stop work, isolate equipment, and contact the responsible person.
How to Measure and Verify Tool Repeatability
Repeatability should be measured with a consistent method. Choose one important output, define the test conditions, and collect results across repeated operations. The results should show both the average value and the amount of variation.
For example, a shop may check the length of ten parts made with the same saw setup. Record each measurement, compare the results with the required tolerance, and look for patterns. Repeat the check at useful points during the production run.
A small range does not automatically prove that the process is good. All measurements could remain close together but fall outside the required specification. The target and acceptable limits must be checked as well.
Choose one output
Select a measurable feature such as cut length, hole position, depth, torque, or surface condition.
Keep test conditions stable
Use the same tool, material type, fixture, and measurement method during a repeatability check.
Collect repeated results
Take a suitable sample based on the process risk, production volume, and quality plan.
Compare the results
Check the average, spread, range, and distance from specification limits.
Repeat under changed conditions
Where needed, compare operators, shifts, material batches, or different approved setups.
Check the Measurement System First
A measurement system can create variation that does not come from the production tool. Different operators may apply different pressure. A part may sit differently in the gauge. A measuring device may also have wear, damage, or calibration problems.
A measurement system analysis can help determine how much variation comes from the gauge and how much comes from the operator or measurement method. A gauge repeatability and reproducibility study, often called a gauge R and R study, is one method used for suitable measurement systems.
Do not use a poor measuring system to make major process decisions. First confirm that the measuring device and method are suitable for the tolerance and feature being checked.
Repeat the same measurement
Check whether the same person and device obtain similar results on the same feature.
Compare operators
Check whether trained operators obtain similar results using the approved method.
Use reference standards
Where suitable, compare the measuring device with a known reference.
Understand Process Capability
Process capability helps show whether a stable process can meet its specification limits. Two common measures are Cp and Cpk. Cp compares the specification width with the process spread, while Cpk also considers how close the process average is to the nearest specification limit.
The basic formulas are Cp = (USL – LSL) / 6s and Cpk = the smaller of (USL – mean) or (mean – LSL), divided by 3s. Here, USL is the upper specification limit, LSL is the lower specification limit, and s represents the estimated process standard deviation.
These values are useful only when the data and process conditions support the analysis. A process should be stable before capability results are used to predict future performance. ASQ also warns that capability estimates depend on sampling and distribution assumptions. 【turn762953view0】
Cp
Shows the relationship between specification width and estimated process spread.
Cpk
Accounts for both process spread and the position of the process average.
Control charts
Help identify changes and unusual patterns over time before capability is assessed.
Production Metrics That Show the Real Improvement
A repeatability improvement should create a measurable benefit. Track a small group of useful production measures before and after changing the tool or setup process. Use the same definitions and time periods so the comparison remains fair.
Do not judge success by machine speed alone. A machine can produce more total parts while also creating more defective parts. Good output, stable quality, and actual production time provide a clearer picture.
First-pass yield
Calculate the number of parts that pass the process without rework divided by the total number processed, then multiply by 100.
Scrap rate
Calculate rejected parts divided by total parts processed, then multiply by 100.
Cycle time
Measure the time needed to complete one defined production cycle.
Changeover time
Measure the time required to move from one production setup to the next using a fixed start and end definition.
Tool downtime
Record the time lost to tool faults, adjustment, inspection, replacement, and maintenance.
Cost per good part
Compare tool, labor, material, maintenance, and rework costs with the number of acceptable parts produced.
Use Overall Equipment Effectiveness
Overall Equipment Effectiveness, or OEE, combines availability, performance, and quality. It helps show how much planned production time becomes useful production of good parts.
The basic formula is OEE = Availability x Performance x Quality. Each factor is expressed as a percentage or decimal. The result shows the combined effect of downtime, reduced speed, and defective output.
A manufacturing team can start by measuring one machine or production cell. Record good output, total output, planned production time, and stop time. The OEE implementation guide recommends starting with a focused production area and collecting detailed loss data before expanding the system. 【turn172398view1】
Availability
The share of planned production time during which the equipment is running.
Performance
How actual production speed compares with the defined ideal cycle time.
Quality
The share of total output that meets the required quality conditions.
Use a Simple Production Comparison
Imagine a hypothetical workshop that processes 1,000 parts in one production period. Before improving its tool setup, 50 parts need to be scrapped or reworked. After a verified improvement, only 20 parts need correction.
The first process has 95% first-pass yield if the remaining 950 parts pass without rework. The improved process has 98% first-pass yield if 980 parts pass on the first attempt.
That is a three-percentage-point improvement in first-pass yield. The team should also check material cost, labor time, and inspection effort to understand the full financial effect.
Before improvement
950 good parts on the first pass out of 1,000, giving a 95% first-pass yield.
After improvement
980 good parts on the first pass out of 1,000, giving a 98% first-pass yield.
Difference
30 additional parts pass without rework in this hypothetical example.
Tool Maintenance and Long-Term Performance
Repeatability depends on keeping tools in a known condition. A tool that performs well after inspection may slowly change as parts wear, accessories become damaged, or connections loosen.
Preventive maintenance helps find these problems before they interrupt production. The maintenance plan should follow the tool manufacturer’s instructions and the demands of the actual operation.
Different tools need different care. A table saw may require blade, fence, alignment, and dust-control checks. A drill press may need checks for spindle condition, table alignment, and workholding. A torque tool may need periodic verification under its required calibration or inspection plan.
Daily checks
Inspect visible damage, attachments, guards, cables, hoses, clamps, and other key parts before use.
Scheduled checks
Follow approved maintenance intervals for cleaning, lubrication, alignment, and adjustment.
Performance checks
Compare actual results with known setup values and quality requirements.
Tool history
Record repairs, faults, replacement parts, inspections, and calibration where applicable.
Replacement planning
Replace damaged or worn components when they can no longer meet the required operating conditions.
Create a Tool Condition Record
A tool condition record gives maintenance staff a clear history of each important tool. It can include the tool identification number, purchase date, service dates, repair details, inspection results, and replacement parts.
This record helps identify repeated faults. For example, if the same tool needs alignment correction after every short production run, the problem may involve a worn holder or fixture rather than operator error.
Use the record to plan maintenance and replacement. Do not rely on a fixed age alone when the tool’s actual condition and service demands provide better information.
Tool identification
Assign a clear number or label to each important tool.
Service history
Record maintenance work, repairs, inspections, and parts used.
Performance history
Link tool condition to defects, setup changes, and production interruptions.
Troubleshooting Inconsistent Tool Performance
When a tool starts producing inconsistent results, stop and identify the source before making repeated adjustments. A quick change may hide the original fault and create a second problem.
Begin with the safest and simplest checks. Confirm the workpiece, accessory, setup, and measurement method. Then inspect the tool and fixture. If the fault involves electrical, mechanical, or other hazardous equipment, use qualified personnel and the required isolation procedures.
Problem: Different dimensions on similar parts
Possible causes include a loose fence, worn stop, unstable workholding, changing material thickness, or an incorrect reference point.
Problem: Rough or changing surface finish
Possible causes include tool wear, unsuitable cutting conditions, vibration, poor alignment, or material differences.
Problem: Longer cycle times
Possible causes include worn accessories, poor feed conditions, repeated adjustments, machine faults, or blocked work areas.
Problem: Different readings from the same part
Possible causes include measuring technique, gauge condition, calibration problems, temperature, or inconsistent contact pressure.
Problem: Setup works for one operator but not another
Possible causes include unclear instructions, inconsistent work methods, poor reference marks, or differences in training.
A Practical Troubleshooting Sequence
First, stop the operation if the output may be unsafe or outside an important specification. Keep affected parts separate until the quality team decides whether they can be accepted or need correction.
Next, check the most recent changes. Look for a new accessory, material batch, operator, fixture adjustment, repair, or machine setting. Compare the current setup with the approved work instruction.
After that, inspect the tool and workholding system. Check for wear, movement, damage, contamination, and loose parts. Verify the measuring device before using its readings to adjust the machine.
Finally, run an approved verification check and record the result. If the variation remains, involve maintenance, engineering, or quality staff. Do not release the process based on one acceptable sample when the problem may return.
Contain the problem
Identify affected parts and prevent uncertain output from moving to the next production stage.
Check recent changes
Review tool changes, setup records, material batches, and operator assignments.
Inspect the equipment
Check the tool, fixture, workholding, and measuring device.
Verify the correction
Use a controlled check and record enough results to support the decision.
Update the process
Revise work instructions or maintenance plans when the root cause is confirmed.
Safety Limits When Improving Tool Efficiency
Production speed must never come before worker safety. A setup method is not an improvement if it encourages workers to remove guards, reach into moving machinery, or perform unsafe adjustments.
OSHA identifies hazards from rotating parts, nip points, flying chips, sparks, and other machine movements. Its machine guarding guidance explains the need for suitable safeguards and protection at the point of operation. Fixed machinery designed for a permanent location must also be securely anchored where required. 【turn172398view2】
Maintenance and servicing can expose workers to unexpected machine movement or stored energy. Employers must establish and use the required energy-control procedures under applicable lockout/tagout rules. Workers should receive the training needed for their assigned tasks.
A quick-change fixture, preset tool, or automated system must retain the safety protection required for the machine. Never defeat an interlock or bypass a guard to reduce setup time.
Keep guards in place
Use the required machine guards and safety devices during normal operation.
Follow energy-control procedures
Use the applicable lockout/tagout process before servicing equipment when required.
Use approved accessories
Confirm that tool attachments and fixtures suit the machine and intended operation.
Train operators
Make sure workers understand the setup, operating limits, emergency controls, and fault-reporting process.
Stop unsafe operations
Remove damaged or unsafe equipment from service until it has been properly inspected and cleared.
When Professional Maintenance Is Needed
Some problems need a qualified technician or maintenance professional. These include damaged electrical components, unusual spindle movement, severe vibration, failed safety devices, and recurring mechanical faults.
Workers should not attempt repairs beyond their training or authorization. Use the manufacturer’s service instructions and the facility’s maintenance procedures. Return the machine to production only after the required checks are complete.
Electrical faults
Have qualified personnel inspect damaged wiring, switches, motors, and electrical controls.
Mechanical damage
Arrange professional inspection for damaged spindles, bearings, shafts, and structural components.
Safety system failures
Do not operate equipment with missing, damaged, or ineffective required safeguards.
Next-Question Gap Map: What Production Teams Should Check
The reviewed reference pages explain measurement systems, process capability, production performance, and machine safety. Their coverage is useful, but each addresses a different part of the problem. A practical shop-floor plan needs to connect these topics into one repeatable workflow.
The following questions are inferred next needs based on the main task. They are not verified search-volume findings. The coverage labels describe only the pages reviewed for this article, not every available resource.
How can a shop separate tool variation from gauge variation?
Reader stage: Before process correction. Basis: Inferred next need. Reviewed coverage: ANSWERED across NIST measurement guidance and ASQ capability guidance, but the combined shop-floor sequence is not fully developed on one reviewed page. Reader benefit: Prevents incorrect machine adjustments. Priority: High. Placement: Measurement verification section.
How should a business measure changeover time?
Reader stage: During process improvement. Basis: Inferred next need. Reviewed coverage: ANSWERED by the OEE implementation guide, which discusses first-good-part, consistent-good-parts, and full-speed definitions. Reader benefit: Makes comparisons fair across production periods. Priority: High. Placement: Production metrics section.
When should Cp and Cpk be used?
Reader stage: After collecting process data. Basis: Inferred next need. Reviewed coverage: ANSWERED by ASQ, with important stability and sampling conditions. Reader benefit: Prevents misleading capability claims. Priority: High. Placement: Measurement section.
How can faster tool changes remain safe?
Reader stage: During setup redesign. Basis: Inferred next need. Reviewed coverage: SHALLOW across the reviewed OSHA and OEE pages because they address safety and changeover as separate topics. Reader benefit: Helps prevent unsafe shortcuts. Priority: High. Placement: Safety section.
How should a business know when to replace a tool?
Reader stage: After process stabilization. Basis: Inferred next need. Reviewed coverage: NOT CHECKED in detail by the selected reference pages. Reader benefit: Supports maintenance planning and cost control. Priority: Medium. Placement: Maintenance section.
Frequently Asked Questions
Q
What is tool repeatability in manufacturing?
Tool repeatability is the ability of a tool or tool-based setup to produce similar results during repeated operations under defined conditions. It helps control variation in dimensions, cuts, holes, torque, and other production features.
Q
What is the difference between tool repeatability and consistency?
Repeatability focuses on how closely repeated tool operations produce the same result. Consistency covers the stability of the wider production process, including tools, materials, operators, fixtures, and inspection methods.
Q
How often should tool repeatability be checked?
The correct frequency depends on tool risk, production volume, tolerance requirements, and the manufacturer’s guidance. Useful checks include the start of a production run, after a tool or accessory change, after maintenance, and whenever output begins to change.
Q
Can a tool be repeatable but still produce defective parts?
Yes. A tool may produce the same incorrect result every time. For example, a fixed stop may be positioned incorrectly but remain stable. Repeatability checks must therefore include a comparison with the required target and specification limits.
Q
Does a faster tool always improve production efficiency?
No. Higher speed may increase output but can also raise defects, tool wear, and maintenance needs. Production efficiency should be judged by good parts, total operating time, rework, scrap, and overall cost rather than speed alone.
Q
What is the best way to improve tool repeatability?
Start by identifying the main source of variation. Then improve workholding, establish fixed reference points, standardize settings, train operators, verify measuring tools, and create a suitable maintenance plan. Test the changes before applying them across the full production process.
✦ Wrapping Up
Conclusion
Tool repeatability is a key part of reliable production. It helps workshops and manufacturing businesses reduce setup delays, prevent defects, limit rework, and make better use of their equipment. The strongest results come from combining stable tools with good fixtures, clear work instructions, reliable measurements, and regular maintenance.
Start with one tool or production task that causes repeated delays or quality problems. Record its current performance, identify the main source of variation, and make one controlled improvement. Check the results against the original production data before changing other work areas.
Remember that production efficiency is not simply about making more parts in less time. It is about producing the required quality with fewer wasted steps, less downtime, and better control of resources. A safe and repeatable process gives the team a stronger base for long-term productivity.
💡 Key Takeaway
Choose one frequently used tool, record its setup time and first-pass quality, inspect its condition, and create a standard setup checklist. Verify the first part, track the next production runs, and compare the results before expanding the method to other tools.
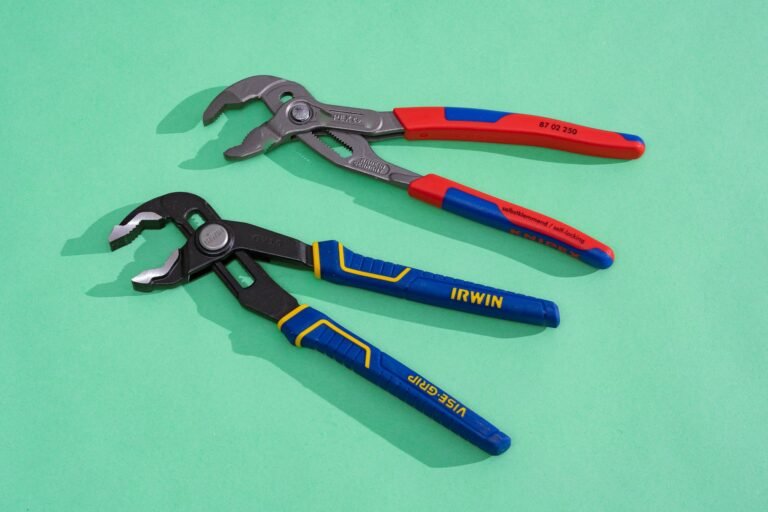
Compare locking pliers vs channel lock pliers to learn which gives better grip, ease and value for DIY or pro work – quick tips and expert picks to choose smart.