Tool vibration isolation reduces repeated motion transferred from equipment to its surroundings or the operator. Shock absorption manages sudden impacts by slowing movement and dissipating energy. The right system uses suitable materials, mount stiffness, damping, and correct installation.
In U.S. garages, construction sites, cabinet shops, and factories, vibrating tools can shake workbenches, damage machine parts, reduce cutting accuracy, and place repeated stress on workers’ hands. A grinder, drill, concrete breaker, or stationary saw can create different types of vibration. Each tool needs a control method that fits its design and its work.
Tool vibration isolation and shock absorption solve related but different problems. Isolation reduces how much repeated movement travels through a machine, handle, or support. Shock absorption controls sudden impacts by allowing controlled movement and converting some mechanical energy into heat. A good design may use rubber mounts, springs, dampers, suspended handles, or a combination of these parts.
The best result starts at the source. A damaged bearing or unbalanced cutting wheel can create more vibration than a mount can safely control. Proper maintenance, correct tool selection, and a well-designed isolation system work together to improve machine stability and reduce operator exposure.
Source: snapklik.com
What Tool Vibration Isolation and Shock Absorption Mean
Tool vibration isolation is a method of reducing the movement that passes from one part of a machine to another. An isolator sits between the vibrating equipment and its support. It creates a flexible connection that limits the transfer of repeated mechanical forces.
For example, a bench grinder can send vibration through its feet and into a workbench. Proper isolation mounts reduce this transfer. They can also help limit noise caused by a vibrating table or floor.
Shock absorption has a different role. It manages a short and sudden force, such as a tool striking a hard surface or a machine receiving an impact during transport. A shock absorber allows controlled movement and reduces the force of the impact over time.
Both methods can protect tools, machine frames, nearby equipment, and workers. However, neither method removes every source of vibration. The result depends on the source, the material, the mount design, and the way the tool is used.
Source: hoanisolator.com
Vibration isolation
Limits the transfer of repeated motion from a machine to its base, floor, handle, or nearby equipment.
Shock absorption
Reduces the effect of sudden impacts by controlling movement and dissipating energy.
Vibration damping
Reduces the amount of motion by converting some vibration energy into heat within a material or mechanical system.
Resilient mounting
Uses a flexible material or spring between two connected parts to reduce direct mechanical contact.
Why the Difference Matters
A spring can store energy and release it again. This makes it useful for supporting equipment, but it may allow unwanted bouncing. A damper reduces that movement by dissipating energy. A rubber mount may provide both flexibility and damping, depending on its design.
Think of a spring as a cushion that can bounce back. A damper acts more like a controlled brake. Some industrial systems combine both so the equipment can move without continuing to oscillate.
Repeated movement
Needs an isolation system designed around the vibration frequency and equipment load.
Sudden impact
Needs enough damping, movement allowance, and impact capacity to control the shock.
How Vibration and Shock Travel Through a Tool
Vibration starts when a moving part creates an unbalanced or repeated force. A rotating motor, cutting wheel, drill bit, hammer mechanism, or reciprocating piston can all create these forces. The force then moves through the tool body and reaches connected parts.
A rigid connection gives vibration a direct path. Metal feet bolted to a workbench can transfer motion into the bench. A rigid handle can pass tool movement straight into the operator’s hands.
A flexible mount changes this path. It allows a small amount of movement between connected parts. When the mount is selected correctly, less vibration reaches the support or operator.
Shock follows a related path but acts over a shorter time. When a tool hits a hard object, the force can travel through its frame, handle, and mounting points. A suitable shock absorber controls the movement and reduces the peak load passed to other parts.
Source: hoanisolator.com
Unbalanced rotating parts
A damaged wheel, bent shaft, or poorly fitted accessory can create repeated forces during rotation.
Impact mechanisms
Hammer drills, breakers, and chipping tools create repeated impact forces that can reach the handle and operator.
Loose machine parts
Worn bearings, loose bolts, and damaged supports can increase movement and create extra noise.
Structural transfer
A rigid workbench, floor, frame, or machine base can carry vibration beyond the original tool.
Natural Frequency and Resonance
Every mounted system has a natural frequency. This is the rate at which it tends to move after a disturbance. The natural frequency depends on the supported mass and the stiffness of the isolator.
Resonance happens when a repeated force is close to the natural frequency of the system. At this point, movement can grow instead of falling. A soft rubber mount is not always better because it may allow too much movement or create an unwanted resonance.
The ASHRAE Handbook explains that vibration transmissibility depends on the disturbing frequency and the natural frequency of the isolation system. It also warns that poor isolator selection can increase transmitted force.
Natural frequency
The frequency at which the supported equipment and isolator tend to move freely.
Disturbing frequency
The frequency created by the operating tool or machine.
Resonance
A condition where the two frequencies are close enough to cause increased movement.
Common Types of Tool Vibration Isolators and Shock Absorbers
The main types of vibration control systems use rubber, metal springs, wire rope, air, or special damping materials. Each type has a different response to load, frequency, impact, and the surrounding environment.
A small workshop machine may need simple rubber feet. A large industrial machine may need engineered spring mounts. A portable tool used in a harsh environment may need a compact wire rope system or an internal shock-control design.
The choice should depend on measured or documented operating conditions. Material names alone do not prove that a mount will work well. Its shape, hardness, stiffness, damping, load rating, and installation also matter.
Source: hoanisolator.com
Rubber and elastomer mounts
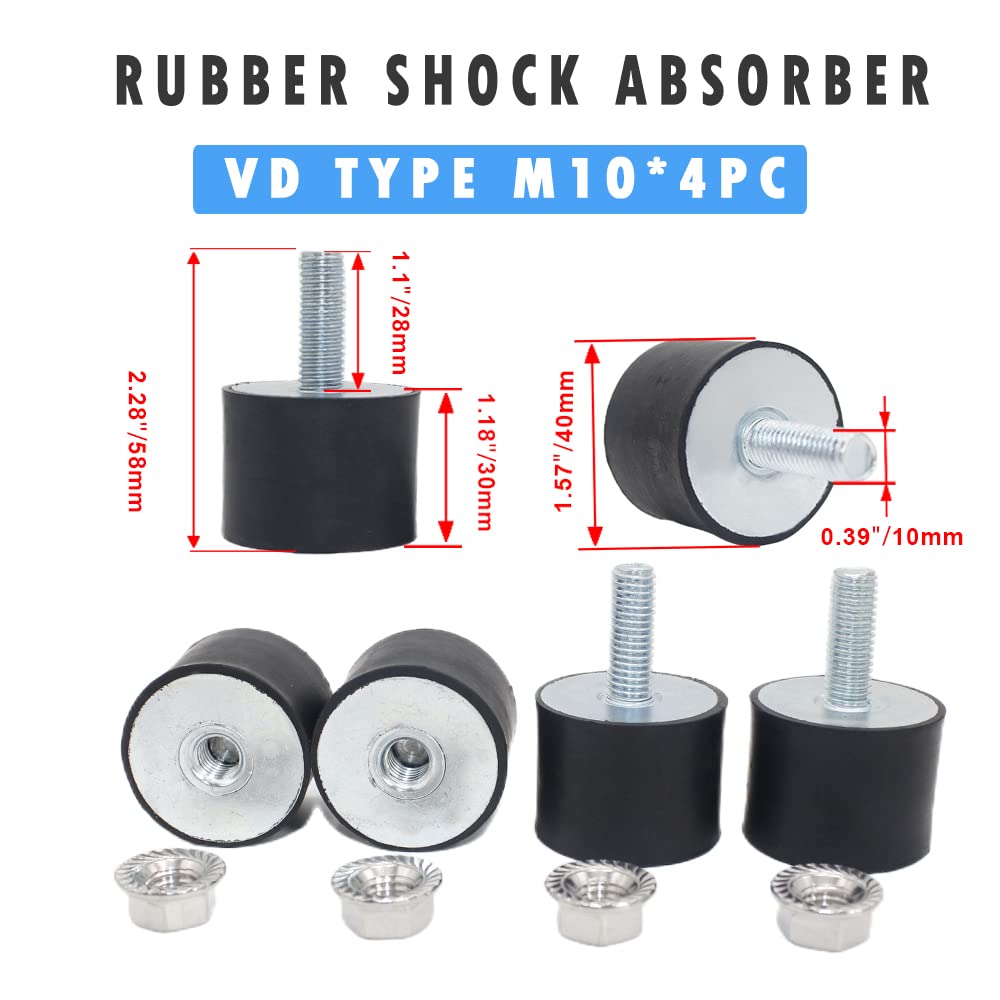
These mounts provide flexibility and some damping. They are common under small machines, motors, compressors, and workshop equipment. Their performance can change with load, heat, oil, chemicals, and age.
Steel spring isolators
Springs support heavier equipment and can provide greater movement than compact rubber mounts. They need correct sizing and may need a separate damper or restraint to control bouncing and sudden movement.
Wire rope isolators
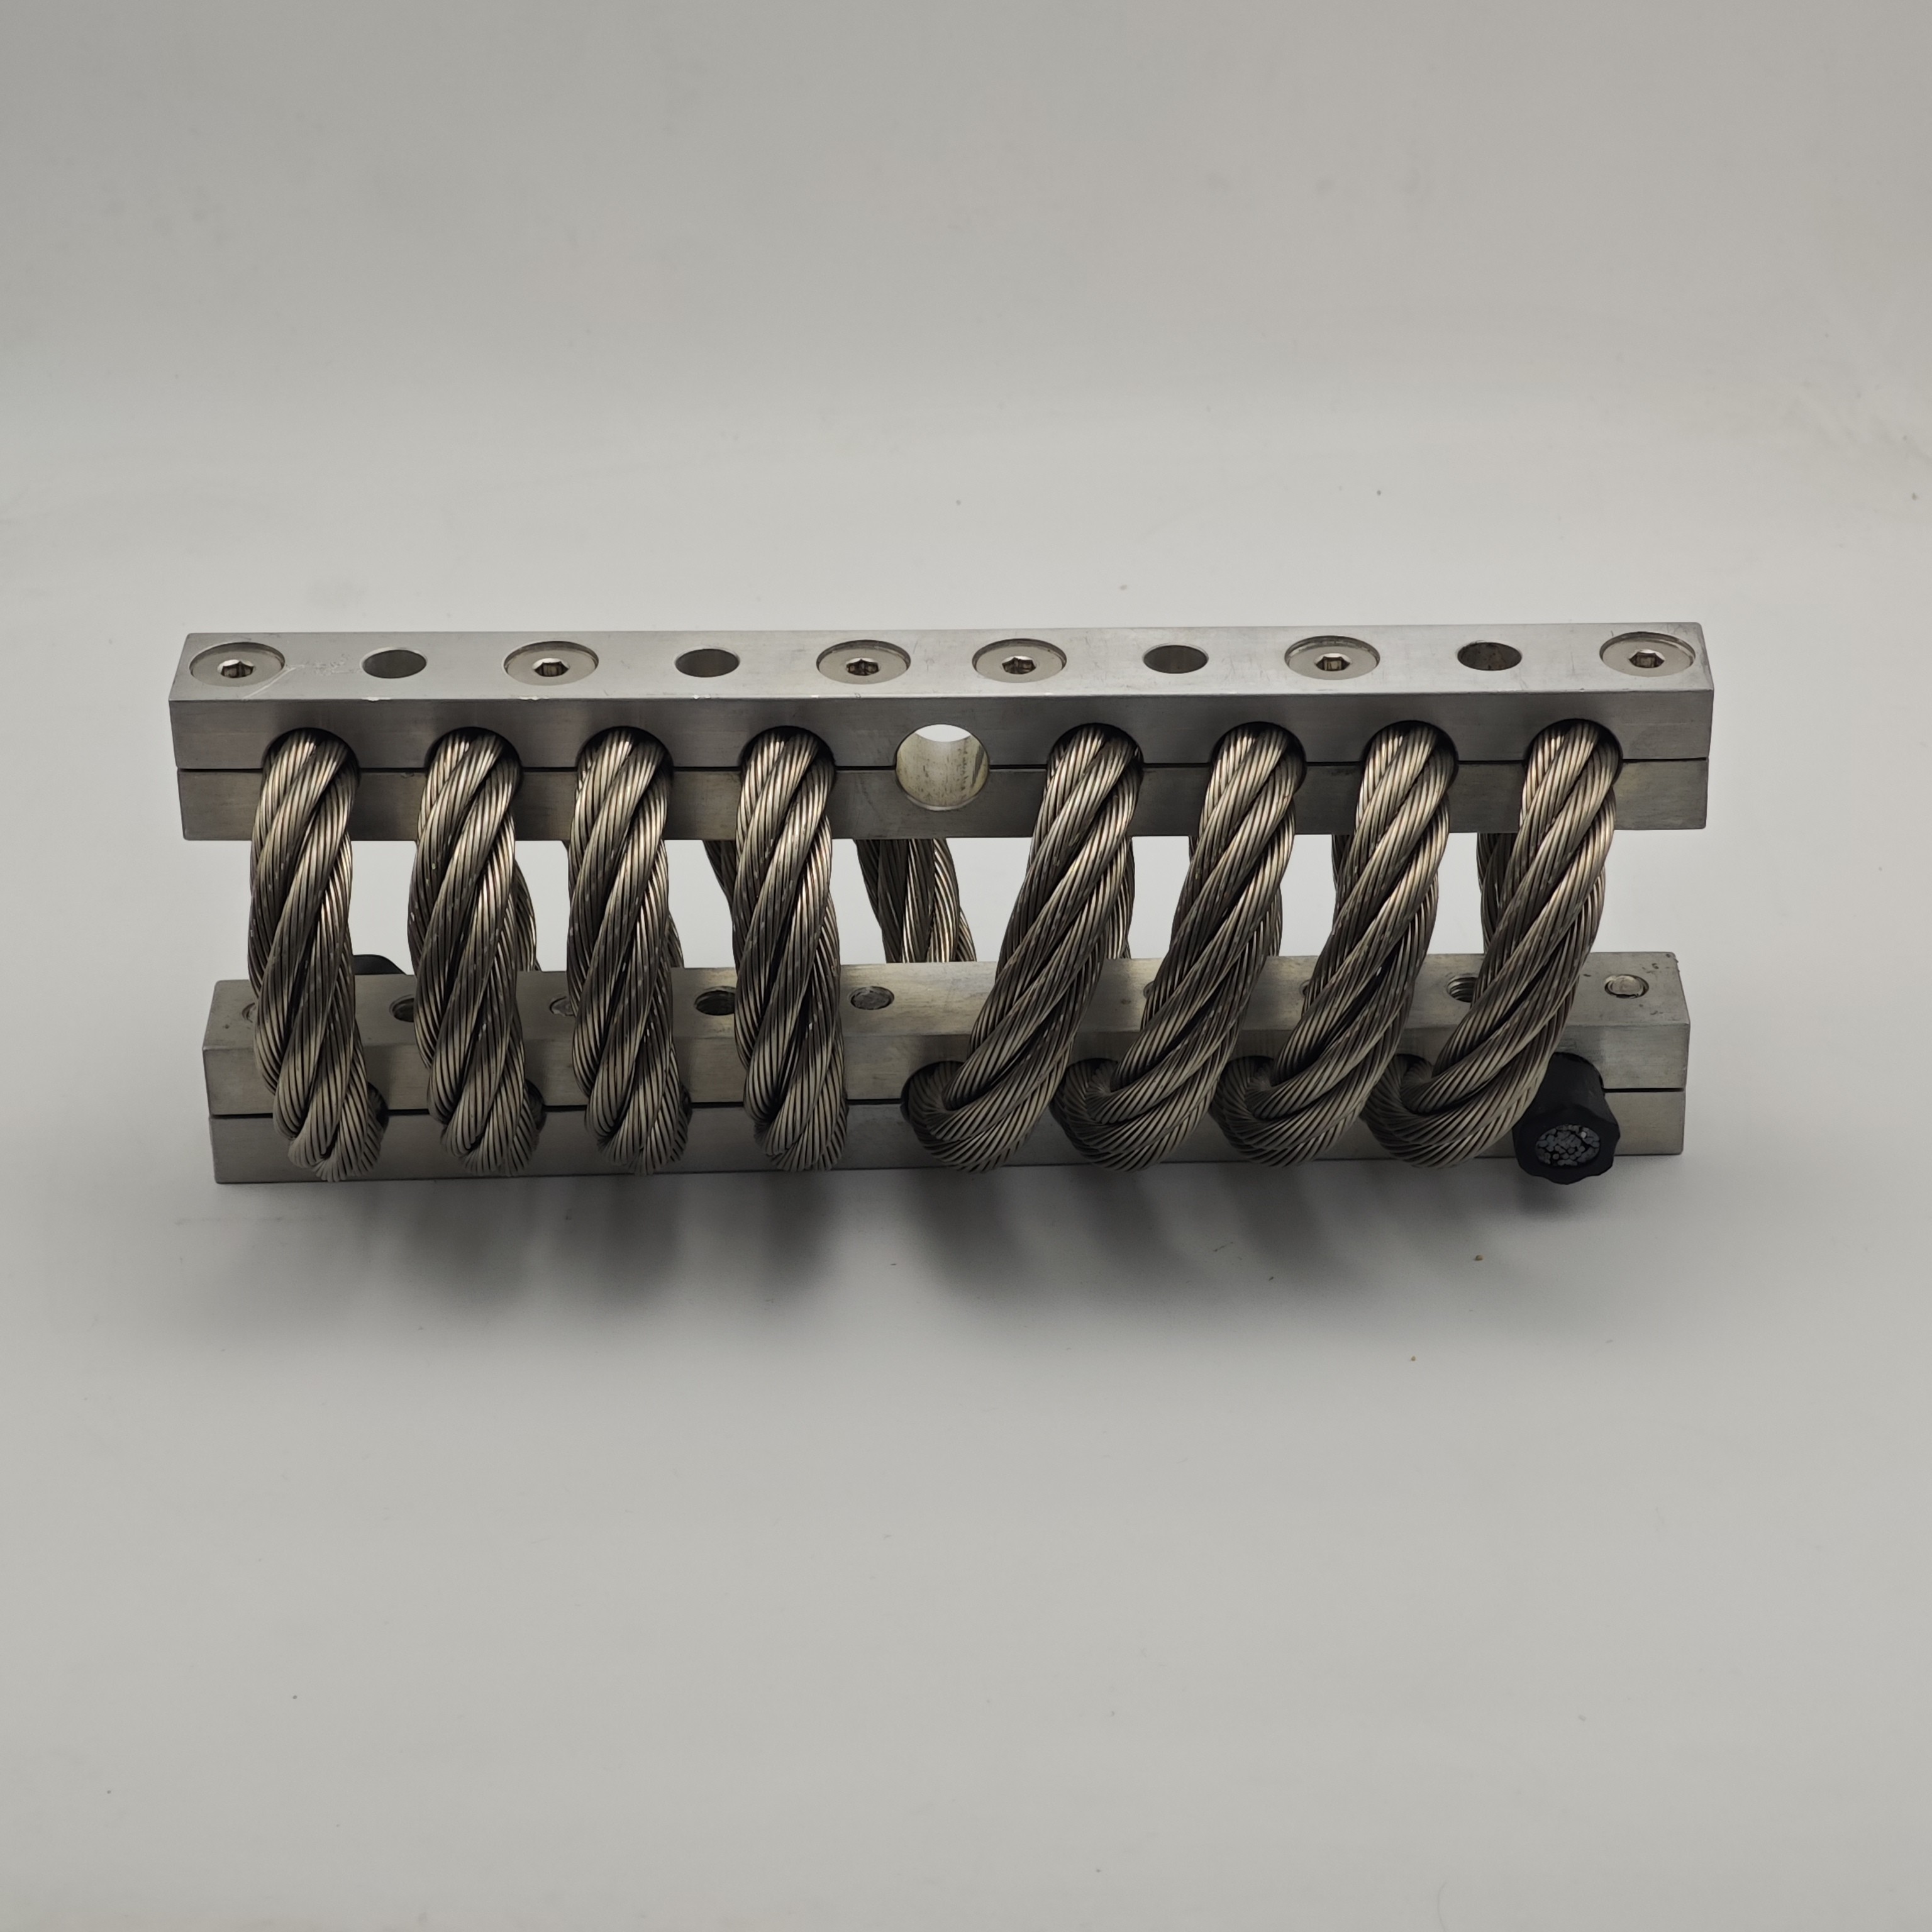
These use metal cable formed into loops between metal plates. Their design can provide shock and vibration protection in several directions. They are used where equipment must handle movement, impact, or harsh conditions.
Viscoelastic damping materials
These materials reduce the ringing of machine panels and housings. They can help control vibration in guards, covers, and sheet metal parts, but they do not automatically isolate an entire machine from its base.
Air mounts
Air-supported systems can provide adjustable support for sensitive equipment. They are useful in some precision applications but need suitable air supply, control, and maintenance.
Suspended handles and internal dampers
Some handheld tools use spring systems, counterweights, or isolated handles to reduce vibration at the grip. These systems must be designed for the tool because changes can affect control and performance.
Choosing Between Rubber, Springs, and Wire Rope
Rubber is often a practical choice for compact machines that need simple isolation and moderate damping. Springs can suit heavier equipment that needs a lower natural frequency. Wire rope designs can be useful when shock loads and movement from more than one direction are important.
No type is best for every tool. A spring that works well under a steady load may allow too much movement during an impact. A rubber mount may be too stiff for a low-frequency machine. A wire rope mount may cost more than a simple workshop setup needs.
Check the mount manufacturer’s technical data before buying. The stated load range, movement limits, temperature range, and permitted loading direction should match the real application.
For small stationary tools
Consider approved rubber or elastomer mounts when their load and vibration ratings match the machine.
For heavy machinery
Consider engineered spring systems with suitable damping and movement restraints.
For shock-heavy equipment
Consider a shock-rated wire rope or combined isolation system designed for the expected impact.
How to Choose the Right Isolator or Damper
Choose an isolator by matching its working range to the machine’s actual load, operating frequency, movement, and environment. Do not choose a mount only because it looks thick or has a high maximum weight rating.
Start with the tool manual and the mount manufacturer’s technical sheet. Find the machine weight, the number of mounting points, the location of its center of gravity, and the main vibration source. For rotating machines, operating speed can help identify the main disturbing frequency.
The mount must support the real load at each mounting point. It also needs enough movement to work without becoming unstable, bottoming out, or allowing the machine to shift during operation.
Source: hoanisolator.com
Equipment weight
Record the full operating weight, including attachments, workpieces, and other parts supported by the mounts.
Load per mount
Estimate the load carried by each mounting point. Do not assume equal loading if the center of gravity is offset.
Operating frequency
Identify the main vibration frequency or operating speed. A mount must be suitable for the frequency that needs control.
Shock force and travel
Check the expected impact, permitted movement, and available stroke. The mount must not bottom out during normal operation.
Mount stiffness
Match stiffness to the equipment mass and vibration frequency. Excessive stiffness may transfer vibration, while insufficient stiffness may create instability.
Environmental conditions
Check heat, cold, moisture, oil, cleaning chemicals, dust, and outdoor exposure before choosing a material.
Mount direction
Confirm whether the mount is designed for compression, shear, tension, or more than one direction of loading.
Safety and movement limits
Check whether the system needs travel stops, safety restraints, guards, or other parts to prevent excessive movement.
A Simple Mount Load Calculation
Consider a hypothetical machine that weighs 60 pounds and sits on four mounts. If the load is evenly shared, each mount carries about 15 pounds at rest. This is a starting estimate, not a final engineering design.
The actual load may differ because the motor, workpiece, and other heavy parts can shift the center of gravity. Each mount must be checked against its real working load and permitted deflection. The maximum load rating alone is not enough.
For example, a mount rated for 50 pounds may not work well if the actual load is too low to compress it enough. A mount that is overloaded may deform, fail, or lose its intended isolation performance.
Hypothetical calculation
60 pounds divided by four evenly loaded mounts equals 15 pounds per mount.
Final selection
Check corner loads, stiffness, frequency, movement, and the manufacturer’s load-deflection data before approval.
Understand Vibration Transmissibility
Transmissibility describes how much vibration passes through an isolation system. A lower value means less vibration reaches the supported structure. Isolation efficiency describes the share that is not transmitted.
For a simple example, if a measured vibration input is 100 units and the transmitted amount is 20 units, transmissibility is 20 percent. The corresponding isolation efficiency is 80 percent under those same measurement conditions.
This is only an example. Actual performance changes with frequency, load, mount design, installation, and measurement location. A product claim such as 90 percent isolation should not be treated as a guarantee for every machine or operating condition.
Low transmissibility
Means less vibration passes through the mount under the tested conditions.
High transmissibility
Means more vibration reaches the supporting structure.
How to Install and Check an Isolation System
Correct installation is just as important as choosing the right mount. A suitable isolator can fail to reduce vibration if it is installed under the wrong load or connected to a rigid part that creates a second path for vibration.
Before starting, read the tool and mount manuals. Turn off and disconnect the equipment. Follow the required lockout procedure when working on industrial machinery, and use proper lifting equipment for heavy machines.
Never remove guards, safety restraints, or required supports to make room for an isolator. If the machine needs a structural change, have the work reviewed by a qualified engineer or the equipment manufacturer.
Source: walmart.com
Step 1: Inspect the equipment
Check bearings, shafts, wheels, cutting parts, bolts, and the machine base. Repair damaged parts before adding isolation mounts.
Step 2: Confirm the load
Record the equipment weight and estimate the load at each mounting point. Check the center of gravity and support layout.
Step 3: Prepare the support
Make sure the floor, bench, or frame is sound, level, and strong enough to carry the equipment and its operating forces.
Step 4: Position the mounts
Place mounts in the approved locations. Use the manufacturer’s layout and loading direction. Do not move mounts without checking the effect on stability.
Step 5: Install and secure
Follow the specified fastener size, torque, orientation, and compression limits. Avoid direct metal contact that bypasses the isolator.
Step 6: Check connected parts
Inspect pipes, cables, ducts, hoses, guards, and nearby frames. A rigid connection can create a path that carries vibration around the mount.
Step 7: Test under normal conditions
Start with a safe idle test. Then test the machine under its normal working load while checking movement, noise, stability, and mount position.
Signs That the System Is Working
A successful system should reduce unwanted movement without making the tool unstable. The machine should stay in its approved position, and the mounts should remain within their working movement limits.
For a better comparison, measure vibration before and after installation at the same locations. Keep the tool speed, workpiece, load, and operating method as consistent as possible. A suitable vibration meter or accelerometer can provide better evidence than judging movement by touch alone.
A simple workshop check can show whether the setup has changed. It is not a formal occupational exposure assessment or proof of compliance with a safety standard. A qualified vibration specialist should perform detailed measurements when the risk or accuracy requirement is high.
Stable operation
The machine does not rock, slide, or move beyond its approved limits.
No bottoming out
The mounts do not reach their travel limits during normal use.
Reduced transmitted movement
The support structure shows less vibration under comparable test conditions.
Secure connections
Fasteners remain tight and no rigid bypass or unexpected contact is present.
What to Do When Isolation Does Not Work
Stop and inspect the setup if the machine shakes more after installation. The mounts may be too soft, too stiff, overloaded, or poorly positioned. Resonance may also be increasing movement.
Check for uneven loading, a weak support frame, loose fasteners, or rigid connections around the isolator. Do not keep changing mount thickness or adding rubber layers without finding the cause.
If the machine moves in an unsafe way, stop using it until the problem is corrected. Ask the manufacturer or a qualified vibration engineer to review the mount selection and installation.
More vibration after installation
Check resonance, mount stiffness, loading, and rigid connections.
Machine rocking
Check the floor, mount layout, center of gravity, and uneven load.
Mount damage
Check overload, excessive movement, chemical exposure, and incorrect loading direction.
Reducing Vibration Exposure at the Operator’s Hands
Handheld power tools need a different approach from stationary machines. A rubber foot under a bench machine may reduce vibration reaching the floor, but it will not protect a worker holding a vibrating drill or grinder.
The main goal is to reduce vibration at its source and limit the amount that reaches the hands. OSHA’s woodworking guidance identifies vibration isolators and damping techniques as engineering controls. It also highlights maintenance, task rotation, training, and correct tool use.
NIOSH technical research describes three main ways to control vibration in handheld tools. These include reducing the forces that create vibration, making the tool less sensitive to those forces, and isolating the tool body from the grip surfaces.
Some tools use counterweights, balanced moving parts, suspended handles, or internal spring systems. These features should be designed and approved for the specific tool. Adding an unapproved handle or changing the grip system can affect control and safety.
Choose a low-vibration tool
Compare vibration information for tools that can perform the same task. Check the tool’s manual and the conditions used for its vibration rating.
Maintain moving parts
Replace worn bearings, damaged wheels, bent shafts, and poor accessories. Keep blades and cutting edges sharp.
Use the correct accessory
A poorly fitted or unbalanced wheel, bit, blade, or pad can increase vibration.
Use a light but safe grip
Hold the tool firmly enough to control it, but avoid unnecessary force. Let the tool do the work.
Support heavy tools
Use suitable stands, jigs, or supports where permitted. This can reduce the force needed to hold the tool.
Limit exposure time
Plan work so operators do not spend unnecessary time on vibrating tools. Rotate tasks when suitable and track actual tool operating time.
Keep hands warm and dry
Cold and wet hands can increase problems with blood flow. Suitable clothing and normal protective gloves can help maintain warmth.
Can Anti-Vibration Gloves Protect Workers?
Anti-vibration gloves are not a replacement for low-vibration tools, maintenance, and exposure control. Some designs may reduce certain vibration frequencies, but their performance depends on the glove, the tool, and the frequency being transmitted.
NIOSH guidance warns that gloves alone should not be relied on to reduce harmful hand vibration. Some glove materials can reduce tactile feedback or make it harder to hold a tool safely. Select hand protection based on the actual task and the manufacturer’s guidance.
Workers should report repeated tingling, numbness, pain, finger whitening in cold conditions, or loss of grip strength. These may be early signs of hand-arm vibration syndrome, also known as HAVS. Reduce further exposure and seek medical advice from a qualified health professional.
Do not rely on gloves alone
Use engineering controls and work practices to reduce vibration before relying on personal protective equipment.
Watch for early symptoms
Tingling, numbness, cold-related finger whitening, and reduced grip strength need prompt attention.
Get medical advice
A healthcare professional familiar with occupational vibration should assess persistent or repeated symptoms.
Common Mistakes and Troubleshooting Problems
Many vibration problems continue because users treat the mount as the only part that matters. A mount cannot correct every source of mechanical imbalance or poor machine design. The complete tool, support, and work process must be checked.
A second mistake is using the softest available material. Excessive flexibility can allow too much movement, affect cutting accuracy, and create resonance. The right mount is the one that meets the required load and frequency conditions while keeping the machine stable.
A third mistake is ignoring maintenance. Rubber can age, springs can weaken, and fasteners can loosen. Oil, heat, dust, and repeated impacts can also affect the life of an isolation system.
Adding random rubber pads
Why it fails: The pads may have the wrong stiffness or load rating. Better action: Check the equipment weight and use a mount designed for the application.
Ignoring an unbalanced accessory
Why it fails: The tool keeps producing a large vibration force. Better action: Inspect the wheel, bit, blade, spindle, and bearings before changing mounts.
Overloading a mount
Why it fails: The mount may compress too far or reach its movement limit. Better action: Calculate the load at each support point and check its rated working range.
Using an isolator without damping
Why it fails: The equipment may continue to bounce after an impact. Better action: Check whether the application needs a combined spring and damper design.
Leaving rigid connections in place
Why it fails: Bolts, pipes, or frames can bypass the flexible mount. Better action: Check all mechanical connections while preserving required safety and service connections.
Ignoring unusual vibration
Why it fails: A damaged part may cause further wear or unsafe operation. Better action: Stop the tool and inspect it according to the manufacturer’s instructions.
When Professional Help Is Needed
Get help from a qualified engineer when a machine has high impact loads, a large or offset center of gravity, unusual movement, or strict alignment needs. Precision equipment may also need a specialist to check its natural frequency and vibration response.
A qualified occupational health and safety professional or industrial hygienist can help assess worker exposure to hand-arm vibration. This is especially important when several tools are used across a shift or when symptoms have been reported.
Do not modify a tool’s internal spring, handle, guard, or motor support without approval from the manufacturer or a qualified designer. Such changes can affect tool control, electrical safety, and mechanical strength.
Mechanical warning signs
Severe shaking, repeated mount failure, cracked frames, loose supports, or sudden changes in machine movement.
Precision problems
Loss of alignment, poor cutting accuracy, or unwanted movement in measurement equipment.
Health warning signs
Repeated tingling, numbness, finger blanching, pain, or reduced hand strength.
Frequently Asked Questions
Q
What is the difference between vibration isolation and shock absorption?
Vibration isolation reduces the transfer of repeated movement from one part of a machine to another. Shock absorption controls sudden impacts by slowing movement and dissipating energy. Some rubber mounts and combined spring-damper systems perform both functions.
Q
Do rubber mounts stop all tool vibration?
No. Rubber mounts can reduce vibration transfer, but they cannot remove every source of movement. Their performance depends on the machine’s weight, operating frequency, mount stiffness, and installation. A damaged bearing or unbalanced wheel must be repaired at the source.
Q
Can soft vibration mounts make a machine shake more?
Yes. A mount with unsuitable stiffness can create resonance or allow excessive movement. The machine may shake more if its operating frequency is close to the isolation system’s natural frequency. Check the load and mount specifications before replacing the supports.
Q
Are anti-vibration gloves enough to prevent HAVS?
No. Gloves should not be the main control for hand-arm vibration. Some designs may reduce certain frequencies, but their performance is limited and tool-specific. Low-vibration equipment, maintenance, suitable work practices, and exposure control are more important.
Q
How often should vibration isolators be replaced?
There is no single replacement period for every mount. Follow the equipment and mount manufacturer’s maintenance instructions. Inspect mounts for cracks, hardening, corrosion, deformation, loose fasteners, and signs of bottoming out. Replace damaged parts before they affect safe operation.
✦ Wrapping Up
Conclusion
Tool vibration isolation and shock absorption help control unwanted movement, protect machine parts, and improve working conditions. Rubber mounts, springs, wire rope systems, dampers, and suspended handles each have a useful role. Their performance depends on correct design and proper use.
Start by finding the source of the vibration. Check the tool, moving parts, accessories, machine weight, operating speed, and support structure. Then select an isolation or damping system that matches the real working conditions.
For handheld tools, choose low-vibration designs, keep equipment in good repair, use a safe grip, and reduce unnecessary exposure. Pay attention to early hand and finger symptoms. Better vibration control begins with sound equipment and careful work practices, not simply with a softer mount.
💡 Key Takeaway
Before buying or installing an isolator, record the machine weight, load at each mounting point, operating frequency, impact conditions, and environmental limits. Match these details to the manufacturer’s technical data, install the system correctly, and compare vibration under consistent operating conditions.