A tool accessory is compatible only when its mount, size, speed rating, material rating, guard, and operating mode match the exact tool and task. If performance drops or vibration starts, stop and check the accessory, tool, and workpiece in a safe order.
In a U.S. home shop, garage, or worksite, one power tool may handle many jobs by using different blades, bits, wheels, pads, and other attachments. The right accessory can make a clean cut or a smooth finish. The wrong one can waste time, damage the tool, or fail under load.
Do not judge fit by brand name or by whether an accessory slides onto the tool. Check the exact model manual, the accessory label, and the maker’s approved use. This guide explains how to check fit, match performance, install an accessory, and trace common faults without claiming hands-on tests.
What Tool Accessory Compatibility Really Means
Compatibility has several parts. The accessory must attach to the tool in the way the maker designed. Its size must fit the tool’s limits and guard. Its rated speed and work type must also suit the job.
An accessory can appear to fit and still be unsafe. A wheel may thread onto a grinder but have the wrong size or speed rating. A bit may enter a chuck but fail to lock. A blade may fit an arbor yet leave too little guard clearance.
Performance also depends on the work. A sharp blade for wood may cut metal poorly. A masonry bit may work in a hammer drill but not suit a plain drill for the same task. A sanding disc with the wrong hole pattern may block dust flow or fail to sit flat.
Physical fit
The shank, arbor, thread, collet, pad, or blade holder must match the tool.
Rated limits
Diameter, length, thickness, speed, and load limits must stay within the tool and accessory ratings.
Job fit
The accessory must be made for the material, cut, finish, and tool mode.
Safe control
The guard, clamp, retainer, and work support must still work as designed.
Start With the Exact Tool Model
Find the model number on the tool label. Then open the manual for that exact model and region. Check the accessory section, not just the product photo or the name on the box.
Record the tool’s mount type, allowed accessory size, maximum speed, and any limits on use. If the manual lists a part number or approved accessory family, use that as the first choice. If the data is missing, ask the tool maker before fitting an uncertain part.
Check the Mount and Dimensions Before Use
The mounting system is the first physical check. Match the accessory to the tool’s holder, then check all key dimensions. Do not force a part that almost fits.
Common drill bits use round or hex shanks held by a chuck or quick-change holder. Rotary hammers use named systems such as SDS-plus or SDS-max. These systems are not direct substitutes for one another.
Saws and grinders use other fit rules. Circular saw blades need the right diameter and arbor bore. Jigsaw blades need the shank style accepted by the clamp. Grinder wheels may use a center hole, a threaded hub, or a maker-specific mounting system.
Drills and drivers
Check shank shape, shank size, chuck capacity, and whether the bit is rated for impact use when used in an impact driver.
Rotary hammers
Match SDS-plus, SDS-max, or another holder exactly. Use an adapter only when both tool and adapter makers approve it for that mode.
Circular and miter saws
Match blade diameter, arbor bore, blade thickness, kerf, rotation direction, and the saw’s stated limits.
Grinders
Check spindle thread or bore, wheel diameter, thickness, flange type, and guard compatibility.
Routers
Use the exact collet size for the bit shank. Similar inch and metric sizes are not interchangeable just because they look close.
Match pad size, hole pattern, hook-and-loop or adhesive type, and the tool’s blade interface.
Why Adapters Need Extra Care
An adapter changes the connection. It does not prove that the accessory is safe for the tool. It may affect balance, reach, speed, impact transfer, or guard clearance.
Use only an adapter named or approved by the tool or accessory maker. Check whether it is allowed in drilling, hammering, cutting, or grinding mode. Never stack adapters or add loose sleeves, washers, or homemade spacers to make a part fit.
Match Speed, Size, Guard, and Operating Mode
Check the accessory’s maximum rated speed against the tool’s maximum no-load speed. For a wheel or other high-speed rotating part, the accessory rating must be at least as high as the tool speed unless the maker gives a specific approved setup with a lower fixed limit.
Do not assume that a low speed dial makes an under-rated wheel safe. A dial can be moved by mistake, and some tools change speed under load. Use the tool and accessory makers’ limits, not a guess.
Size matters as much as speed. A larger blade or wheel may not fit under the guard. A thick wheel may not fit the flange or guard. A long bit may exceed the tool’s stated capacity or create too much side load.
Mode matters too. A drill bit made for rotation may not be approved for hammer action. A cutting wheel is not a grinding wheel. A sanding pad is not a backing plate for an unrelated disc.
Compare speed ratings
Read the maximum RPM on the tool and accessory. Never exceed the lower permitted limit.
Keep the guard
The correct guard must cover and support the accessory as the tool maker requires. Never remove or alter it to gain clearance.
Use the right mode
Select drill, hammer, impact, cut, grind, or sand mode only when the accessory is approved for it.
Abrasive Wheels Need a Strict Check
Abrasive wheels can break if they are damaged, mounted badly, or run too fast. U.S. OSHA rules for workplaces address wheel guards, inspection, mounting, and speed. The construction rule is in 29 CFR 1926.303, while general industry rules include 29 CFR 1910.215 and 1910.243.
OSHA’s portable-tool rule calls for close inspection and a ring test before mounting covered abrasive wheels, plus a check that machine speed does not exceed the wheel’s marked maximum. Use the correct test for the wheel type. Some bonded wheels do not give the same clear ring as others, so follow the maker’s method and applicable rule.
Keep the wheel’s contact faces, flanges, and mounting parts clean and flat. The wheel should fit freely. Do not force it onto a spindle, enlarge its hole, or tighten the nut beyond the maker’s direction.
Choose the Accessory for the Material and the Task
The right mount does not make every accessory right for every material. Choose the cutting edge, abrasive, coating, or bit shape for the workpiece. Then use the speed and feed guidance for that accessory.
Drill bits vary by point shape and material. A brad-point bit helps start a hole in wood. A twist bit suits many general drilling jobs. High-speed steel bits are common for metal, while cobalt or carbide types serve certain harder or hotter applications. Masonry bits use a tip made for mineral materials, and tile often needs a bit made for that surface.
Saw blades vary by tooth shape, tooth count, kerf, and material rating. A blade for fast framing cuts may leave a rough edge on trim. A fine finish blade may cut more slowly and can clog if used on the wrong material.
Abrasives vary by grit, backing, bond, and abrasive grain. Coarse grit removes material faster but leaves deeper marks. Fine grit leaves a smoother finish but removes less material per pass. A flap disc, cutoff wheel, and grinding wheel have different jobs and must not be swapped by appearance.
Wood
Choose a blade or bit made for the cut, grain, and finish. Keep resin and pitch from building up on cutting edges.
Metal
Use a metal-rated bit, blade, or abrasive. Match the accessory to the metal type and thickness, and use coolant only when the tool and accessory instructions allow it.
Concrete and masonry
Use a masonry or diamond accessory approved for the tool and material. Check whether the tool must use rotation, hammer action, or a wet or dry method.
Plastic and soft materials
Use a suitable edge and speed. Too much heat can melt, smear, or deform the surface.
Fasteners
Match the driver tip to the screw recess and use an impact-rated bit when the driver maker calls for one.
Performance Is a Balance of Speed and Feed
Speed is how fast the accessory moves. Feed is how fast it enters or travels through the material. Too much feed can stall a tool, bend a blade, or break a bit. Too little feed can create heat, rubbing, and poor results.
Start with the maker’s stated range and test on scrap when the job allows it. Use steady pressure. Let the accessory cut instead of leaning on the tool. If the tool slows, chatters, or heats up, stop and find the cause rather than pushing harder.
Install the Accessory and Verify the Fit
Before changing an accessory, switch the tool off and disconnect its power. Unplug a corded tool or remove the battery. For air tools, disconnect the air supply and release stored pressure as the manual directs.
Clean the holder and the accessory’s contact surfaces. Check the part for cracks, bends, chips, worn teeth, damaged threads, or a loose insert. Do not use a part that has been dropped if the maker says it must be discarded or if its condition is uncertain.
Fit the accessory as the manual shows. Seat the shank to the required depth, align pins or flats, use the correct collet or flange, and tighten the lock by the stated method. Do not grip the fluted or cutting part of a bit when the holder is designed to grip its shank.
Restore the guard and check that it moves as designed. Confirm that the accessory does not touch the guard or housing. If the maker allows a no-load check, hold the tool in the stated position, keep people clear, and stop at once if the part wobbles, shifts, or makes a new noise.
Step 1: Isolate power
Unplug the tool, remove the battery, or disconnect air or other power as the manual directs.
Step 2: Inspect both parts
Look for damage, dirt, wear, and signs of a bent mount or damaged holder.
Step 3: Confirm every rating
Recheck size, speed, material, tool mode, and guard requirements.
Step 4: Seat and lock
Use the correct holder, flange, nut, pin, or retainer. Tighten only as the maker directs.
Step 5: Verify before work
Check guard clearance and run a permitted no-load check. Test on scrap at a safe feed if the tool maker allows it.
Signs of a Correct Installation
The accessory sits straight and does not rock in the holder. The lock or clamp fully engages. The guard stays in place and does not rub the accessory.
During a permitted test, the tool runs without new vibration, scraping, or unusual noise. In the workpiece, the accessory cuts, drills, or sands at a steady rate without excess heat or force. These signs support a good setup, but they do not replace the manual’s fit and rating checks.
Diagnose Poor Performance in a Safe Order
Start by stopping the tool and removing power. Do not touch a hot accessory until it cools. Clear chips or dust only after the tool has stopped and the maker’s safe cleaning steps are clear.
Look at the symptom before changing parts. A slow cut may point to a dull edge, the wrong accessory, a poor feed rate, or a tool that cannot maintain speed. Vibration may point to a loose or bent part, a dirty mounting face, a damaged bearing, or an unsteady workpiece.
Change one factor at a time. First inspect the accessory and its mount. Then confirm material, speed, and feed. Check work support and tool alignment next. Replace the accessory only when inspection or a controlled comparison points to wear or damage.
Poor cut or slow drilling
Check for a dull, clogged, or wrong accessory; incorrect speed; too much feed; or a workpiece that moves.
Burn marks or melting
Check pitch build-up, a dull edge, wrong speed, slow feed, poor chip removal, and material mismatch.
Vibration or wobble
Stop at once. Check the accessory for bends or cracks, then inspect seating, flanges, collet, arbor, and tool play.
Bit slips or comes loose
Check shank size, holder condition, insertion depth, and the maker’s locking steps. Do not solve slip by overtightening.
Fast wear or broken teeth
Check material rating, side load, binding, heat, feed pressure, and whether the accessory is made for the tool mode.
New noise or burning smell
Stop and inspect. If the sound or smell comes from the motor, switch, bearing, or wiring, do not keep testing the tool.
Use the Symptom to Set the First Check
A blade that burns wood does not always need replacement. Resin on the teeth, a fence that is out of line, or a poor feed can cause heat. Clean and inspect the blade, then check saw alignment using the saw maker’s method.
A drill bit that wanders may have the wrong point for the surface or may start without a pilot mark. A sanding disc that leaves deep swirls may be loaded with grit, worn, or used with too much pressure. A grinder disc that vibrates is not a finish problem; stop the tool and inspect the wheel and mount before any more use.
Separate an Accessory Fault From a Tool Fault
A good diagnosis tests the accessory, tool, and workpiece as separate parts. A poor result does not prove the accessory is bad. The tool may have a worn chuck, bent arbor, damaged spindle, weak battery, blocked vent, or a bearing fault.
After the tool is cool and safe to handle, inspect the accessory and holder. If the accessory is damaged, replace it with a new part that is known to match the tool. If the accessory looks sound, compare it with another known-good accessory that is approved for the same tool and task.
Use the same material and a similar cut or hole for a fair comparison. If the fault follows one accessory, the accessory is the likely cause. If the fault remains with more than one known-good accessory, the tool, setup, or workpiece may be at fault.
Fault follows the accessory
The part may be dull, bent, damaged, clogged, or unsuitable for the material. Replace it or follow the maker’s approved cleaning process.
Fault stays with the tool
The holder, spindle, bearing, motor, battery, switch, or internal control may need service.
Fault appears only in one material
Review material type, thickness, hardness, support, feed rate, and the accessory’s application rating.
Fault appears only under heavy load
Check for binding, excess feed, poor power supply, a low battery, or a tool capacity limit.
When to Stop and Get Service
Do not open a tool housing or repair a damaged spindle unless the maker’s service instructions allow it and the person doing the work is qualified. A bent arbor, loose spindle, cracked housing, damaged cord, repeated motor stall, or burning electrical smell needs professional review.
Remove a cracked or bent accessory from service. Do not straighten a saw blade, reshape a wheel, weld a shank, or glue a loose cutting tip back in place. A repaired part may fail at speed or under load.
Avoid Common Compatibility and Diagnosis Mistakes
Many accessory failures start with a shortcut. A part looks close enough, a label says universal, or a worker assumes that one brand’s accessory fits every tool in that brand’s range. These clues are not proof of compatibility.
Do not use an accessory just because it can be clamped in place. Do not use a larger wheel or blade because the arbor fits. Do not remove a guard, grind down a shank, drill out a mounting hole, or stack washers to make a part work.
Do not keep using a part that vibrates, slips, cracks, or binds. Do not press harder when a tool slows. More force can raise heat, break the accessory, or cause loss of control.
Mistake: checking only the brand
Fix: verify the exact model, holder, size, rating, and approved use.
Mistake: treating all speed ratings as equal
Fix: compare the accessory’s marked maximum speed with the tool’s maximum speed and the maker’s instructions.
Mistake: using the wrong wheel for the task
Fix: choose a cutting, grinding, sanding, or polishing accessory made for that operation.
Mistake: forcing a near-fit part
Fix: stop and find the exact size or a maker-approved adapter.
Mistake: diagnosing while the tool is live
Fix: isolate power before touching, adjusting, or removing an accessory.
Protect the User and the Work Area
Use the guards and personal protective equipment named in the tool manual and job rules. Eye protection is a basic need for many cutting, drilling, and grinding tasks. Hearing and respiratory protection may also be needed, based on noise, dust, and material.
Clamp the work when practical. Keep bystanders clear of the line of fire. For grinding, keep sparks away from flammable items and use the correct guard. For dust from concrete, mortar, or stone, follow the job’s silica controls and current OSHA requirements where they apply.
Track Wear and Replace Accessories at the Right Time
Replace an accessory when it reaches the maker’s wear limit or shows damage that affects safe use. A blade with missing teeth, a cracked wheel, a bent bit, a loose tip, or a sanding pad that will not hold its disc should not return to service.
Some wear is less clear. A bit may still look sharp but cut slowly. A sanding disc may be loaded with dust. A saw blade may have resin on its teeth. Clean only by a method the maker allows, then check the result on scrap. If the accessory still performs poorly or shows damage, replace it.
Keep a short record for tools used often. Note the tool model, accessory part number, material, speed setting, date fitted, and reason for replacement. This record can reveal repeat problems, such as a poor match for one material or damage caused by a setup issue.
Replace now
Cracks, bends, missing teeth, loose inserts, damaged threads, or a wheel that has been dropped or hit.
Clean and recheck
Removable pitch, dust, or material build-up when the maker allows cleaning and the part has no damage.
Review the setup
Repeated dulling, burning, chipping, or breakage across several new accessories.
A Simple Accessory Record
A useful log does not need special software. A paper card or shop spreadsheet can list the tool model, accessory type, size, material, speed range, and service notes. Add a short note when a part fails.
Use the record to compare like with like. If one accessory wears out much faster than another, check the material, feed, speed, and storage conditions before blaming the brand. The record helps show a pattern; it does not prove the cause by itself.
Frequently Asked Questions
Q
Can I use any brand of accessory on my power tool?
Sometimes, but brand alone does not decide fit. The accessory must match the tool’s holder, size, speed, guard, and intended use. Check both makers’ instructions before using a third-party part.
Q
If an accessory fits, does that mean it is safe?
No. A part can fit the mount and still be too large, too slow-rated, wrong for the material, or unsafe with the tool’s guard. Physical fit is only the first check.
Q
Can I use an adapter to fit a different accessory?
Use an adapter only when the tool or accessory maker approves it for the exact tool and mode. An adapter can change balance, reach, speed, and guard clearance. Do not use homemade sleeves or stacked adapters.
Q
Why does a new blade or bit perform poorly?
The accessory may be wrong for the material or task. Speed, feed, work support, tool alignment, and setup can also affect results. Check these factors before deciding that the new part is defective.
Q
When should I stop using an accessory at once?
Stop if it cracks, bends, wobbles, slips, binds, makes a new harsh noise, or causes the tool to vibrate. Disconnect power before inspection. Replace damaged parts and get tool service if the fault remains with a known-good accessory.
✦ Wrapping Up
Conclusion
Good accessory performance starts with a full compatibility check. Match the holder, dimensions, speed, guard, material, and tool mode before the first cut or hole. Then install the part as the manual shows and test only in a way the maker permits.
When a tool performs poorly, stop and inspect before adding force. Check the accessory, mount, speed, feed, workpiece, and tool in a set order. Replace damaged parts, and seek service when a fault stays with the tool.
💡 Key Takeaway
Before the next job, write down the exact tool model and accessory part number, then confirm the mount, size, maximum speed, material rating, and approved operating mode in both manuals.
Compare power, portability, cost and ease in our air nailer vs cordless nailer guide to find the perfect tool for your projects – save time and money now.
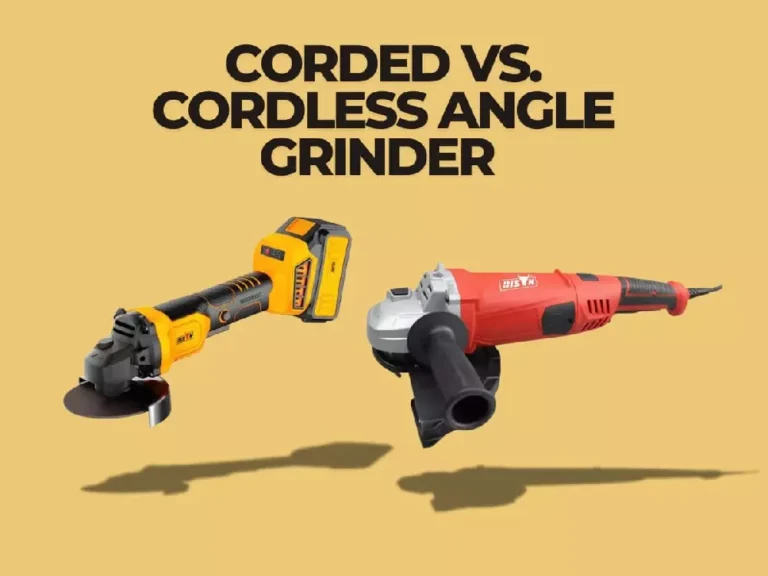
Compare corded angle grinder vs cordless angle grinder performance, runtime, and cost to pick the right tool for your projects. Quick buying tips inside.