Grip the chuck, loosen or open it, remove the old bit, insert the new bit, and tighten securely.
I’ve changed hundreds of drill bits in workshops and on job sites. This guide explains exactly how to change a drill bit properly, step by step, with safety tips, chuck-specific advice, and real-life tips I learned the hard way. Read on for clear instructions you can trust, whether you use a corded drill, a cordless driver, or an SDS rotary hammer.

Why changing a drill bit properly matters
Changing a drill bit properly keeps you safe. It also makes your drill cut straighter and last longer.
A loose or bent bit can ruin the workpiece and the tool. Proper technique saves time and prevents accidents.
I prefer quick, clean swaps. That keeps my projects on schedule and reduces wear on the drill.

Tools and safety checklist
Before you change a bit, gather these items. Small prep prevents big problems.
- Drill or driver with power off and unplugged or battery removed.
- Protective gloves and eye protection.
- Suitable replacement bit for material and hole size.
- Chuck key for keyed chucks, if needed.
- Bit holder or magnetic tray to keep parts safe.
Safety tips to follow every time:
- Remove power or battery first. This stops accidental starts.
- Wear eye protection to catch flying metal shavings.
- Use gloves when changing hot bits, but avoid loose gloves that can snag.

Source: youtube.com
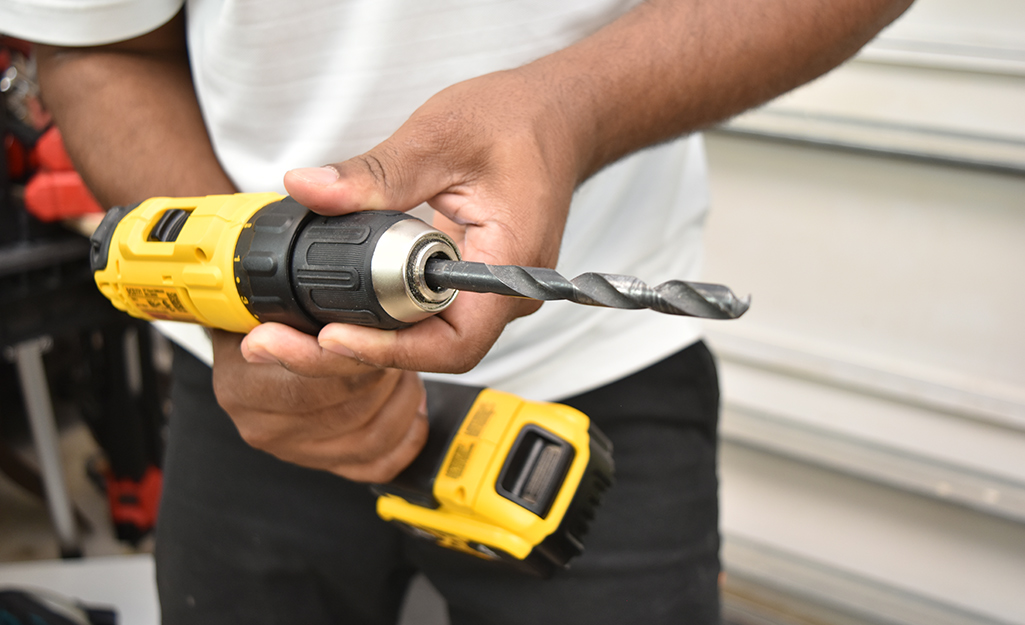
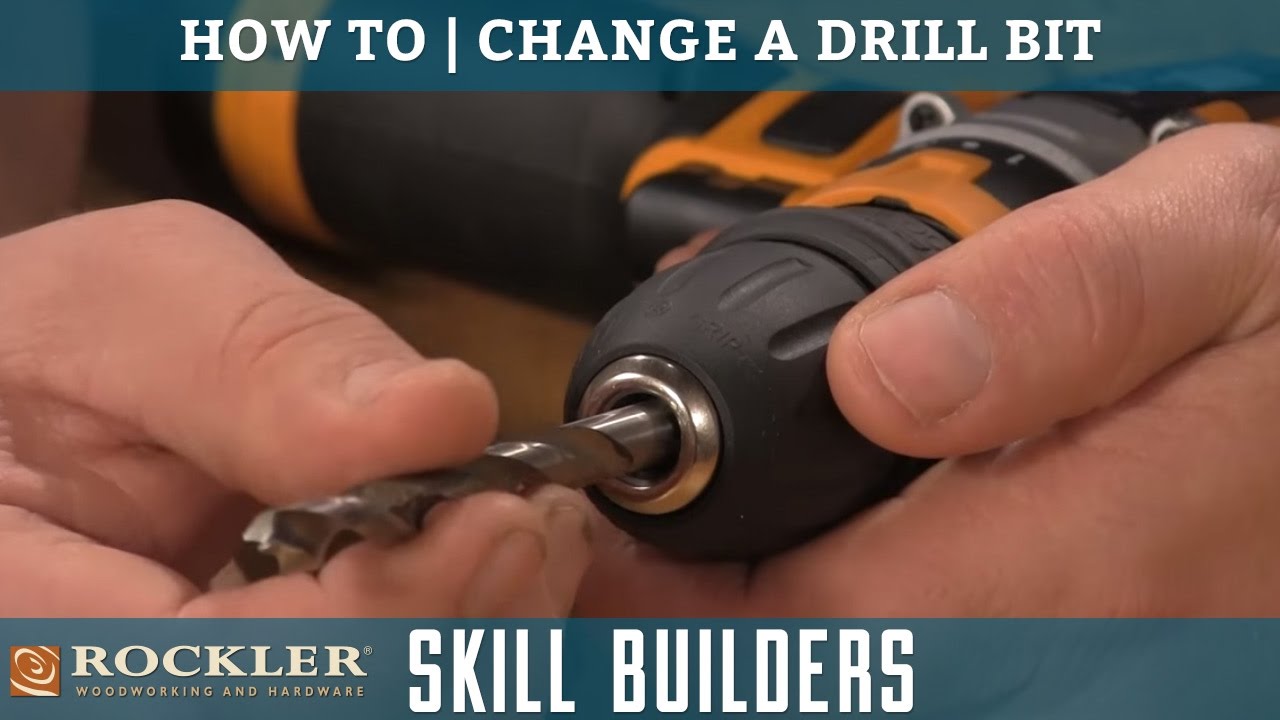
Step-by-step: how to change a drill bit properly
Follow these clear steps. Each step works for most drills.
- Power down the drill. Unplug corded tools or remove the battery from cordless tools.
- Open the chuck. For keyless chucks, hold the drill and twist the chuck sleeve counterclockwise. For keyed chucks, insert the chuck key and turn it counterclockwise.
- Remove the old bit. Pull it straight out. If it’s stuck, tap gently or wiggle while pulling.
- Inspect the bit and chuck. Check for damage, rust, or debris. Clean the jaws with a cloth if needed.
- Insert the new bit. Push the shank fully into the chuck so it sits square.
- Tighten the chuck. For keyless chucks, hold the drill and twist the sleeve clockwise until snug. For keyed chucks, use the key to tighten each side evenly.
- Test the bit. Reinstall power and run the drill at low speed. Check for wobble or slipping.
- Adjust as needed. If the bit wobbles, power down and re-seat it. Repeat tightening until it runs true.
People also ask:
How tight should I make the chuck?
Tighten until it’s snug and the bit does not slip under moderate pressure. Over-tightening can damage some keyless chucks, so apply firm hand force or one turn with the key.
Can I change a bit with the drill still plugged in?
No. Always remove power or battery first. Accidental starts can cause severe injury.
How do I know the correct bit size?
Match the bit diameter to the hole size you need. Use a drill gauge or the material manufacturer’s recommendations for pilot holes and screws.
 different chuck types”
style=”max-width: 100%; height: auto; border: 2px solid black; border-radius: 10px; display: block; margin: 0 auto;”
loading=”lazy”
/>
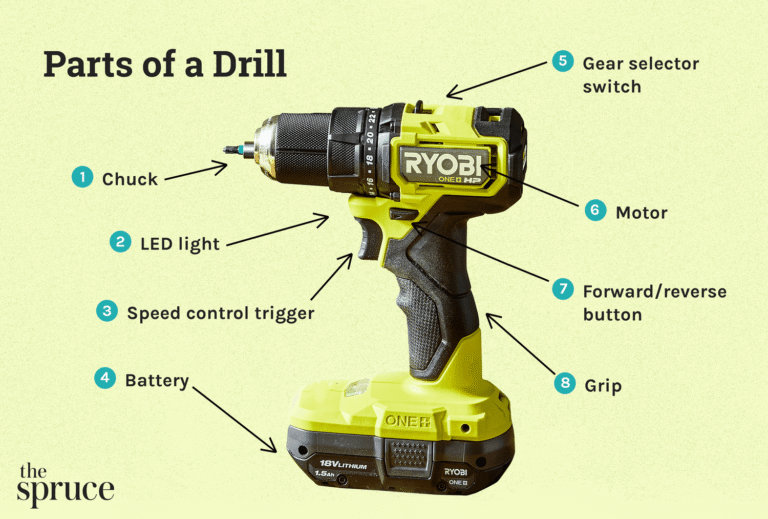
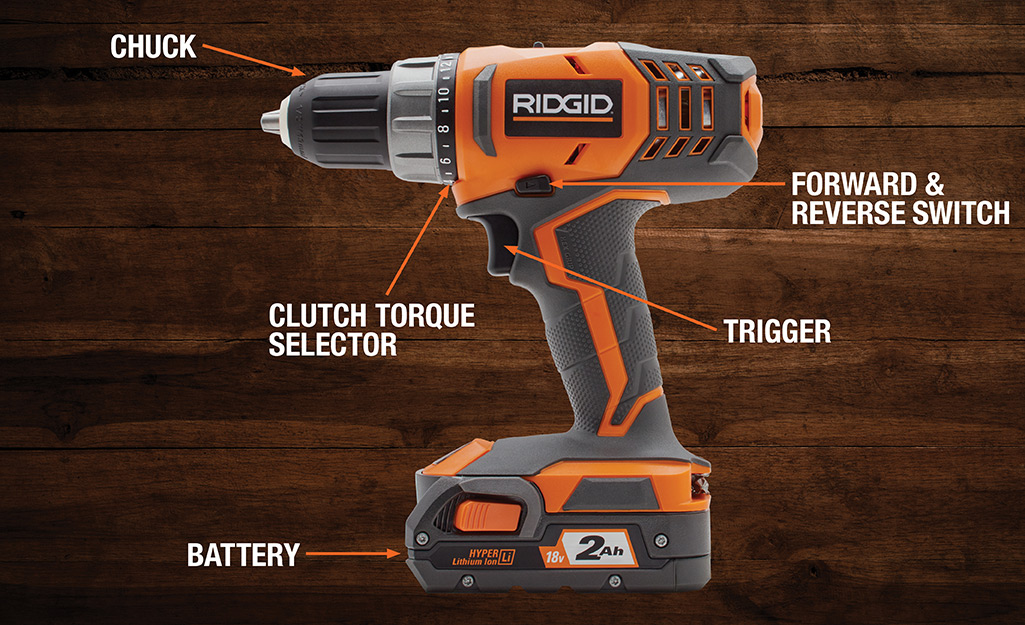
Tips for different chuck types
Different chucks need slightly different handling when you learn how to change a drill bit properly.
Keyless chuck
- Use two hands: one holds the drill, one turns the sleeve.
- Hand-tighten; avoid using pliers. Pliers can over-stress the mechanism.
Keyed chuck
- Use the chuck key in the keyed hole. Tighten each side for a balanced grip.
- Store the key on the drill if it has a holder to avoid losing it.
SDS and SDS-plus
- Pull back the sleeve, insert the SDS shank until it clicks, and release.
- Check the lock by pulling lightly on the bit. An SDS locks differently than a standard chuck.
Hex-shank quick-change
- Pull the collar or push-and-release mechanism, insert the shank, and release.
- These are handy for fast swaps during repetitive tasks.

Source: youtube.com
Common mistakes and how to avoid them
Avoid these pitfalls when you change a drill bit properly.
- Rushing with power attached. Always remove power or battery first.
- Inserting the bit crooked. Push the shank fully in and align it before tightening.
- Not checking for damage. Bent or dull bits make bad holes and can be dangerous.
- Over-tightening keyless chucks with tools. This can strip the chuck.
- Not tightening evenly on keyed chucks. Tighten across jaws for balance.
Source: homedepot.com
Maintenance and storage of bits
Good care extends bit life and keeps changes simple.
- Clean bits after use. Wipe off dust, resin, and rust.
- Store by type and size. Use a labeled case or rack for quick access.
- Sharpen HSS and masonry bits as needed. Replace bits that are chipped or bent.
- Lubricate large bits when drilling metal. A drop of oil reduces heat and wear.
Source: youtube.com
Frequently Asked Questions of how to change a drill bit properly
What is the safest way to change a drill bit?
Always remove power or the battery, wear eye protection, and secure the drill before loosening the chuck. Take your time and use the right key or hand method.
How do I stop a drill bit from wobbling?
Power down, remove the bit, clean the chuck jaws, reinsert the bit fully, and tighten evenly. Replace the bit if wobble persists.
Can I use any bit in my drill?
Use bits designed for your drill and the material you’re drilling. SDS bits go in SDS tools; standard round-shank bits go in chucks.
How often should I replace drill bits?
Replace bits when they become dull, chipped, or bent. Frequent use on hard materials shortens bit life.
Is it okay to tighten a keyless chuck with pliers?
No. Pliers can over-torque and damage the chuck. Tighten by hand or use the drill’s built-in ratchet action if available.
Conclusion
Changing a drill bit properly is quick, safe, and repeatable once you learn the steps. Power down, clean the chuck, insert the bit fully, and tighten with the right method for your chuck type. Practice this routine and your work will be cleaner, safer, and faster. Try it on your next project, share your experience, or ask a question below to get help tailored to your drill model.