Tool chemical exposure can damage plastic housings, rubber seals, coatings, adhesives, and electrical insulation. Always check the tool manual, cleaner safety data sheet, and material compatibility before using a solvent. Choose the least aggressive approved cleaner and avoid soaking tool parts.
Across the United States, mechanics, construction workers, woodworkers, and home workshop owners use cleaning chemicals to maintain their tools. A common job may involve removing grease from a drill, cleaning paint from a scraper, or removing adhesive from a saw housing. These tasks seem simple, but the wrong chemical can cause lasting damage.
A cleaner that removes oil from a steel part may also soften a plastic grip or weaken a rubber seal. Some solvents can attack coatings, damage wire insulation, or cause cracks in clear plastic. The damage may not appear at once. A part can look normal after cleaning and fail later under heat, pressure, or regular use.
Tool chemical exposure happens when a material comes into contact with a cleaner, solvent, degreaser, oil, adhesive remover, or other chemical. The result depends on the exact chemical and the material it touches. Exposure time, temperature, concentration, and mechanical stress also affect the result.
I use one basic rule for evaluating this problem: never assume that a cleaner is safe just because it works on metal. A complete tool may contain several materials with very different chemical limits. Safe maintenance starts with identifying those materials and checking the manufacturer’s cleaning instructions.
What Is Tool Chemical Exposure and Solvent Damage?
Tool chemical exposure occurs when a chemical contacts a tool surface or internal component. The chemical may be a cleaner, degreaser, lubricant, paint remover, adhesive remover, fuel, or industrial solvent. The contact may happen during normal maintenance, accidental spills, storage, or repair work.
Solvent damage is a physical or chemical change caused by that contact. A solvent can dissolve a material, soften it, remove important additives, or change its size and strength. Some materials also absorb chemicals without showing an immediate change.
Think of a tool as a group of different materials working together. Its metal body may resist a cleaning fluid, but its rubber grip may swell. Its plastic housing may crack, while a painted section may lose its finish. One cleaning mistake can therefore affect several parts in different ways.
Material compatibility describes how well a material withstands contact with a particular chemical under defined conditions. A compatible material keeps the properties needed for its job. An incompatible material may lose its shape, strength, flexibility, surface finish, or ability to seal.
Chemical attack
The chemical reacts with or dissolves part of a material. This may cause surface damage, softening, discoloration, or loss of strength.
Chemical absorption
The material takes in part of the chemical. Plastic and rubber parts may swell or change their mechanical properties.
Surface degradation
A cleaner removes paint, protective coatings, labels, lubricants, or surface treatments that help the tool resist wear and corrosion.
Hidden component damage
Chemical contact may affect seals, wire insulation, switch parts, or adhesives inside the tool without creating an obvious mark on its outer surface.
Solvent Damage Is Not the Same as Ordinary Dirt Removal
A cleaning chemical is meant to remove unwanted material without harming the surface underneath. Solvent damage occurs when the cleaner also affects the tool itself. The difference can be hard to see because both processes may begin with a shiny or clean surface.
For example, a strong degreaser may remove old oil from a metal gear. If it also removes grease from a bearing or attacks a nearby seal, the cleaning job may create a new mechanical problem. Cleanliness alone does not prove that a tool is safe to use.
Successful cleaning
The unwanted dirt is removed while the original material, finish, and function remain intact.
Chemical damage
The unwanted material is removed, but the tool also loses an important physical or protective property.
Why Material Compatibility Matters When Cleaning Tools
A tool is rarely made from one material. A cordless drill, for example, may contain a metal gearbox, a plastic housing, rubber grips, nylon components, electrical insulation, adhesives, and elastomer seals. Each part has its own chemical resistance.
The cleaner must be suitable for every part that it can reach. A chemical that is safe for a steel surface may be unsuitable for the surrounding polymer. This is why choosing a solvent based only on the material that looks dirty can lead to failure.
The same issue appears in woodworking tools, automotive equipment, pneumatic tools, measuring devices, and industrial machines. A cleaner may remove grease from a metal saw table but damage its painted fence, plastic adjustment knob, or rubber foot.
Chemical resistance charts help narrow the choices. However, they are not universal guarantees. The exact material grade, additives, manufacturing process, and operating conditions can change the result.
Tool safety
Chemical damage can weaken a handle, crack a housing, or reduce the strength of an important component.
Mechanical performance
Swollen seals, damaged bearings, and weakened plastic parts can affect movement, alignment, and operating accuracy.
Electrical protection
Solvents can affect insulation and coatings. Liquids entering a tool may also cause short circuits or corrosion.
Service life
Repeated exposure can shorten the useful life of materials even when each cleaning session causes only small changes.
Chemical Resistance Does Not Mean Unlimited Protection
A material rated as resistant to a solvent may still have limits. The rating may apply only to room temperature, a certain concentration, or a defined exposure period. It may not cover a hot part, a stressed component, or repeated cleaning.
A compatibility chart should therefore be treated as a starting point. For a safety-critical part, use the exact manufacturer’s data and seek technical advice when the material grade or chemical formulation is uncertain.
Excellent resistance
The material shows little or no meaningful change under the stated test conditions. This does not mean it is safe under every condition.
Limited resistance
The material may tolerate brief or mild exposure but may fail under stronger, hotter, or longer contact.
Poor resistance
The chemical may cause swelling, cracking, softening, or other serious changes. Avoid contact unless the manufacturer confirms suitability.
No available data
The result is unknown. Do not treat missing information as proof of compatibility.
Common Tool Materials and Their Chemical Vulnerabilities
Different tool materials react to solvents in different ways. Identifying the material is one of the most useful steps in preventing chemical damage. Do not identify a part by appearance alone when a wrong choice could affect safety.
A manufacturer may use several grades of plastic or rubber in one tool. Even two parts that look alike may contain different additives, coatings, or compounds. The following guidance explains common risks, not universal compatibility ratings.
Steel and iron
Many common organic solvents do not directly attack ordinary steel in the same way they attack soft plastics. However, aggressive chemicals can remove protective oil, affect coatings, or contribute to corrosion when moisture and reactive chemicals remain on the surface.
Aluminum
Aluminum can tolerate many common cleaning fluids, but strong acids, strong alkaline cleaners, and some industrial formulations may attack its surface or protective finish.
ABS and polycarbonate plastics
Some ketones, aromatic solvents, and other aggressive cleaners can soften, craze, or crack these plastics. Stressed plastic parts may be especially vulnerable.
Polyethylene and polypropylene
These plastics resist many chemicals, but they are not suitable for every solvent. Aromatic and chlorinated solvents can create problems with some grades and exposure conditions.
Nylon and engineering plastics
Their response depends on the exact polymer, additives, moisture, temperature, and chemical. A general plastic compatibility chart may not represent a particular molded tool component.
Rubber and elastomers
O-rings, gaskets, grips, boots, and flexible seals may swell, shrink, soften, harden, or lose elasticity after exposure to an incompatible chemical.
Paint and protective coatings
Solvents can soften paint, remove clear coats, weaken protective layers, or cause peeling and discoloration.
Why Rubber Seals Are Especially Sensitive
Rubber seals must maintain a specific shape and level of flexibility. Chemical absorption can change both properties. A swollen O-ring may no longer fit its groove, while a hardened seal may lose the ability to close small gaps.
Different elastomers have different strengths. Nitrile rubber, EPDM, silicone, neoprene, and fluoroelastomers do not respond to every solvent in the same way. A seal that works well with oil may not tolerate a particular ketone or cleaning agent.
Parker’s O-ring engineering guidance explains that fluid exposure can change elastomer volume and performance. It also shows why chemical compatibility must be considered alongside temperature and mechanical use. A swollen seal in a moving application can create extra friction and lose useful wear properties.
Never choose a replacement seal based only on its color or size. Match its material, dimensions, hardness, and application requirements to the tool manufacturer’s specification.
Swelling
The seal absorbs chemicals and becomes larger. This may increase friction or prevent correct installation.
Shrinkage
The material loses volume or releases ingredients. The seal may become loose and fail to maintain contact.
Hardening
The rubber loses flexibility and may no longer form a reliable seal.
Softening
The seal becomes weak, tacky, or easier to tear under normal movement.
Adhesives, Labels, and Electrical Insulation
Adhesives hold many tool parts in place. They may secure rubber grips, labels, internal covers, or electronic components. A solvent can weaken an adhesive bond even when the surrounding plastic looks unchanged.
Electrical insulation also needs special care. Wire jackets, switch housings, connector seals, and protective coatings must retain their insulating properties. Chemical exposure may soften or crack these materials and increase the risk of electrical failure.
A liquid cleaner can also travel through vents, seams, and small openings. It may reach areas that are difficult to inspect. Never assume that a tool is safe simply because its outer housing looks clean.
Adhesive failure
A grip, label, or bonded cover may begin to lift or move after chemical contact.
Insulation damage
Wire coverings and electrical barriers may soften, crack, or lose their protective properties.
Coating damage
Protective layers may become cloudy, sticky, discolored, or detached.
How Common Solvent Types Affect Tool Materials
The chemical family provides useful clues about possible damage. However, a solvent name alone does not tell the whole story. Commercial cleaners often contain several ingredients, and their concentration can change their effect.
The following comparison is a screening guide. It is not a substitute for the exact cleaner’s safety data sheet, tool manual, or material manufacturer’s compatibility information.
Acetone and other ketones
Acetone and methyl ethyl ketone can attack several common plastics, coatings, and adhesives. Polycarbonate, acrylic, and some ABS parts may soften, craze, or crack. Do not use these solvents on tool housings unless the tool manufacturer approves them.
Aromatic solvents
Toluene and xylene may affect plastics, rubber parts, paint, and adhesive bonds. They can cause swelling or softening in vulnerable materials.
Chlorinated solvents
Some chlorinated cleaners can attack plastics and elastomers. They may also present serious health hazards. Avoid treating them as general-purpose tool cleaners.
Alcohol-based cleaners
Isopropyl alcohol and ethanol may work with certain surfaces, but they are not safe for every coating, stressed plastic, or adhesive. Confirm the exact material before use.
Mineral spirits and petroleum solvents
These products may remove grease and oil, but some rubber compounds, paints, and adhesives can react badly. Check seals and nearby plastic parts before selecting them.
Citrus-based cleaners
Products containing d-limonene can dissolve oils and other residues. Natural origin does not make them harmless to rubber, elastomers, coatings, or plastics.
Water-based alkaline cleaners
These cleaners may be less aggressive toward some plastics, but strong alkaline formulas can affect aluminum, coatings, and sensitive materials. Concentration and contact time matter.
Why Acetone Is Not a Universal Tool Cleaner
Acetone is widely used because it dissolves many oils, resins, and uncured materials. However, its cleaning strength can also become a weakness when it contacts sensitive tool components.
A manufacturer’s cleanup guide may recommend acetone for removing a specific uncured resin or foam. That recommendation applies to the named material and cleanup task. It does not mean acetone is suitable for every tool housing, rubber grip, painted surface, or electrical part.
The same principle applies to paint thinner, lacquer thinner, and gasoline. A chemical that removes one type of residue may also remove a protective coating or damage an adjacent component.
Check the exact task
Determine whether the chemical is intended for metal cleaning, adhesive removal, paint removal, or another specific purpose.
Check nearby materials
Look beyond the dirty surface and identify all components that could receive the cleaner.
Follow product instructions
Use only the cleaning method and exposure conditions approved for the exact material and tool.
Factors That Control Solvent Damage and Material Compatibility
A chemical does not always produce the same result when it touches the same material. The exposure conditions can change the level of damage. Four major factors are concentration, temperature, exposure time, and mechanical stress.
A brief wipe at room temperature is not equal to soaking a component in a concentrated solvent. The second exposure gives the chemical more time and opportunity to enter or affect the material.
Chemical concentration
A stronger solution may produce a more severe reaction. Diluting a cleaner may reduce some risks, but only use a dilution approved by the product manufacturer.
Temperature
Heat can increase chemical activity and speed up material changes. A tool that has just been used may have warm parts that respond differently to a cleaner.
Exposure time
Longer contact gives a chemical more opportunity to penetrate, dissolve, or swell a material. Repeated short exposures may also create cumulative damage.
Mechanical stress
A plastic part under tension may be more likely to develop cracks when exposed to an incompatible solvent. Stressed molded housings and clips deserve extra care.
Material formulation
Plasticizers, fillers, curing agents, pigments, and other additives can change chemical resistance. Two parts made from the same broad polymer family may react differently.
Chemical mixtures
A commercial degreaser may contain several active ingredients. Its compatibility cannot always be predicted by looking at only one ingredient.
A Practical Example of Exposure Time
Consider a hypothetical plastic adjustment knob that has brief contact with an incompatible cleaner. The surface may appear unchanged after the cleaner evaporates. That does not establish that the plastic has retained its original strength.
Now consider the same knob left in a container of that cleaner for several hours. The longer exposure may allow more chemical absorption and produce visible swelling or softening. The two situations involve the same chemical and material, but the exposure conditions differ.
This example is not a measured test result. It shows why compatibility information must match the expected contact method, temperature, and duration.
Short contact
May create limited surface exposure, but even a brief contact can cause immediate damage with a highly aggressive solvent.
Prolonged contact
Creates more opportunity for chemical absorption, swelling, softening, and coating failure.
Repeated contact
May produce gradual changes that are difficult to notice after each individual cleaning session.
How to Check Chemical Compatibility Before Cleaning a Tool
The safest way to check compatibility is to identify the exact chemical and material, review authoritative product information, and avoid unapproved exposure. Do not start with trial and error on an expensive or safety-critical tool.
A useful check involves the tool manual, the cleaner’s safety data sheet, and the material manufacturer’s technical information. Each source answers a different question.
Tool manual
Shows the manufacturer’s approved cleaning methods, restricted chemicals, and maintenance precautions.
Safety Data Sheet
Explains the cleaner’s hazards, handling requirements, exposure controls, storage conditions, and other safety information.
Material compatibility chart
Helps evaluate how a chemical may affect a specific polymer, elastomer, metal, or other material.
Technical support
Can clarify uncertain material grades, cleaner formulations, and application-specific compatibility limits.
Step 1: Identify the Exact Cleaning Chemical
Read the product label and identify the complete product name. Do not rely only on words such as degreaser, contact cleaner, or industrial solvent. Products with similar names can contain different ingredients.
Obtain the current safety data sheet for the exact product. Check Sections 1, 2, and 3 for product identification, hazards, and ingredient information. Review Sections 7 and 8 for handling, storage, exposure controls, and protective equipment.
Section 9 provides physical and chemical properties, while Section 10 covers stability and reactivity. Section 4 contains first-aid information. These sections help establish whether the cleaning task has additional safety limits.
Record the product name
Use the exact name and formulation rather than a broad chemical category.
Check the revision date
Use the latest available SDS so the information reflects the current product formulation.
Step 2: Identify the Tool Materials
Inspect the tool manual and parts information. Identify plastic housings, rubber grips, seals, coatings, electrical insulation, and exposed metal surfaces.
If the exact material is unknown, contact the manufacturer or an authorized service center. Do not assume that a black rubber ring is nitrile or that a clear plastic cover is polycarbonate.
Pay particular attention to materials around joints, vents, switches, bearings, and battery contacts. These areas may be more sensitive than the main metal body.
Identify exposed parts
List the materials that the cleaning chemical may touch directly.
Identify hidden parts
Consider whether the cleaner could enter openings and reach seals, insulation, or electrical components.
Step 3: Compare the Compatibility Information
Find the exact chemical in a material compatibility chart. Then check the exact material grade where available. Review the stated temperature, concentration, and exposure time.
Do not treat a general rating as approval for a different application. A chemical may be suitable for a static storage container but unsuitable for a moving rubber seal. The mechanical role of the component matters.
If the chart gives no information, or if two sources disagree, contact the material or tool manufacturer. For a safety-critical component, use an approved replacement or cleaning method instead of guessing.
Match the chemical
Use the exact cleaner or a verified formulation rather than a broad solvent category.
Match the material
Confirm the specific plastic, elastomer, coating, or metal grade.
Match the exposure
Check concentration, temperature, duration, repeated use, and mechanical stress.
Step 4: Use Controlled Testing Only When Approved
When the manufacturer allows testing, use a separate sample or a replaceable noncritical part made from the same material. Follow the cleaner manufacturer’s handling instructions and use suitable protective equipment.
Keep the test conditions close to the intended use. A room-temperature wipe test does not prove that a hot component can tolerate prolonged contact. Likewise, one successful exposure does not establish compatibility with repeated cleaning.
Inspect for changes such as swelling, cracks, softening, discoloration, tackiness, or coating loss. Allow the sample to dry as directed and check for delayed changes. If the result is uncertain, do not approve the cleaner for the tool.
Never deliberately expose a working electrical tool, battery pack, safety guard, or load-bearing component to an unknown solvent just to see what happens.
Use a suitable sample
Choose a sample of the same material and grade whenever possible.
Follow safe exposure limits
Use only the manufacturer’s approved test method, concentration, and duration.
Document the result
Record the product, material, test conditions, visible changes, and final decision.
Signs That a Tool Has Suffered Chemical Damage
Chemical damage may appear as a visible surface change, a change in part dimensions, or a loss of normal function. Some problems appear immediately, while others develop after the cleaner has evaporated.
Inspect the affected area before using the tool again. If the damaged part helps control movement, protect the user, contain fluid, or prevent electrical contact, stop using the tool until it has been assessed.
Swollen plastic or rubber
The part looks larger, distorted, or unusually tight in its original position.
Soft or sticky surfaces
The housing, grip, or seal feels tacky, weak, or unusually flexible.
Cracks and surface crazing
Fine lines or cloudy patterns may appear on stressed plastic surfaces.
Hard or brittle rubber
A seal or grip may lose its flexibility and become more likely to split.
Discoloration
The original color may fade, change, or become uneven after chemical contact.
Peeling coatings
Paint, clear coats, printed markings, or protective finishes may lift or separate.
Loose adhesive bonds
Labels, grips, and bonded covers may move or detach.
Electrical problems
A tool may show intermittent operation, switch problems, damaged insulation, or signs of corrosion after liquid enters its housing.
Troubleshooting Chemical Exposure
Start by identifying the chemical and the exact area of contact. Do not add another cleaner in an attempt to reverse the damage. Mixing chemicals can create additional hazards and make the original problem harder to assess.
Disconnect the tool from its power source if it is safe to do so. For a cordless tool, remove the battery according to the manufacturer’s instructions. If the battery is hot, swollen, leaking, or otherwise damaged, do not handle it as an ordinary cleaning problem.
Inspect the affected part for changes in shape, flexibility, color, and surface condition. Compare it with an undamaged part of the same type when possible. Do not rely on appearance alone if the affected part is safety-critical.
If the chemical entered the housing, switch, motor, battery compartment, or electrical connector, do not energize the tool until a qualified service technician has assessed it. Replace damaged components using approved parts.
If the surface becomes cloudy
Stop cleaning and check for coating damage or plastic crazing. Do not polish the area until compatibility is confirmed.
If a seal becomes swollen
Stop using the affected assembly and check the seal specification. Replace it if its dimensions or performance have changed.
If a grip becomes sticky
Stop using the tool if grip control is affected. Follow the manufacturer’s replacement instructions.
If liquid enters electrical parts
Keep the tool disconnected and arrange a qualified inspection before use.
Safe Ways to Clean Tools Without Causing Solvent Damage
The safest cleaning method is usually the least aggressive method that the tool manufacturer approves. Many power tool manuals recommend a soft cloth, mild soap, and limited moisture for exterior cleaning. Some specifically warn against solvents that can harm plastic and insulated parts.
Milwaukee tool maintenance instructions identify gasoline, turpentine, lacquer thinner, paint thinner, chlorinated cleaning solvents, and ammonia-containing products among cleaners that can damage plastics and insulated components. DEWALT instructions for certain tools also warn against solvents on nonmetallic parts.
These warnings are model-specific examples, not a complete chemical compatibility list for every tool. Always follow the instructions for the exact model and do not assume that a cleaning method approved for one tool is suitable for another.
Use mild cleaning methods first
Remove loose dust with an appropriate brush or dry cloth. Use a damp cloth and mild soap only when the manual permits it.
Keep moisture controlled
Do not soak the tool or allow liquid to enter vents, switches, connectors, or battery compartments.
Use approved specialist cleaners
Choose a specialist product only when its manufacturer confirms compatibility with the exact materials and cleaning task.
Protect sensitive surfaces
Keep cleaners away from rubber grips, printed markings, clear covers, seals, and painted parts unless they are approved for those materials.
A Step-by-Step Tool Cleaning Process
Step 1: Read the tool manual. Find the cleaning and maintenance instructions for the exact model. Check any restrictions on solvents, moisture, and disassembly.
Step 2: Disconnect the power source. Unplug corded equipment and remove a removable battery when the manual directs. Allow hot components to cool before cleaning.
Step 3: Identify the contamination. Determine whether the residue is dust, grease, oil, paint, adhesive, or another material. Different residues may need different approved cleaning methods.
Step 4: Select the cleaner. Check its label and SDS. Confirm that the chemical is approved for the tool and the materials it may contact.
Step 5: Apply the cleaner carefully. If the manufacturer permits a damp cloth, apply a small amount to the cloth rather than spraying the tool. Keep liquid away from openings and electrical components.
Step 6: Remove residue as directed. Use a clean cloth and avoid aggressive scraping that may damage protective coatings or plastic surfaces.
Step 7: Allow the tool to dry. Follow the manufacturer’s drying instructions and inspect the cleaned area for any change in shape, color, texture, or function.
Step 8: Check the tool before use. Confirm that guards, grips, seals, switches, and moving parts remain in their proper condition. Seek service if damage or uncertainty remains.
A successful cleaning result
The unwanted residue is removed, the material remains unchanged, and the tool retains its normal mechanical and electrical function.
An unsuccessful cleaning result
The surface becomes sticky, cloudy, swollen, cracked, or discolored, or the tool develops an unusual operating problem.
When to Replace a Damaged Component
Do not try to restore a chemically damaged seal, grip, electrical insulator, or structural plastic part with another solvent. A surface may look better after drying while its original strength or flexibility remains reduced.
Replace the component when the manufacturer identifies it as nonrepairable or when its condition no longer meets the required specification. Use approved replacement parts and follow the correct service procedure.
If the affected part supports a safety guard, controls electrical isolation, contains pressure, or prevents moving components from reaching the user, arrange professional inspection rather than continuing to operate the tool.
Replace visibly cracked plastic
A crack can grow under normal vibration, pressure, or handling.
Replace damaged seals
A seal that has changed size or hardness may no longer prevent leakage or maintain its intended fit.
Service damaged electrical parts
Insulation and electrical protection must meet the manufacturer’s requirements. Do not rely on tape or an unapproved coating as a repair.
Chemical Exposure Safety for US Workshops and Job Sites
Chemical compatibility is only one part of safe solvent use. A cleaner may damage a tool and also expose the person using it to harmful vapors, skin contact, fire, or eye injury. A safe cleaning process must control both material damage and worker exposure.
In the United States, OSHA’s Hazard Communication Standard requires safety data sheets for hazardous workplace chemicals. The SDS gives workers information about chemical hazards, safe handling, exposure controls, and first aid.
NIOSH explains that chemicals can enter the body through the skin. Organic solvents are among the chemical groups that may be absorbed in this way. Skin exposure can cause irritation and, for certain chemicals, effects beyond the skin.
Never judge solvent safety by smell alone. A weak odor does not prove that vapor exposure is safe. Use the controls and exposure information specified for the exact product.
Ventilation
Use suitable ventilation for the chemical and task. Certain flammable-liquid handling operations have specific OSHA ventilation requirements.
Gloves
Choose gloves based on the exact chemical and the manufacturer’s breakthrough information. Ordinary disposable nitrile gloves are not suitable for every solvent.
Eye protection
Use suitable splash protection when there is a risk of chemical contact with the eyes.
Fire prevention
Keep flammable cleaners away from sparks, open flames, hot surfaces, and other ignition sources. Never use flammable solvents around an operating power tool.
Chemical storage
Keep products in their approved, labeled containers and follow the storage instructions on the SDS.
Waste handling
Dispose of contaminated cloths, solvent waste, and containers according to the product instructions and applicable local requirements.
How to Select the Right Protective Gloves
Do not choose gloves only because they are thick or marketed for industrial use. Different glove materials resist different chemicals, and a glove that protects against one solvent may allow another solvent to pass through.
Check Section 8 of the cleaner’s SDS for protective equipment recommendations. When the information is not clear, ask the glove manufacturer or workplace safety professional for chemical-specific selection advice.
Consider breakthrough time, glove thickness, temperature, contact duration, and whether the work involves splashes or prolonged contact. Replace damaged or contaminated gloves as directed by the manufacturer.
A glove that has absorbed a solvent may hold the chemical against the skin. Do not continue wearing a contaminated glove simply because it has no visible tear.
Check chemical resistance
Confirm the glove material is suitable for the exact cleaner and its concentration.
Check breakthrough time
Use the manufacturer’s data to understand how long the glove material can resist the chemical under stated conditions.
Check physical condition
Replace gloves that are damaged, swollen, softened, or contaminated beyond their approved service limits.
What to Do After Accidental Chemical Contact
If a cleaner touches your skin or eyes, follow the product’s SDS first-aid instructions immediately. Remove contaminated clothing when directed and use the specified washing or flushing method. Do not use another solvent to clean solvent-contaminated skin.
For eye exposure, begin appropriate flushing promptly and seek medical assistance according to the chemical’s first-aid instructions. For significant exposure, breathing difficulty, severe irritation, or symptoms that do not improve, obtain urgent medical advice.
If a large spill occurs, stop the work and follow the site’s emergency procedure. Do not attempt cleanup unless you have the training, equipment, and correct protective measures for that chemical.
Keep the product label and SDS available when seeking medical or emergency assistance. The exact chemical name helps responders understand the exposure.
Skin contact
Follow the SDS washing instructions promptly. Remove contaminated clothing as directed.
Eye contact
Start the specified eye-flushing procedure and seek appropriate medical help.
Inhalation
Move away from the exposure area to fresh air if it is safe to do so and obtain medical assistance when indicated.
Major spill
Keep others away and follow the workplace emergency and spill-response procedure.
Common Mistakes That Cause Chemical Damage to Tools
Many chemical damage problems begin with a simple assumption: if a cleaner removes grease, it must be suitable for the entire tool. That assumption ignores the different materials used in a tool assembly.
A careful cleaning process avoids shortcuts. It also recognizes that a tool manual may impose stricter limits than a general compatibility chart.
Using one solvent for every cleaning task
Different residues and materials need different cleaning methods. Use the cleaner approved for the exact job.
Assuming all plastics are alike
ABS, polycarbonate, acrylic, polypropylene, and other plastics have different chemical resistance.
Ignoring rubber components
A cleaner may pass across a metal surface and collect around seals, grips, and flexible parts.
Soaking tool components
Prolonged immersion increases exposure and can allow liquid to reach hidden components.
Using a compatibility chart without checking conditions
A rating for room-temperature exposure may not apply to a warm component or repeated cleaning.
Mixing cleaning chemicals
Combining products can create dangerous reactions and may produce a mixture with unknown material compatibility.
Ignoring small changes
Early swelling, tackiness, and fine cracks can indicate damage that may become more serious during use.
Using a damaged tool
A tool with weakened grips, cracked housings, or compromised insulation may no longer provide its intended protection.
Why Natural and Eco-Friendly Cleaners Still Need Compatibility Checks
A cleaner is not automatically safe for tool materials because it comes from plants or carries an environmentally friendly label. Natural solvents can still dissolve oils, soften plastics, or attack rubber.
D-limonene is one example. It is a plant-derived solvent with strong cleaning properties, but industrial compatibility guidance warns that it can affect some elastomers and rubber materials.
The same rule applies to products labeled biodegradable, non-toxic, or low odor. These descriptions do not establish compatibility with every tool material or prove that the product is safe for every exposure route.
Read the full product label
Check ingredients, restrictions, and recommended uses rather than relying on marketing descriptions.
Review the SDS
Look for exposure hazards, handling instructions, and material-related precautions.
Verify tool compatibility
Confirm that the cleaner is suitable for all exposed components.
Building a Better Tool Chemical Maintenance Plan
A basic maintenance plan can prevent repeated chemical exposure and reduce the chance of accidental damage. The goal is to make safe cleaning a normal part of tool care rather than a decision made in a hurry.
Start by keeping the manuals and approved cleaning instructions for the tools used most often. Store SDS information for workplace cleaning products where workers can access it. Keep incompatible products separate and use clear labels on all approved containers.
Create a short inspection routine after cleaning. Check grips, seals, coatings, adjustment controls, and electrical openings for visible changes. Record any unusual reaction so the same cleaner is not used on another tool without review.
For professional shops, maintenance records can help identify repeated exposure problems. Record the cleaner, tool model, date, affected part, and action taken. This information can help a technician or safety manager trace a failure to its likely source.
Keep an approved cleaner list
Record which products are approved for each tool type and cleaning task.
Keep safety documents available
Maintain current SDS information for hazardous workplace cleaners and solvents.
Train users
Explain which materials are sensitive, where liquids must not enter, and which cleaning products are restricted.
Inspect after cleaning
Check for surface changes and confirm that the tool remains safe to operate.
Replace damaged parts
Use manufacturer-approved parts and service procedures when chemical exposure affects a component.
A Simple Chemical Compatibility Record
A small record can prevent the same mistake from happening again. It should identify the tool, cleaner, exposed materials, approved method, and any restrictions.
For a workplace, assign responsibility for reviewing new cleaners before they are introduced. A maintenance worker should not have to guess whether an unfamiliar solvent is safe for a particular machine.
Tool information
Record the manufacturer, model, and relevant part or material.
Cleaner information
Record the full product name and current SDS revision.
Approved method
Record the approved application method, dilution if applicable, and exposure restrictions.
Inspection result
Record any visible changes, service work, replacement parts, and approval status.
Frequently Asked Questions
Q
Can acetone damage plastic tool housings?
Yes. Acetone can soften, craze, or damage certain plastics, including some polycarbonate, acrylic, and ABS materials. It may also affect paint, coatings, and adhesives.
Never assume that acetone is safe because it evaporates quickly or removes grease well. Use it only when the tool or material manufacturer specifically approves it for the intended cleaning task.
Q
Is isopropyl alcohol safe for cleaning power tools?
Not in every situation. Isopropyl alcohol is suitable for some cleaning applications, but it can affect certain coatings, adhesives, and stressed plastic parts. The exact formulation and material determine compatibility.
Check the tool manual before using alcohol. Apply it only in the approved manner and keep liquid away from electrical openings, switches, and battery connections.
Q
Can a rubber seal recover after solvent exposure?
Some elastomers may partially return toward their original size after the solvent evaporates. However, visible recovery does not prove that the seal has regained its original strength, hardness, or sealing ability.
A seal that has swollen, cracked, softened, or hardened should be assessed against its original specification. Replace it when its dimensions or performance are uncertain, especially in a safety-critical or pressure-containing application.
Q
How do I know whether a cleaning solvent is compatible with my tool?
Start with the exact tool manual and the cleaner’s current safety data sheet. Identify the materials that may contact the cleaner, including plastic housings, rubber seals, coatings, adhesives, and electrical insulation.
Compare those materials with the cleaner manufacturer’s compatibility data. Check the stated concentration, temperature, and exposure time. If the material grade or compatibility is unknown, contact the tool or material manufacturer rather than experimenting on a working tool.
Q
Are chemical resistance charts always accurate?
Compatibility charts are useful technical references, but their ratings apply to stated materials and test conditions. They may not cover a different material grade, commercial cleaner mixture, temperature, or exposure duration.
Use the chart together with the current manufacturer’s technical information. For critical parts, seek application-specific confirmation and do not treat missing data as proof of safety.
Q
Can solvent damage happen without visible signs?
Yes. A solvent may affect internal seals, wire insulation, adhesive bonds, or protective coatings without causing an obvious surface change. Some material changes may also become visible only after drying or repeated use.
If a cleaner enters the tool housing or reaches electrical parts, keep the tool disconnected and arrange a qualified inspection before using it again.
Q
Which gloves should I wear when working with solvents?
The correct glove depends on the exact solvent, its concentration, contact time, and working conditions. No single glove material protects against every chemical.
Check Section 8 of the safety data sheet and consult the glove manufacturer’s chemical resistance and breakthrough information. Replace contaminated or damaged gloves according to the product instructions.
✦ Wrapping Up
Conclusion
Tool chemical exposure can cause more than surface discoloration. An incompatible solvent may weaken plastic, swell rubber seals, remove protective coatings, damage adhesives, or affect electrical insulation. These changes can reduce tool performance and create safety problems.
The best way to prevent solvent damage is to identify the exact chemical and materials before cleaning. Read the tool manual, review the cleaner’s SDS, and check manufacturer compatibility information. Consider temperature, concentration, exposure time, and repeated contact rather than relying on a general chemical resistance rating.
Choose the least aggressive approved cleaner and use a controlled application method. Keep liquids away from electrical openings and sensitive components. If chemical exposure causes swelling, cracks, softening, or electrical problems, stop using the tool and arrange the correct inspection or replacement.
💡 Key Takeaway
Before your next tool cleaning job, identify the cleaner, check the tool manual and SDS, confirm compatibility with every exposed material, disconnect the power source, and use the least aggressive approved cleaning method. Never experiment with an unknown solvent on a working tool.
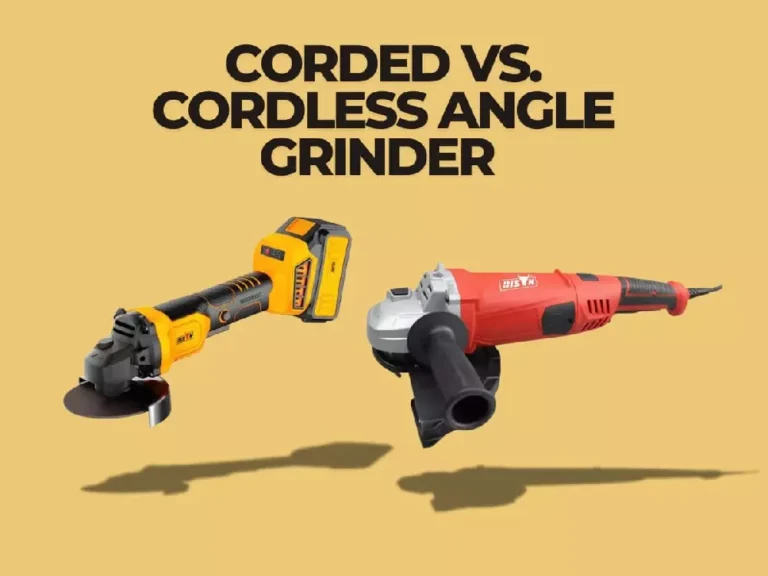
Compare corded angle grinder vs cordless angle grinder performance, runtime, and cost to pick the right tool for your projects. Quick buying tips inside.