Safe tool disassembly starts with disconnecting every power source, checking the correct service manual, and recording the position of each part. Inspect each component for wear, cracks, damage, and poor fit. Reassemble the tool in the correct order, using approved parts and specified settings. Complete a safety check before putting it back to work.
Across the United States, tools are used in home garages, construction sites, farms, factories, and repair shops. Drills, saws, grinders, sanders, and other machines need regular care. Some jobs need only a clean or a new part. Other jobs call for full disassembly. Taking a tool apart without a plan can lead to lost screws, damaged wires, loose gears, or missing safety parts.
Tool Disassembly Reassembly and Component Inspection is a planned process. It means taking a tool apart in a safe order, checking its parts, fixing or replacing approved parts, and putting everything back in the right place. Each step matters. A small washer or spring may look unimportant, but it can control how a tool moves or locks.
The safest approach is to use the service manual for the exact tool model and type. General repair advice cannot replace model-specific instructions. Some tools allow simple owner repairs. Others have sealed parts, stored energy, or complex safety systems that need a trained repair worker. OSHA also sets rules for controlling hazardous energy during covered workplace service work. This guide explains the general process and its limits.
Source: prolec.energy
What Tool Disassembly, Reassembly, and Component Inspection Mean
Tool disassembly means taking apart a tool to reach, clean, inspect, or replace internal parts. The work may involve removing a cover, handle, gear case, motor housing, or other serviceable section. The goal is to reach the part that needs attention without damaging parts that still work.
Reassembly is the process of putting those parts back in their correct places. It includes fitting gears, springs, bearings, seals, wires, covers, and fasteners. Each part must sit in the correct position. The tool must also keep its original safety features.
Component inspection means checking each part before it goes back into the tool. The check looks for wear, cracks, rust, loose joints, heat marks, and other signs of damage. It also checks whether a part still meets the limits in the service manual.
These three tasks work together. Disassembly gives access to the parts. Inspection shows which parts need care. Reassembly restores the tool to its proper form.
Disassembly
Remove parts in a planned order while keeping their position and fit clear.
Component inspection
Check each part for wear, cracks, poor fit, corrosion, and other defects.
Reassembly
Return all approved parts to their correct places and restore the tool’s safety features.
Why the Three Steps Must Stay Together
Taking a tool apart is not a repair by itself. A tool may look clean after disassembly but still have a worn bearing or a cracked gear. Reassembly without inspection can hide that fault inside the housing.
Inspection also has little value if the tool is put back together in the wrong order. A misplaced washer can change the fit of a gear. A pinched wire can create an electrical fault. A loose guard can expose the user to a moving blade or wheel.
A complete service job must cover all three steps. This gives the repair worker a clear record of what was found, what was changed, and what was checked before use.
Prepare the Tool and Work Area Before Disassembly
Good preparation makes tool repair safer and easier. Before opening the tool, find its model number and gather the correct service documents. Set up a clean bench with enough light and room to lay out the parts.
The model number matters because tools that look alike may have different internal parts. Some models also have different production types or revisions. A parts diagram for the wrong version may show the wrong screw, gear, switch, or housing.
DEWALT explains that users may need both the model number and the type number to find the correct manual, parts list, and diagram. Makita also directs users to model-specific manuals and parts breakdowns. These documents help prevent mistakes during repair. citeturn254919view1turn102101view0
Correct service manual
Find the manual for the exact model and type. Check its service limits, parts list, safety notes, and repair instructions.
Basic hand tools
Prepare the correct screwdrivers, hex keys, sockets, pliers, and other tools listed in the service instructions.
Inspection tools
Use a flashlight, clean cloth, magnifier, and suitable measuring tools when the manual calls for them.
Parts storage
Use small trays, labeled bags, or divided boxes to keep screws, clips, springs, and washers in order.
Personal protection
Use suitable eye protection and other protective equipment based on the work and the material involved.
Clean work surface
Keep dust, metal chips, oil, and loose items away from open parts and electrical contacts.
Check the Model and Parts Diagram
Write down the tool model, type, and serial or date code if present. These details help identify the correct service documents. Keep a copy of the exploded parts diagram nearby.
An exploded diagram shows how parts fit together. It can show the order of washers, clips, gears, and covers. However, a diagram may not explain every repair step. Use the service manual for torque values, special tools, lubrication points, and safety limits.
If the correct manual or parts list is not available, contact the maker or an authorized service center. Do not guess the internal layout from a similar tool.
Set Up a Clear Parts System
Use one tray for each stage of disassembly. For example, keep the handle screws in one tray and the gear case parts in another. Label each tray with its location.
A simple photo record can also help. Take a clear photo before removing a wire, spring, or small part. Take another photo after each major layer is removed. This creates a visual guide for reassembly.
Keep clean parts away from damaged parts. A clean bearing can be harmed by metal dust or grit from an old gear case.
Isolate Power and Stored Energy Before Opening a Tool
Energy isolation is the first safety step. A tool must not start while someone has a hand inside its housing. It must also be free from stored energy that could release during repair.
OSHA identifies electrical, mechanical, hydraulic, pneumatic, chemical, and thermal energy as possible hazards during service work. Unexpected startup or energy release can cause shock, burns, crushing, cuts, and other serious injuries. Covered U.S. workplaces must follow the applicable hazardous-energy control rules and their own safety procedures. citeturn254919view0
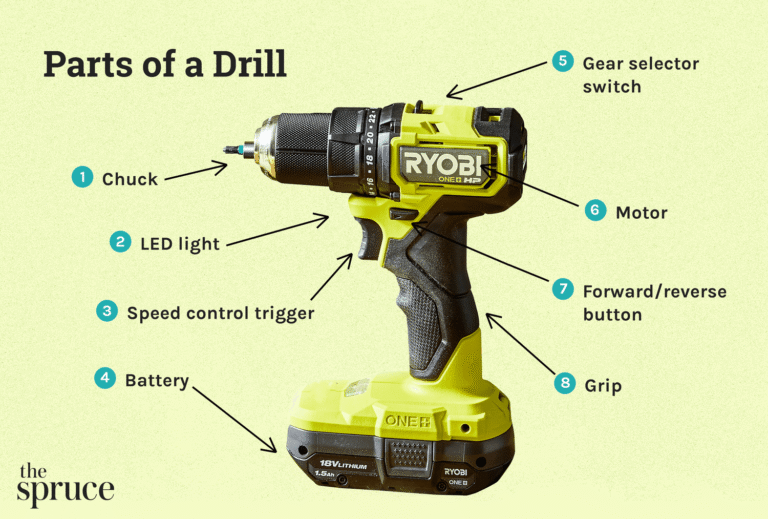
For a typical cordless drill, switch it off and remove the battery before inspection. For a corded tool, unplug it and keep the plug under your control. For air tools, disconnect the air supply and release pressure as directed by the maker.
Do not assume that switching a tool off makes it safe. Some parts can hold a charge or spring force after the power source is removed. Follow the service manual when dealing with capacitors, pressure systems, fuel, or loaded springs.
Corded tools
Unplug the tool. Keep the plug where the person doing the work has control of it. Check the workplace energy control procedure when applicable.
Cordless tools
Switch off the tool and remove the battery. Store the battery away from the repair area.
Pneumatic tools
Disconnect the air hose and release trapped pressure according to the manual.
Gas-powered tools
Follow the maker’s shutdown and fuel isolation steps. Allow hot parts to cool before service.
Hydraulic tools
Isolate the pressure source and release stored pressure only by the approved method.
Spring-loaded parts
Do not release spring tension without the proper method and tools. A spring can move with enough force to cause injury.
Understand Workplace Lockout and Tagout
Lockout and tagout, often called LOTO, are workplace methods for controlling hazardous energy. A lock helps prevent an energy source from being turned on. A tag warns others that service work is in progress.
OSHA’s general industry standard, 29 CFR 1910.147, covers certain servicing and maintenance tasks where unexpected startup or stored energy could cause harm. It also has specific scope limits and exceptions. Unplugging cord-and-plug equipment may control the hazard when the plug remains under the exclusive control of the worker performing the service.
This rule is not a reason to skip a site safety plan. Employers must assess the work and use the required procedures. A worker should not remove another person’s lock or restart equipment without proper authorization.
Check for Stored Energy
Some tools contain energy even after disconnection. A charged capacitor, compressed air chamber, loaded spring, or rotating part may still move or release energy.
Never short electrical contacts to discharge a capacitor. Do not open a sealed battery pack or try to release a pressure system without the correct service instructions. These tasks may need a trained technician.
If the energy source is unclear, stop. Find the correct procedure before removing any cover.
Document the Tool Before Removing Internal Parts
A clear record makes reassembly much easier. Before removing the first screw, inspect the outside of the tool and note any damage. Look for cracks, missing covers, loose handles, damaged cords, and signs of impact.
Take photos of the tool from several sides. Then take close photos of wires, connectors, gear positions, and other parts that may be hard to remember. Use a label for each connector if the manual allows its removal.
Keep a written list of parts removed. Record the location and condition of each part. If a part needs replacement, write down its part number and the reason for the change.
This process creates a useful repair record. It also helps identify a problem caused during disassembly instead of confusing it with an older fault.
Record the original condition
Note cracks, stains, missing screws, damaged insulation, unusual odors, and other visible signs.
Photograph each stage
Take clear photos before and after removing each main section.
Label connectors
Mark wire and plug positions when the service procedure permits their removal.
Track small parts
Record where each washer, spacer, clip, spring, and fastener belongs.
Record measurements
Write down only the measurements required by the service manual and note the tool used.
Why Small Parts Need Special Attention
A small part can control a large movement. A thin washer may set the gap between two gears. A spacer may keep a shaft in line. A retaining clip may stop a bearing from moving out of its seat.
Do not place all small parts in one box. Their size may look alike, but their shape, thickness, or position may differ. Keep each group tied to its original location.
If a part falls out before it is recorded, stop and check the parts diagram. Do not guess where it belongs.
How to Disassemble a Tool in a Safe and Controlled Order
Remove parts in a planned order. Start with the outside covers and work toward the internal parts that need inspection. Follow the maker’s steps when they differ from this general method.
Use the correct driver or wrench for each fastener. A tool that does not fit well can damage the screw head. It can also slip and harm nearby wires or plastic parts.
Do not force a housing open. Some covers use hidden screws, clips, seals, or tabs. Check the diagram before using a pry tool. A broken tab can make the housing unsafe or stop it from holding its proper fit.
Remove one part at a time. Record its location and place it in the correct tray. If the next step needs force, a special puller, or a spring tool, check the manual before continuing.
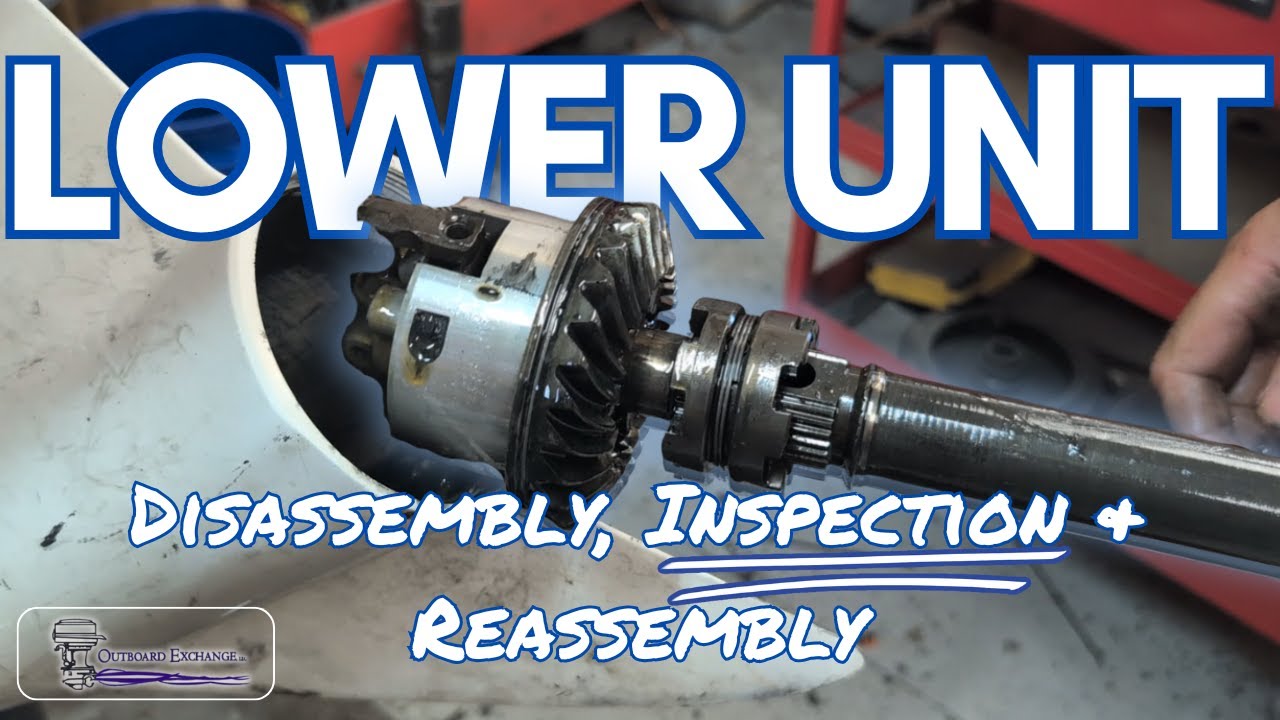
Source: youtube.com
Step 1: Clean the outside
Remove loose dust and dirt so they do not fall into the open tool.
Step 2: Remove external parts
Take off approved accessories, guards, covers, and handles as directed by the manual.
Step 3: Remove housing fasteners
Use the correct driver and record the position of each screw.
Step 4: Separate the housing
Open the case with care. Do not twist or bend it to force the halves apart.
Step 5: Expose the target parts
Remove only the parts needed to reach the area being serviced.
Step 6: Record each removal
Photograph, label, and store every part before moving to the next step.
Protect Wires, Seals, and Plastic Housings
Wires can be trapped between two housing halves. Pulling the case apart too fast may break a connector or damage insulation. Check the wire route before moving the cover.
Rubber seals can stick to their seats. Lift them only by the method given in the service manual. A sharp metal tool can cut the seal and create a leak or dust path.
Plastic housings can crack under too much force. Use the correct release points and avoid placing pressure on thin tabs.
Do Not Open Parts That Are Not User-Serviceable
Not every internal part is designed for home repair. Some battery packs, chargers, motor units, and electronic control modules are sealed or marked as non-serviceable.
Opening a lithium-ion battery pack can expose cells and electrical parts to damage. A damaged cell can create a fire risk. Leave battery pack repair to a qualified service provider.
The same care applies to compressed-air systems, fuel systems, and parts with stored spring force. If the manual does not give a safe service method, stop and seek qualified help.
Inspect Tool Components for Wear and Damage
Inspect every exposed part before cleaning or replacing it. Look at the part first, then compare its condition with the service limits in the manual. A part that looks worn may still meet its limit. A part that looks clean may still have a crack or poor fit.
Use good light and a clean surface. Turn each part slowly and inspect all sides. Look for heat marks, rust, broken teeth, bent shafts, loose joints, and worn contact points.
Do not make repair decisions from appearance alone when the manual gives a measurement. Use the stated method and tool. If no limit is listed, do not invent one or assume that a small amount of wear is safe.
Check the housing
Look for cracks, broken screw posts, worn tabs, heat marks, and signs of impact.
Check gears and shafts
Look for chipped teeth, uneven wear, rust, bends, and poor movement.
Check bearings
Look for rough movement, noise, corrosion, excess play, and damaged seals.
Check electrical parts
Look for damaged wires, loose connectors, burnt areas, and cracked insulation.
Check fasteners
Look for stripped threads, worn heads, bends, rust, and missing locking parts.
Check safety parts
Inspect guards, switches, locks, brakes, and other safety features for damage and poor movement.
Housing, Handles, and Structural Parts
The housing holds the tool together and protects its internal parts. Check the case for cracks near screw holes, joints, and handle mounts. A crack in one of these areas can let parts shift during use.
Inspect rubber grips and handles for loose sections or damage. Check the threads and screw posts that hold them in place. A broken mounting point can make the tool hard to control.
Do not repair a load-bearing or safety-related housing with glue unless the manufacturer approves that method. A repair that looks strong may fail under vibration or load.
Gears, Shafts, and Drive Parts
Gears transfer power from the motor to the working part. Check each tooth for chips, cracks, and uneven wear. Look for metal debris around the gear case.
A shaft should not show a bend or deep scoring. Check the keyways, splines, and bearing seats for damage. These features help parts stay in line.
A damaged gear can create noise, vibration, or poor power transfer. Replace it with the correct part if it fails the maker’s inspection limit.
Bearings, Bushings, and Seals
Bearings help shafts turn with less friction. Check for rough movement, grinding, rust, and play beyond the stated limit. Do not clean and reuse a bearing that has a clear defect.
Bushings guide moving parts and help keep them in line. Check for wear, oval shapes, and cracks. A worn bushing can allow a shaft to move too far.
Seals keep dust, water, oil, or grease in or out of a tool. Look for cuts, hard spots, swelling, and poor fit. Replace a damaged seal with the correct size and type.
Motor, Switches, and Wiring
Electrical parts need careful inspection. Check the cord, strain relief, switch, wire joints, and battery contacts. Look for exposed wire, loose terminals, dark marks, and melted plastic.
On a brushed motor, check the brushes and commutator only if the manual allows this work. Look for brush wear and damaged contact surfaces. Use the maker’s limits to decide whether a part needs replacement.
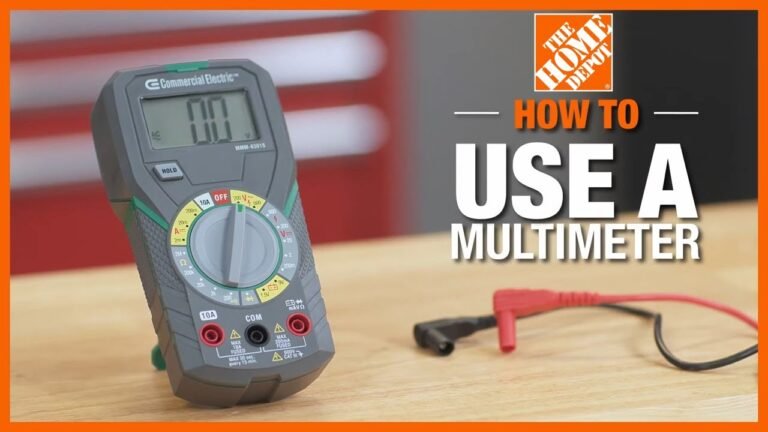
Brushless motors and electronic control units may need special test tools. Do not open or test sealed electronics without the right service procedure. A visual check cannot prove that an electronic part works.
Guards, Switches, and Safety Features
Safety parts need the same care as the motor and drive parts. Check that guards move as designed and return to their safe position. Look for broken springs, loose hinges, and damaged locks.
Test the trigger lock, safety switch, brake, and other controls by the method in the manual. A switch that sticks or fails to return needs attention before use.
Never remove a guard or safety lock to make a repair easier. Do not return the tool to service if a safety feature is missing or uncertain.
Clean, Repair, and Replace Parts the Right Way
Clean parts only after the first inspection. This helps keep the original evidence of wear or damage clear. Use a method and cleaning product that will not harm the material.
A dry cloth or soft brush may work for loose dust. Some metal parts may need an approved cleaner. Do not soak switches, motors, bearings, or electronic parts unless the service manual allows it.
Keep metal dust and dirt away from bearings and electrical contacts. Use the correct method to remove old grease. Do not mix new lubricant with unknown or dirty material.
Replace parts that fail the service limits or show damage that makes them unsafe. Use the exact part number or a replacement that the manufacturer lists as compatible. Similar shape does not prove that two parts are equal.
Clean with care
Use approved cleaners and tools. Keep moisture away from electrical parts unless the manual allows cleaning by that method.
Replace damaged parts
Do not reuse cracked gears, damaged wires, broken guards, or parts that fail stated limits.
Use correct lubricant
Apply only the type and amount listed in the service manual.
Check replacement fit
Confirm the part number, model, type, size, and revision before fitting it.
Keep records
Record each replaced part and the reason for the change.
When Should a Component Be Replaced?
Replace a part when it has a crack, broken tooth, damaged thread, unsafe electrical fault, or other defect listed in the service instructions. Also replace parts that fail the maker’s size or wear limits.
A part does not always need replacement just because it has some surface marks. Small marks may be normal for a used tool. The deciding factor is the part’s function and its stated service limit.
Do not replace parts with an improvised substitute. A bolt with the wrong length can touch a moving part. A seal with the wrong material can fail when exposed to heat or oil.
How to Reassemble a Tool Correctly
Reassemble the tool in the order set by the service manual. In many cases, this means working in reverse order from disassembly. However, some parts need a special fitting sequence or adjustment before the housing closes.
Lay out all inspected parts before starting. Check that every part is clean, approved for reuse, or replaced with the correct new part. Compare the parts with your photos and the exploded diagram.
Work slowly. A part that does not fit may be in the wrong position, turned the wrong way, or paired with the wrong part. Never use a screw to pull a badly aligned housing into place.
Follow the maker’s torque values and tightening order. Do not guess how tight a screw should be. Too little force can let a joint loosen. Too much force can strip threads or crack a plastic housing.
Step 1: Check all parts
Confirm that each part is clean, sound, and correct for the exact tool version.
Step 2: Fit internal parts
Install bearings, gears, shafts, seals, and other parts in the stated order.
Step 3: Restore wire routes
Place wires and connectors in their original paths. Keep them away from moving parts and sharp edges.
Step 4: Fit the housing
Check the joint and make sure no wire, seal, or spring is trapped.
Step 5: Tighten fasteners
Use the specified fastener type, order, and torque value.
Step 6: Refit safety parts
Install all guards, covers, locks, and safety controls before any powered test.
Check Gear and Shaft Alignment
Gears and shafts must sit in the correct position. A gear that is not seated may create noise or bind when the motor turns. A shaft that is out of line may wear its bearing.
Use the manual to check gear direction, spacer order, and shaft position. Make sure retaining clips and pins are fully seated where required.
If a gear or shaft will not fit by hand or with the approved tool, stop and check the part number and position. Do not hammer it into place unless the service instructions give that method.
Restore Wires, Connectors, and Seals
Wire routing matters. A wire trapped under a cover may become cut when the tool is tightened. Keep wires in their original clips and channels.
Check each connector for a full fit. Do not pull on a wire to make a connection. Use the connector body as directed by the maker.
Fit seals in the correct direction and position. A twisted or pinched seal may not protect the tool from dust, water, or oil.
Use the Correct Tightening Method
Some tools use different screw lengths in the same housing. Put each screw back in its original hole. A long screw in the wrong place may damage an internal part.
Use a torque tool when the manual gives a torque value. Follow the stated sequence if the housing or joint needs even pressure.
Do not add threadlocker, grease, or oil unless the manual calls for it. These products can change friction and affect the final fit.
Perform Post-Reassembly Checks Before Using the Tool
A tool is not ready for use just because its housing is closed. It needs a final inspection while it is still disconnected from power. Check the outside, fasteners, moving parts, guards, switches, and cable or battery connection.
Look for gaps between housing sections. Check that no screw is missing and that all covers sit flat. Make sure the handle and guard are secure.
Where the manual allows it, check the movement of unpowered parts by hand. A shaft or gear that binds may point to a misplaced washer, poor alignment, or a damaged part. Do not force the movement.
Only perform a powered test after all safety parts are fitted and the tool passes the required checks. Use the maker’s test procedure and a safe work area. Keep other people clear of the tool.
Stop the test if the tool makes a new grinding noise, shakes, smokes, smells burnt, overheats, or behaves in an unusual way. Switch it off and isolate the power before checking it again.
Housing check
Confirm that the housing is closed, the seams are even, and all fasteners are in place.
Movement check
Check approved moving parts for smooth movement and signs of binding.
Safety check
Confirm that guards, switches, locks, brakes, and handles work as designed.
Electrical check
Look for damaged cords, loose contacts, exposed wires, or other electrical defects.
Powered test
Follow the model-specific test procedure. Start with the safest approved test condition.
Final record
Record the repair, parts used, inspection result, and any limits on further use.
Signs of Successful Reassembly
The housing fits without gaps. All screws and clips are present. Wires are in their correct paths, and seals sit flat. No part is left over unless the service manual identifies it as unused for that version.
Approved moving parts work without unusual binding. Safety controls return to their normal position. Guards remain secure and move as designed.
The tool also passes the maker’s final test. There is no new smoke, burning smell, abnormal noise, or unexpected movement. If any check fails, do not return the tool to work.
Common Reassembly Problems and How to Fix Them
A tool that fails after reassembly needs a careful check. Do not keep trying to run it. Repeated testing can make a small assembly error worse.
Start by isolating the power again. Review the photos, parts list, and service steps. Check the last parts that were installed before the problem appeared.
A part that does not fit can be the wrong version or in the wrong position. A new noise can point to poor alignment, a loose fastener, or a damaged bearing. A tool that will not start may have a connector or switch issue, but electrical testing should follow the manual and be done by a qualified person when needed.
Housing will not close
Check for a trapped wire, misplaced spring, wrong screw, twisted seal, or part that is not fully seated.
Shaft or gear will not turn
Check the gear order, bearing position, spacers, and alignment. Stop if the movement remains blocked.
Tool makes a new noise
Check for loose parts, poor gear fit, bearing damage, and incorrect lubrication.
Tool does not start
Check external power, battery fit, approved connectors, and the switch system according to the manual.
Tool vibrates more than before
Check rotating parts, bearings, fasteners, balance, and the correct fit of the working accessory.
Safety feature does not work
Stop the repair. Check the assembly instructions and replace or service the affected safety part.
When a Part Does Not Fit
First, compare the part with the exploded diagram and part number. Check whether the tool has a different type or production revision. A part may look similar but have a different size or mounting point.
Next, check the order of the nearby parts. A missing washer or spacer can stop the next part from sitting correctly. A seal may also be facing the wrong way.
Do not file, grind, bend, or cut a part to make it fit unless the manufacturer gives that instruction. Changing a part can affect strength and safety.
When to Stop and Use a Repair Center
Some faults need special tools or training. Examples include damaged motor windings, electronic control faults, battery cell damage, high-pressure parts, and broken safety systems.
Stop if the repair needs live electrical testing, internal battery work, spring compression, or a pressure test that you cannot perform safely. Do not use a partly repaired tool as a test machine.
Use an authorized or qualified repair center when the manual calls for professional service. Keep the tool out of use until the repair is complete.
Common Mistakes During Tool Disassembly and Reassembly
Most repair mistakes happen when someone rushes or relies on memory. A tool may have many small parts that look alike. One wrong part can affect the fit, movement, or safety of the whole machine.
The best way to avoid these problems is to use the service manual, take photos, label parts, and check each stage before moving on. Stop whenever the next step is unclear.
Opening a tool while it is powered
This can cause unexpected startup or electric shock. Isolate the power and stored energy first.
Using the wrong parts diagram
Different model types may use different parts. Check the exact model and type before ordering or fitting a part.
Mixing screws and washers
Different fasteners may have different lengths or thread types. Keep each group separate.
Forcing the housing apart
Hidden clips or screws may still hold it. Check the manual before using force.
Using too much lubricant
Excess grease may enter switches or other areas where it does not belong. Follow the stated amount.
Guessing tightening force
Too much or too little force can damage the joint. Use the specified torque where provided.
Ignoring safety features
A missing guard, lock, or brake can make a repaired tool unsafe. Restore every required safety part.
Testing before final inspection
A loose part or pinched wire may cause damage when the tool starts. Complete the checks first.
Which Tool Repairs Can Be Done at Home?
The right repair level depends on the tool, the fault, and the service instructions. A simple accessory change is not the same as opening a motor or battery pack.
Some makers allow users to replace certain external parts. Other parts need special tools or trained service workers. Always follow the manual and any workplace rules that apply.
The table below gives a general guide. It does not replace the service limits for a specific model.
Often suitable for a careful owner
Approved external cleaning, accessory replacement, guard checks, and simple user-serviceable part changes listed in the manual.
May need repair training
Internal gear changes, bearing replacement, switch replacement, and motor service when the maker provides an approved procedure.
Best left to qualified service staff
Battery pack repair, damaged electronic controls, live electrical testing, complex spring systems, pressure systems, and safety-critical repairs without an approved user procedure.
Simple Hand Tools
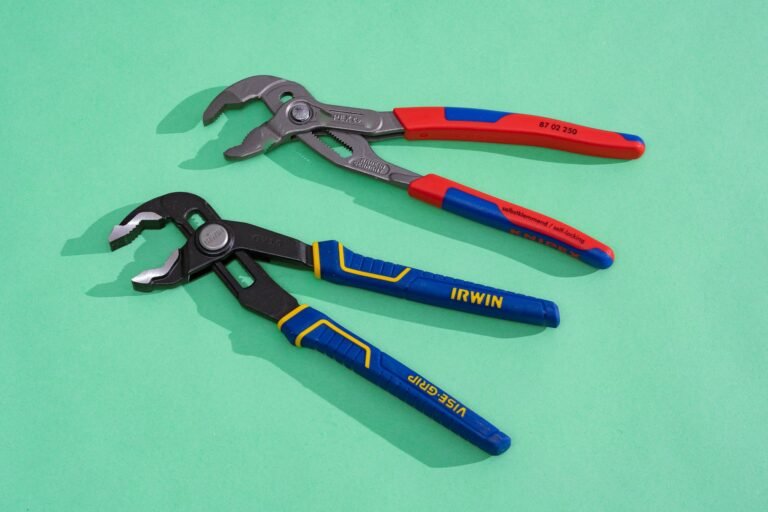
Hand tools such as pliers, wrenches, and screwdrivers often need less complex service. Their parts may include handles, jaws, springs, pivots, and fasteners.
Check handles for cracks and loose joints. Look at cutting edges for chips and damage. Inspect pivots for excess play. Replace parts when they fail the maker’s requirements.
Do not use a damaged hand tool just because it has no motor. A cracked handle or loose head can still cause injury.
Corded and Cordless Power Tools
Drills, saws, sanders, and grinders may contain motors, switches, gears, bearings, and safety systems. Some have owner-serviceable parts, while others require factory or authorized service.
Cordless tools also have battery contacts and electronic controls. The battery should be removed before service. Do not open the battery pack unless the maker provides a safe procedure for a qualified repair provider.
Never operate a power tool with an open housing or missing guard just to see whether the motor works.
Pneumatic and Hydraulic Tools
Air and hydraulic tools can store pressure after the supply is disconnected. A hose, seal, valve, or internal chamber may release that pressure during service.
Use the correct pressure release and inspection steps. Do not open a pressurized part. Check hoses, fittings, seals, and fasteners for damage.
If a pressure part has a crack or the safe release method is unclear, use qualified service support.
Research Scope, Evidence, and Important Follow-Up Questions
This guide uses a United States market focus. Research was conducted on November 7, 2026, using searches related to tool disassembly, power tool servicing, component inspection, hazardous-energy control, repair manuals, and parts diagrams.
The reviewed reference material included OSHA’s hazardous-energy overview, OSHA’s Hand and Power Tools booklet, DEWALT’s instructions for finding manuals and parts diagrams, Makita U.S.A.’s service FAQ, and a Makita instruction manual. These sources provide safety rules, manufacturer documentation, and model-specific service examples. They are not independent hands-on repair tests.
The documented findings are that tools must be disconnected before covered service work, hazardous energy needs proper control, and model-specific manuals and parts diagrams help identify the correct components. The general workflow in this article is an analysis of those safety and service principles.
No tool was physically disassembled or tested for this article. No universal torque value, bearing clearance, gear tolerance, or replacement interval is claimed. Those details must come from the service manual for the exact tool.
The reviewed reference pages give useful guidance on energy isolation, finding service documents, and manufacturer repair limits. They provide less detail on keeping small parts in order, inspecting each component, and checking a tool after reassembly. The following questions are inferred next needs based on the repair process, not verified search-volume findings.
Question: How can small screws and washers be kept in order?
Reader stage: Before and during disassembly. Basis: Inferred next need. Reviewed-page coverage: Missing from the inspected reference pages. Reader benefit: Better part tracking and fewer assembly errors. Answer evidence: Exploded diagrams and a photo record. Priority: High. Placement: Preparation and documentation sections.
Question: Which components need inspection before reassembly?
Reader stage: During inspection. Basis: Inferred next need. Reviewed-page coverage: Shallow in the inspected general safety and manufacturer support pages. Reader benefit: A clear inspection checklist. Answer evidence: Model-specific service limits and visual checks. Priority: High. Placement: Component inspection section.
Question: How can correct reassembly be confirmed?
Reader stage: After repair. Basis: Inferred next need. Reviewed-page coverage: Shallow in the inspected reference pages. Reader benefit: Fewer missed fasteners, poor fits, and unsafe tests. Answer evidence: Service instructions and post-reassembly checks. Priority: High. Placement: Final inspection section.
Question: How can the correct replacement part be found?
Reader stage: Before ordering parts. Basis: Inferred next need. Reviewed-page coverage: Answered by the inspected DEWALT and Makita support guidance for their own product systems. Reader benefit: Fewer incorrect part orders. Answer evidence: Exact model, type, and official parts breakdown. Priority: High. Placement: Preparation section.
Question: When should an owner stop and use a repair center?
Reader stage: During repair. Basis: Inferred next need. Reviewed-page coverage: Answered in part by manufacturer service guidance. Reader benefit: Clear safety limits. Answer evidence: The exact tool manual and approved service procedures. Priority: High. Placement: DIY versus professional repair section.
Evidence Categories Used in This Guide
Documented facts refer to instructions or requirements stated in official safety material and manufacturer documents. These include OSHA’s hazardous-energy guidance and the model-specific service instructions published by tool makers.
Analysis refers to practical steps that connect those documents into a useful repair workflow. Examples include taking photos, using separate parts trays, and checking the last installed parts when a housing does not close.
Not established means that no universal value or result can be claimed. Tool designs differ. A torque value, bearing limit, lubricant amount, or repair method for one model should not be applied to another without support from its service documents.
There are no tested-by-us performance claims in this article. All repair advice should be checked against the current manual and the condition of the exact tool.
Frequently Asked Questions
Q
Should I remove the battery before disassembling a cordless tool?
Yes. Switch off the tool and remove the battery before inspection or service. Keep the battery away from the work area so it cannot be fitted by mistake.
Do not open the battery pack unless the manufacturer provides a suitable service procedure for qualified repair staff. A damaged lithium-ion cell can create a fire or injury risk.
Q
Do I need the exact model number for tool disassembly?
Yes. The exact model and type help you find the right service manual and parts diagram. Similar tools may use different gears, screws, switches, or housings.
Check the tool’s nameplate before ordering parts. If the type or revision is unclear, contact the manufacturer or an authorized service provider.
Q
Should all bearings and seals be replaced during disassembly?
No. Replace parts that are damaged, worn beyond the stated limit, or listed for replacement during that service. A sound part does not always need to be changed.
However, some manuals require certain seals, clips, or other parts to be replaced after removal. Follow the instructions for the exact tool.
Q
How tight should screws be during tool reassembly?
Use the torque value and tightening order given in the service manual. Do not guess or use the same setting for every screw.
Different screws may have different sizes and roles. Too much force can strip threads or crack plastic. Too little force can let parts move during use.
Q
What should I do if a tool binds after reassembly?
Switch it off and disconnect the power source at once. Do not keep testing it. Binding can point to a misplaced washer, poor gear alignment, a trapped wire, a damaged bearing, or an incorrectly seated part.
Review the service diagram and your photos. Check the last parts installed and confirm that each part number and position is correct. If the cause is unclear or the repair involves a safety-critical part, use a qualified repair center.
✦ Wrapping Up
Conclusion
Tool disassembly, component inspection, and reassembly should follow a clear plan. Start by finding the correct service manual and isolating every energy source. Record the original condition and remove parts in a controlled order.
Inspect each component before putting it back. Check for cracks, wear, rust, poor fit, heat damage, and other faults. Use approved replacement parts and follow the correct instructions for lubrication, alignment, and tightening.
Never rush the final checks. Confirm that the housing, wires, fasteners, guards, and safety controls are in place. Complete the approved test before returning the tool to normal work. If a step is unclear or the repair involves a sealed or hazardous part, stop and seek qualified service.
💡 Key Takeaway
Before opening any tool, get its exact service manual, remove or isolate every power source, and set up a labeled parts tray. Photograph each stage, inspect every exposed component, and check the completed assembly against the manual before use.
Compare locking pliers vs channel lock pliers to learn which gives better grip, ease and value for DIY or pro work – quick tips and expert picks to choose smart.