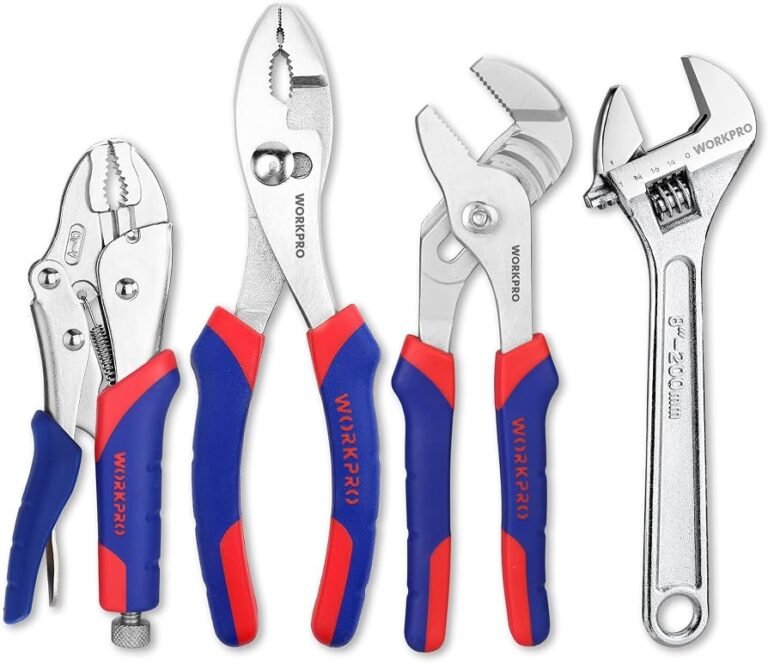
Repair a tool when the fault is clear, the tool is safe, parts are available, and the repair buys enough useful life for the money. Replace it when repair costs, repeated failures, downtime, poor support, or safety risks make a new tool the better long-term choice.
In the United States, homeowners, woodworkers, mechanics, contractors, and maintenance teams depend on tools every day. A broken drill can stop a home project. A failed table saw can delay a woodworking order. A damaged compressor can leave a repair shop without the air it needs. The choice between repair and replacement affects both the budget and the work schedule.
The lowest repair quote does not always mean the best deal. A cheap fix may last only a few weeks. A new tool may cost more at first but save money through better reliability and fewer service calls. The right choice depends on the fault, repair cost, tool age, expected life, parts supply, and cost of lost work.
This guide explains how to judge whether a tool is economically serviceable. It covers hand tools, cordless tools, corded power tools, workshop machines, and common jobsite equipment. It also provides a simple cost method that helps compare repair and replacement on fair terms. Safety comes first in every decision.
What Economic Serviceability Means
Economic serviceability means a tool can be kept in safe working order at a reasonable cost. The tool must have a useful purpose after repair. Its parts must be available, and a qualified person must be able to complete the work. A repair that costs little but leaves the tool unreliable is not good value.
There are three parts to this decision. Technical serviceability asks whether the tool can be fixed. Safety serviceability asks whether the tool can return to safe use. Economic serviceability asks whether the repair makes financial sense. All three must support the repair choice.
For example, a drill with worn carbon brushes may need a simple service. Its motor, housing, and switch may still be in good shape. Replacing the brushes can restore normal use at a modest cost. A drill with a damaged motor, burned wiring, and a cracked housing may need several costly repairs instead.
The same idea applies to larger machines. A table saw with a worn belt may be worth fixing. A machine with a damaged frame, poor alignment, and unavailable safety parts may not be. The full condition matters more than one failed part.
Technical serviceability
The fault has a known cause, suitable parts exist, and a capable repair person can restore the tool.
Safety serviceability
The repair can restore guards, switches, brakes, insulation, controls, and other safety features.
Economic serviceability
The total repair cost is reasonable when compared with the useful life and value gained.
Why the Original Purchase Price Can Mislead
The amount paid for a tool years ago is not the right price for today’s decision. That money has already been spent. It cannot be recovered by choosing repair or replacement. The better question is what each choice will cost from this point forward.
A professional drill bought for $300 may now have a market value of only $90. A $60 repair may still be a good choice if it gives the drill several more years of reliable use. On the other hand, a $90 repair may be poor value if the tool has several other faults.
Use the current cost of a comparable replacement as a guide. Also consider what the repaired tool can do, how long it may last, and whether it meets the demands of the work.
Use current replacement prices
Compare the repair with a tool that offers similar power, capacity, quality, and intended use.
Ignore sunk costs
Do not repair a tool only because it was costly when new.
Safety and Tool Condition Must Come First
A tool must pass a safety check before its repair cost is considered. A low repair bill cannot justify using equipment that may injure someone. Remove a damaged tool from service until a proper inspection and repair are complete.
In the United States, OSHA rules cover the safe condition and use of many workplace tools. Under 29 CFR 1910.243, tools found to be in improper working order must be removed from service. The rule also calls for repairs in line with the manufacturer’s specifications. Cracked saws must be removed from service.
These rules are especially important for businesses, workshops, and job sites. Employers should not let workers use damaged tools while waiting for a repair decision. A tool that has lost a guard or has a faulty trigger must remain out of service.
Home users should follow the same basic safety approach. Unplug corded tools before inspection. Remove batteries from cordless tools when the manual allows it. Never open a tool or battery pack unless the maker permits the work and the person doing it has the right skills.
Electrical damage
Frayed cords, exposed wires, damaged plugs, burning smells, and signs of overheating need prompt attention.
Damaged guards
A missing, cracked, or poorly working blade guard can make a saw unsafe. Do not use the saw until the defect is fixed.
Cracks and loose parts
Cracked housings, loose handles, broken mounts, and damaged structural parts can affect control and stability.
Faulty controls
A trigger that sticks, a switch that fails, or a brake that does not work needs proper service.
Unusual heat or noise
Smoke, strong electrical odors, heavy vibration, and new grinding sounds may point to serious internal damage.
When Safety Rules Override the Cost Calculation
Some tool parts should never receive an improvised repair. A damaged blade, failed brake, unsafe electrical connection, or weakened load-bearing part may need replacement with an approved component. The maker’s service instructions must guide the decision.
Tools used for lifting, cutting, fastening, or other high-risk work need special care. A repair must restore the required safety and performance. If that result cannot be confirmed, replace the tool or keep it out of service.
Ask a qualified repair technician to inspect serious faults. For workplace equipment, follow the applicable OSHA rules and company procedures. Do not trade a known safety risk for a lower repair bill.
Stop using unsafe equipment
Disconnect the power source where safe, label the tool, and keep others from using it.
Use approved repair methods
Follow the manufacturer’s service instructions and use suitable parts.
Verify the repair
Have the required safety checks and functional tests completed before returning the tool to work.
Compare the Full Cost of Repair and Replacement
A fair comparison includes every cost needed to return the tool to useful service. The repair quote may show only parts and labor. The real cost may also include inspection, shipping, testing, rental equipment, and lost work time.
Replacement has extra costs too. A new cordless tool may need a battery and charger. A stationary machine may need new blades, mounts, setup, or calibration. A different model may also require new training or accessories.
The best method is to compare the total cost of each option over a similar period. This shows how much useful service each choice buys. It also prevents a short repair from looking cheaper than a replacement that may last much longer.
Repair cost
Add the diagnosis fee, parts, labor, shipping, taxes, fitting, calibration, testing, and any rental or downtime cost.
Replacement cost
Add the purchase price, tax, batteries, charger, accessories, setup, delivery, and training. Subtract any realistic resale or trade-in value.
Future risk
Allow for repeat failures, another service visit, lost work, and the chance that a repair will not last as expected.
Use Cost Per Month or Cost Per Working Hour
Cost per month is a simple way to compare tools with different expected service lives. Divide the total cost by the realistic number of months of useful service. For a business, cost per working hour may be more useful when tools have very different use levels.
The formula is simple: cost per month equals total cost divided by expected useful months. Use a realistic estimate, not the longest life you hope to get. Compare tools that can perform the same job.
For a more detailed business decision, add yearly service costs and expected failure costs. Large equipment purchases may need a full life-cycle cost review. This can include maintenance, operating costs, downtime, future repairs, and disposal.
Repair cost per month
Total repair cost divided by the expected extra months of reliable use.
Replacement cost per month
Net replacement cost divided by the expected useful months of the new tool.
A Hypothetical Repair Versus Replacement Example
Imagine a small U.S. woodworking shop has a cordless drill with a failed internal component. A repair shop quotes $110 for diagnosis, parts, and labor. The technician expects the repair to provide about 36 more months of useful service.
The repair cost per month is about $3.06. A comparable new drill costs $260. It also needs a $35 battery and charger set. The owner expects to recover $20 by selling the old tool, making the net replacement cost $275.
If the new drill is expected to last 72 months, its cost is about $3.82 per month. In this example, repair has the lower cost per month. It also requires less money at the start.
These figures are hypothetical. They do not describe a tested tool or a guaranteed service life. The result could change if the repair has a high failure risk, the new tool is more productive, or the old drill needs another costly repair.
Repair option
$110 total repair cost divided by 36 months equals about $3.06 per month.
Replacement option
$275 net replacement cost divided by 72 months equals about $3.82 per month.
Decision
Repair is cheaper in this example if the expected life and safety of the repaired drill are realistic.
Include the Expected Cost of Another Failure
A repair may fail again. That risk should be part of the decision. A repair that costs $100 may not be a bargain if another failure would cause a second repair, a new part, and several days of lost work.
Expected failure cost is the chance of failure multiplied by the cost if it happens. For example, if a qualified technician estimates a 10 percent chance of a repeat fault and the loss from that fault would be $500, the expected failure cost is $50.
Do not invent a failure percentage to make the calculation look exact. Ask the repair shop about the condition of the other parts. If no reliable estimate exists, compare low-risk, medium-risk, and high-risk cases instead.
Check the repair warranty
Ask how long the repair is covered and what parts or labor are included.
Check the root cause
Find out why the part failed and whether another worn or damaged part could cause the same problem.
Allow for another breakdown
Include the cost of a second repair, replacement parts, and lost work when the risk is meaningful.
Understand the 50 Percent Rule and Its Limits
The 50 percent rule is a common starting point for repair decisions. It suggests taking a close look at replacement when the repair cost reaches about half the cost or value of the tool. Some tool management guides use this rule to help teams review repair requests.
It is a screening method, not a law or a fixed financial standard. A repair that costs 30 percent of a new tool may still be poor value if it buys only a few months of use. A repair that costs 60 percent may still make sense if the tool is expensive, parts are available, and the repair restores many years of service.
Use the price of a comparable new tool as the main reference. Do not compare a repair quote with the original purchase price from several years ago. Also avoid comparing a basic replacement with a high-capacity professional tool.
Age is another weak rule when used alone. A five-year-old tool may be in good shape if it had light use and proper care. A two-year-old tool may be badly worn after heavy work in dust, heat, or wet conditions.
Below 30 percent
A repair may be attractive when the fault is isolated and the tool has a good service history.
Between 30 and 50 percent
Compare expected remaining life, repair quality, parts support, and replacement features.
Above 50 percent
Review replacement closely, especially when other components show wear or another failure is likely.
Near the full replacement cost
Replacement often offers better value unless a special tool, unusual part, or high replacement cost changes the result.
Why a Fixed Percentage Can Give the Wrong Answer
A percentage does not show how long a repair will last. It also does not show the cost of downtime or the risk of another failure. A repair quote must be judged against the service it is expected to provide.
For example, a $150 repair on a $300 tool may seem too expensive. But if the tool is a specialized machine and a suitable replacement costs $1,200, the repair may be reasonable. The same repair may be poor value on a common tool that costs $180 to replace.
Use the percentage as a warning sign. Then check the full costs and remaining useful life before making the final choice.
Do not treat 50 percent as an automatic cutoff
The right answer depends on tool type, condition, use, reliability, and replacement cost.
Use the same level of quality
Compare the repair with a replacement that can handle the same work and duty level.
Check Remaining Life, Parts Support, and Downtime
A good repair should provide enough useful life to justify its cost. A tool may be old but still have sound major parts. Another tool may look clean but have worn bearings, weak electrical parts, or a damaged drive system. A proper inspection gives a better picture than age alone.
Look at the repair history. One isolated fault is different from repeated failures across several parts. If the same fault keeps returning, the repair may not be fixing the real cause. A second opinion may help before you spend more money.
Parts support also affects serviceability. A tool may be easy to repair today but difficult to maintain next year if key parts are no longer made. Check whether the maker or a qualified repair shop can still supply the parts and service information.
Repair history
Review past repairs, service dates, repeated faults, and the total amount spent.
Parts availability
Check stock, delivery time, part quality, and whether future service is likely to remain possible.
Workload
A tool used every day needs stronger reliability than one used for a few small home projects each year.
Downtime
Count lost work, idle labor, delayed jobs, rental tools, and the time needed to get a replacement.
Performance
Consider whether the repaired tool will still meet the speed, power, accuracy, and capacity needed.
Downtime Can Change the Best Financial Choice
A repair may be cheaper but take two weeks. A new tool may be available today. For a homeowner, that delay may not matter. For a contractor with booked jobs, the delay can cost much more than the price difference.
Estimate the cost of each day without the tool. Include lost work income, idle staff, delayed orders, and rental fees. If another tool can handle the job, the real downtime cost may be low.
A spare tool can also change the decision. Businesses that depend on one critical machine may benefit from a backup. This can reduce the pressure to make a rushed repair or replacement choice.
Low downtime cost
Repair may be sensible when the tool is not needed right away or a spare is available.
High downtime cost
A faster replacement may be better when delays affect paid work or important deadlines.
Long part delays
Ask about part stock and delivery dates before approving a repair.
Consider the Type of Tool Before Choosing
Different tools have different repair needs. A simple hand tool may need only a new handle or a sharp edge. A cordless tool may have a battery, motor, switch, or control fault. A large workshop machine may need specialist work and careful testing.
The type of tool affects the cost, skill, parts, and time needed for repair. It also affects the risk of a poor repair. Use the manufacturer’s service guide and choose a repair method that suits the tool.
Cordless Power Tools
Cordless tools need a separate review of the tool, battery, and charger. A drill may be in good shape while its battery has lost useful capacity. Replacing the battery may be far cheaper than replacing the full kit.
Check battery cost and compatibility before buying a new tool. A replacement from the same platform may work with batteries and chargers already in the shop. A different platform may require several new items.
Do not open a lithium-ion battery pack to repair its cells unless you are trained and the manufacturer permits that work. Damaged cells can create fire and injury risks. Use approved service or battery recycling options.
Battery fault
Test with a known compatible battery or charger when the manual allows it. Confirm the source of the fault before replacing the tool.
Motor or switch fault
Get a repair quote and compare it with the cost of a bare tool or a complete kit.
Platform change
Include all batteries, chargers, and useful accessories in the new system cost.
Corded Power Tools
Corded drills, sanders, saws, and grinders can often receive repairs to cords, switches, brushes, and other approved parts. A single worn component does not always mean the whole tool has reached the end of its life.
The decision changes when the motor, housing, bearings, and electrical parts show widespread wear. A tool that has suffered heat damage or repeated electrical faults may need a full inspection before any repair is approved.
Never use a tool with exposed wires or a damaged plug. Do not attempt electrical repairs unless you have the right skills and follow the manufacturer’s instructions.
Simple fault
A replaceable cord, switch, or approved service part may make repair practical.
Multiple internal faults
Compare the full service quote with a suitable replacement and consider the risk of repeat failure.
Stationary Workshop Machines
Table saws, drill presses, planers, band saws, and jointers may justify repair because a new machine can cost much more than a small part or service job. Belts, bearings, switches, and other replaceable parts may be worth servicing.
Major frame damage, poor alignment, worn drive systems, and unavailable safety parts can change the result. A machine must return to the required level of accuracy and safe operation. A repair that leaves the machine unstable or out of alignment is not a sound investment.
For large machines, ask for a written inspection and repair estimate. Include setup, alignment, testing, and transport costs in the comparison.
Repair may suit
The frame is sound, the fault is limited, and parts and skilled service are available.
Replacement may suit
Major structural damage, repeated faults, or poor accuracy makes safe and reliable repair unlikely.
Hand Tools and Pneumatic Tools
Hand tools often have simple repair needs. A damaged handle may be replaceable. A dull cutting edge may need proper sharpening. A worn wrench or cracked striking tool may need to be removed from service if its condition creates a risk.
Pneumatic tools may need new seals, valves, hoses, or fittings. These repairs can be useful when the main body remains sound. Check that replacement parts match the tool and the rated air pressure.
Do not use a makeshift fitting or an unapproved part in a pressurized system. A small air leak may be simple to fix, but damaged pressure parts need proper inspection.
Hand tool repair
Repair simple parts when the tool can be restored to safe use.
Pneumatic tool repair
Check seals, valves, hoses, fittings, and manufacturer-approved service parts.
How to Make a Repair or Replacement Decision
A short process can make the choice easier. It also helps prevent rushed spending. Follow these steps before approving a costly repair or ordering a replacement.
Write down the tool model, serial number, fault, and work it must perform. Then collect the repair estimate and a price for a comparable replacement. Use the same quality and capacity level in both options.
Step 1: Identify the fault
Record the symptoms and get a clear diagnosis. Do not assume that the first visible damaged part is the only problem.
Step 2: Check safety
Remove unsafe equipment from service. Confirm whether the tool can be restored to safe working order.
Step 3: Check warranty coverage
Review the warranty, proof of purchase, service terms, and any available manufacturer support before paying for repairs.
Step 4: Get a full repair quote
Ask for parts, labor, inspection, shipping, testing, and expected completion time in writing.
Step 5: Price a comparable replacement
Include required batteries, chargers, accessories, setup, delivery, and disposal.
Step 6: Estimate useful life
Ask how long the repair may last and review the condition of the other major parts.
Step 7: Include downtime and risk
Work out the cost of waiting, repeat failure, lost work, or hiring another tool.
Step 8: Compare the results
Compare total cost, cost per month or working hour, reliability, and safety.
Step 9: Record the decision
Keep the quote, service report, part numbers, repair date, warranty details, and reason for choosing repair or replacement.
Signs That a Repair Was Successful
A successful repair should restore the tool’s required function. It should also meet the maker’s safety and performance requirements. The technician should explain what was replaced and what tests were completed.
Look for a written service record. It should name the fault, work performed, parts fitted, and any limits on the repair warranty. If the tool needs calibration, ask for the required result or certificate.
If unusual heat, noise, vibration, smoke, or poor performance remains, stop using the tool and request another inspection. Do not keep operating it in the hope that the problem will go away.
Normal operation
The tool performs its intended task without unusual noise, heat, or vibration.
Working safety features
Guards, switches, brakes, locks, and other safety parts work as designed.
Verified testing
Required functional and safety checks have been completed by a qualified person.
What to Do When the Repair Estimate Is Unclear
Ask the repair shop to explain the fault and list the parts that may need replacement. Ask whether the quote is fixed or whether extra work may raise the cost. A written estimate helps prevent surprises.
If the diagnosis is uncertain or the repair is costly, consider a second opinion. This is useful when the tool is specialized or the first repair shop cannot confirm the root cause.
If a safe and lasting repair cannot be confirmed, replacement may be the more sensible option. Do not approve open-ended repair spending without a clear limit.
Set a repair limit
Agree on the maximum cost that can be approved without further permission.
Ask about extra faults
Find out whether the repair shop has found other worn or damaged parts.
Compare another quote
Use a second qualified repair shop when the cost or diagnosis is uncertain.
Common Mistakes in Tool Repair Decisions
Many poor repair decisions happen because owners focus on one number. A repair bill alone does not show the value of the work. The tool’s condition, future use, and reliability also matter.
The opposite mistake is replacing every tool that develops a fault. This can waste money and send useful equipment into the waste stream too early. A simple repair may be all that is needed.
A good decision uses clear facts and realistic estimates. It also accepts that some costs cannot be known exactly. When estimates are uncertain, compare more than one possible outcome.
Using the original purchase price
Old purchase prices do not show the current value of the tool. Compare the repair with a suitable replacement available now.
Ignoring repeat failures
Several repairs in a short period may point to widespread wear or an unresolved root cause.
Ignoring downtime
A low repair quote may become expensive when the tool is unavailable for a long time.
Buying an unsuitable replacement
A cheaper tool may lack the power, capacity, accuracy, or duty rating needed for the work.
Forgetting batteries and accessories
A new cordless platform can cost much more when batteries and chargers are added.
Using poor replacement parts
Parts with the wrong fit or rating can affect performance and safety.
Continuing unsafe repairs
Never use a damaged tool just because a replacement is outside the current budget.
Keep Good Repair and Maintenance Records
A repair record helps show whether a tool is becoming costly to maintain. Write down each fault, repair date, part cost, labor charge, and time out of service. Keep the records with the tool’s model and serial number.
For a small workshop, a basic spreadsheet may be enough. Larger businesses can use an equipment register or maintenance system. The main goal is to make past costs easy to review.
A record also helps identify patterns. If one tool needs repeated motor work, another has regular battery faults, and a third has stable service costs, future budgets can reflect those differences.
Track total repair spending
Record each repair instead of judging every service visit on its own.
Track time out of service
Record repair waiting time and the effect on work.
Set review points
Review high-cost tools before another major repair is approved.
Environmental Costs, Disposal, and Business Planning
Repair can reduce waste when it safely extends the life of a useful tool. It can also delay the need for new materials and manufacturing. But environmental value does not make an unsafe repair acceptable.
If a tool must be replaced, look for a suitable recycling or take-back program. Separate batteries when the manufacturer and local program require it. Do not place lithium-ion batteries or devices containing them in household garbage or normal recycling bins.
The U.S. Environmental Protection Agency advises people to use proper recycling options for lithium-ion batteries and to check local programs. Battery recycling rules and collection options can vary by location. Follow the battery maker’s instructions for damaged packs.
Businesses should also consider storage, maintenance, and replacement planning. A small stock of critical spare parts may reduce downtime. A backup tool may also help avoid emergency purchases when a machine fails during a busy period.
Repair when safe
Keep useful tools in service when the repair is sound and the cost makes sense.
Recycle batteries correctly
Use approved collection or recycling services for lithium-ion packs.
Keep useful spare parts
Store parts that are likely to fail when doing so is practical and supports important equipment.
Plan replacement budgets
Set aside money for tools that are old, unsupported, costly to repair, or critical to daily work.
Business Accounting and Replacement Budgets
Businesses should review tool costs over the full period of use. Repair expenses, equipment purchases, and major improvements may receive different tax treatment. The correct treatment depends on the facts and current tax rules.
Ask a qualified tax professional how a repair or replacement should be recorded. Do not choose a tool only because one option may offer a tax benefit. The equipment must still meet the business need.
A planned replacement budget can reduce the pressure of sudden equipment failure. It also gives managers time to compare repair quotes, check parts support, and select a suitable machine.
Plan by tool condition
Use inspection reports, repair history, and expected remaining life to plan spending.
Protect critical work
Identify tools that could cause major delays if they fail.
Review costs regularly
Compare repair spending with replacement budgets and actual tool use.
Frequently Asked Questions
Q
When should I repair a tool instead of replacing it?
Repair a tool when the fault is clear, the repair is safe, and suitable parts are available. It should also have enough useful life left to justify the cost. A repair is often a good choice when one part has failed but the rest of the tool remains in good condition.
Replace the tool when repairs are frequent, major parts are damaged, support is poor, or the total cost is too close to a suitable new tool. Always check safety before making the financial choice.
Q
Is the 50 percent rule reliable for power tools?
The 50 percent rule is a useful starting point. It suggests reviewing replacement when the repair cost reaches about half the price or value of the tool. It is not a fixed rule for every tool.
A low-cost repair may still be poor value if it buys little extra life. A higher-cost repair may make sense for an expensive or specialized tool. Compare total cost, remaining life, downtime, and repair risk.
Q
Is it worth repairing an old power tool?
Yes, an old power tool can still be worth repairing. Age alone does not prove that a tool is worn out. A tool with a sound motor, good housing, and available parts may provide years of useful service after a small repair.
Check its repair history and the condition of major parts. If the tool has repeated faults or no longer meets current safety needs, replacement may be better.
Q
Should I repair a cordless tool or replace the battery?
First, find out whether the problem is in the battery, charger, or tool itself. A failed battery may not mean the drill, saw, or impact driver needs replacement. A compatible replacement battery may restore normal use at a lower cost.
Compare the price of a new battery with a complete tool kit. Include charger costs and platform compatibility. Never open or attempt an unsafe repair on a lithium-ion battery pack.
Q
How do I know if a tool is no longer economical to repair?
A tool may no longer be economical to repair when the total repair cost is close to or higher than the cost of a suitable replacement. Repeated faults, long parts delays, poor performance, and short expected service life are also warning signs.
A safety defect can make a tool unsuitable for use even when repair seems cheap. Get a proper inspection and compare both options before making the final decision.
✦ Wrapping Up
Conclusion
Tool repair and replacement decisions should be based on more than the next repair bill. The right choice depends on safety, total cost, expected useful life, repair quality, parts supply, and downtime. A low-cost repair is valuable when it restores reliable service. A new tool is a better investment when repairs only delay an expensive failure.
The 50 percent rule can help you start the review, but it should never make the final decision alone. Compare the full costs of both options. Check the tool’s condition and repair history. Make sure the chosen option meets the demands of the work.
Good records also make future decisions easier. Track service costs, parts, faults, and time out of service. This gives homeowners, contractors, and workshop managers a clearer view of which tools deserve repair and which have reached the end of their useful life.
💡 Key Takeaway
Before spending money, get a clear diagnosis, request a written repair quote, price a comparable replacement, and estimate the useful life of both options. Choose repair only when it is safe and offers dependable service at a reasonable total cost.
Compare static pressure gauge vs differential pressure gauge to choose the right instrument for accurate readings, better control, and smarter decisions.