Crimp connectors offer fast, reliable mechanical joints; solder creates permanent, low-resistance electrical bonds.
I’ve spent years wiring cars, building electronics, and teaching technicians how to choose between crimp connector vs solder connection. This article breaks down their electrical performance, durability, tools, failure modes, and real-world tips so you can pick the best join for your project with confidence. Read on for clear comparisons, step-by-step guidance, and lessons from hands-on experience.

crimp connector vs solder connection: quick overview and key differences
Crimp connector vs solder connection often comes down to speed, environment, and reliability. A proper crimp forms a cold-welded mechanical and electrical joint. A good solder joint forms a metallurgical bond that lowers contact resistance.
Key differences at a glance:
- Crimp joints rely on correct tooling and terminals for a repeatable connection.
- Solder joints depend on proper heat, flux, and solder flow for strength and conductivity.
- Crimp excels in vibration and field repair. Solder shines in low-resistance and delicate electronics.

How crimp connectors work and why they succeed
A crimp connector uses deformation to join wire strands to a metal terminal. The terminal is compressed around the conductor by a crimper. This compression displaces metal and creates a gas-tight, low-resistance path when done correctly.
Why crimp works:
- Mechanical compression creates long-term contact and low impedance.
- Proper crimping cold-welds metal interfaces, resisting corrosion and vibration.
- Color-coded and heat-shrink terminals make installation faster and more consistent.
Real-life note: In automotive work, I switched from hand-twisting and soldering to proper crimping tools. Failures dropped and repair times fell sharply.

How solder connections work and when they shine
Soldering uses a molten filler metal to wet conductor surfaces and form a continuous electrical path. Solder flows into strands and onto pads to create a joint that conducts well and resists oxidation when flux is used.
When solder is best:
- Low-current, high-density electronics where compact, permanent joins matter.
- Sensitive signal lines where minimal contact resistance and stable RF behavior matter.
- Repairing printed circuit boards and delicate assemblies.
Tip from practice: Use temperature-controlled soldering irons and the right flux. Cold solder joints are a common failure mode and cause intermittent faults.

Pros and cons: crimp connector vs solder connection
Crimp advantages:
- Fast and repeatable with the right tool.
- Resistant to vibration and mechanical stress.
- Suitable for field and high-current applications.
- No heat; safe for heat-sensitive components.
Crimp limitations:
- Requires correct terminal and crimper match.
- Poor crimps are worse than no crimps—inspection matters.
- Not ideal for tiny gauge wires in tight PCB spaces.
Solder advantages:
- Creates continuous metal bonds with low electrical resistance.
- Ideal for small conductors and board-level work.
- Can bridge multiple strands cleanly when done right.
Solder limitations:
- Heat can damage insulation, components, or plated surfaces.
- Poor soldering causes cold joints, brittle connections, or wicking.
- Less tolerant of vibration unless mechanically supported.
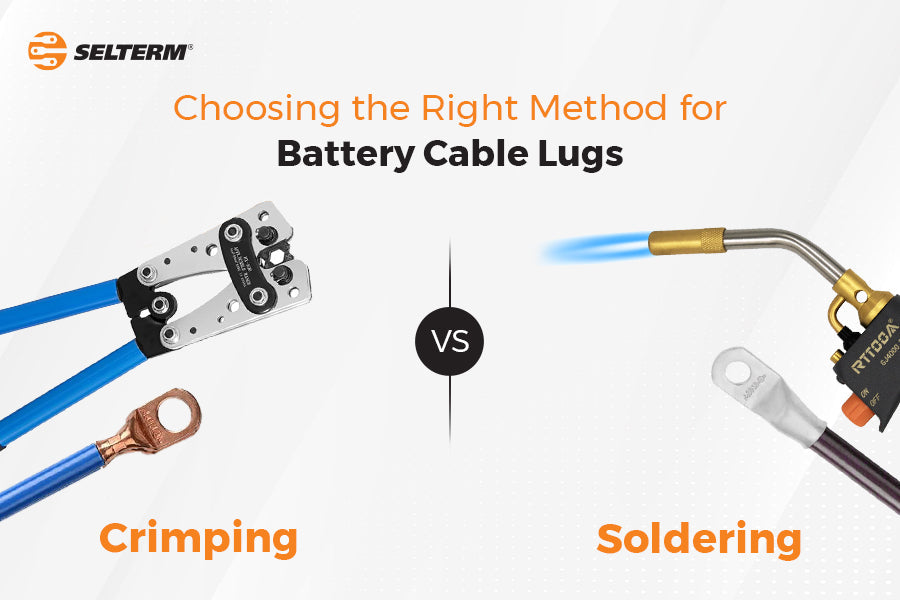
When to choose crimp connector vs solder connection — practical guidance
Choose crimp connector when:
- You need fast, consistent terminations on wire harnesses.
- The environment has vibration or movement.
- Field repairs or rapid replacements are expected.
- You work with larger gauges and high current.
Choose solder connection when:
- You need the lowest possible contact resistance.
- Space is tight and board-level connections are required.
- You’re building small electronics or RF circuits.
Personal experience: For a motorcycle harness, crimping with quality terminals saved me hours and prevented failures. For a compact audio amp, soldering the fine leads gave cleaner sound and stability.

Tools, materials, and best practices for reliable joints
Crimp tools and materials:
- Ratcheting crimper matched to terminal family.
- Proper terminals sized for wire gauge and environment.
- Inspect crimps visually and with pull tests.
- Use heat-shrink or adhesive-lined terminals for moisture protection.
Solder tools and materials:
- Temperature-controlled soldering iron.
- Rosin or no-clean flux suitable for electronics.
- Leaded 60/40 or lead-free alloys per code and preference.
- Desoldering braid, solder wick, and proper ventilation.
Best practices I follow:
- Always strip to the correct length and avoid nicking strands.
- Use the right crimp die and verify crimps on scrap wire.
- Clean and pre-tin pads only when appropriate; avoid over-soldering.
- Support soldered joints mechanically in high-vibration settings.

Common failure modes and how to avoid them
Crimp failure causes:
- Wrong terminal or undersized crimper.
- Incomplete compression leaving air gaps.
- Corrosion from moisture when not sealed.
How to avoid:
- Use certified crimp tools and the correct terminal.
- Inspect crimps and perform pull tests.
- Apply sealing boots or heat-shrink with adhesive.
Solder failure causes:
- Cold solder joints from insufficient heat.
- Solder wicking away from the joint.
- Thermal cycling causing cracks in rigid joints.
How to avoid:
- Use proper iron temperature and flux.
- Heat workpiece, not just the solder.
- Strain-relieve wires to prevent motion at the solder point.

Step-by-step: making a reliable crimp and a reliable solder joint
Crimp steps:
- Strip conductor to specified length.
- Insert wire fully into terminal barrel.
- Place terminal in the correct die of the crimper.
- Compress until ratchet releases; inspect the crimp.
- Apply heat-shrink or boot if needed.
Solder steps:
- Strip and tin wire strands lightly for stranded wire.
- Clean pad or terminal; apply flux.
- Heat joint evenly with iron, then feed solder to the heated part.
- Remove solder then iron; let joint cool undisturbed.
- Inspect for shiny, smooth fillet and no excess flux residue.

PAA-style questions (quick answers readers search for)
What lasts longer under vibration: crimp connector vs solder connection?
Crimp connectors usually last longer under vibration if properly crimped, because the metal deformation resists movement better. Solder joints can crack under repeated motion without mechanical support.
Can you crimp then solder the same joint?
Yes, some technicians crimp for mechanical strength and then add a small solder fillet for extra conductivity; do this carefully to avoid solder wicking and weakening the crimp.
Is crimping or soldering better for high current?
Crimping with the right terminal is generally better for high current because it creates a large contact area and avoids heat damage to insulation. Solder can work but may concentrate heat and create hot spots.
Frequently Asked Questions of crimp connector vs solder connection
What is the main difference between crimp connector vs solder connection?
Crimping mechanically deforms a terminal to make contact, while soldering uses molten metal to bond conductors. Crimping focuses on compression and cold-welding, soldering on metallurgical flow and wetting.
Which method is stronger mechanically?
Crimp connections are often stronger mechanically, especially in vibration or movement. Properly crimped joints resist pullout and fatigue better than bare solder joints.
Can a bad crimp be fixed easily?
Yes, a bad crimp should be cut off and redone with the correct terminal and crimper. Re-crimping over a bad crimp risks a weak joint.
Does solder improve electrical conductivity over crimping?
A properly made solder joint can reduce contact resistance, but a well-executed crimp can match low resistance and often offers more reliable long-term performance in many applications.
Are there safety concerns with soldering?
Yes. Soldering involves heat and fumes. Use ventilation, temperature control, and lead-free options per safety rules. Heat can also damage components if not controlled.
Is crimping suitable for small gauge wires and PCBs?
Crimping is suitable for small wires with the right micro-terminals, but soldering remains the primary method for direct PCB connections and very fine wires.
How should I test a crimp or solder joint after making it?
Perform a visual inspection, a gentle pull test for crimps, and a continuity or resistance measurement for both. For critical systems, use a torque or dynamic test per standards.
Conclusion
Both crimp connector vs solder connection have clear strengths. Use crimping for speed, vibration resistance, and high-current harnesses. Use soldering for low-resistance, compact, and board-level work. Combine methods when a project benefits from both: crimp for mechanical strength and solder for added conductivity. Try each method on scrap wires to build confidence, inspect every joint, and choose tools that match your work. If this guide helped, try one of the recommended workflows on a small project, share your results, or ask a question below.